
You've just snapped this incredible photo on your phone and now of course you want to share it with everyone on Instagram. You open it in IG and awww nuts, this happens....That silly square has cut off bits of your photo :( No worries...there are easy (& even free) apps out there to help you show off your entire photo.For iPhone users, the simplest and most user friendly app available has to be Whitagram. It's free in the iTunes store and with just a few taps you can now view your photo the way it was meant to be. My personal go to app for both cropping and editing my photos is called PicTapGo!. From the makers of Rad Lab, it's priced at $1.99 in the iTunes store. PicTapGo! Give you a couple different options when you are ready to open your image in Instagram:Instagram - Crop will give you the standard full square IG size:Like Whitagram, Instagram - Full will give you … [Read more...]
“Stained Glass” Autumn Leaves
Hi Happy Scrappers!Polly Liana here, with a fun Fall DIY project that's great to do with kids. Here in Massachusetts, we're starting to feel that crisp, cool Autumn air outside. The other day, my daughter and I decided to work together on a project that would make our windows look more festive and get rid of a few lonely, broken crayons in the process. Here's what we did:First, we carefully grated orange, brown, yellow and red crayons with a cheese graters. (obviously, I handled the last little nubs so her fingers didn't get grated!) Here's what it looked like with all of them grated. You don't need very much, just a half of a thick crayon is good: Next, I took a large sheet of waxed paper and folded in half: Then, my daughter and I sprinkled the various colors around one half of the waxed paper, being careful to spread it evenly (avoid piling): Here's … [Read more...]
Fearless Filters and Wordart
Did you know you can apply your filters to your own word art? (or a designer's, but let's make our own for now)First, what I did was choose a background to use for my word art, or title. I picked Amy Wolff's That's Scary kit. It's full of gorgeous textured papers and colors, perfect for this kind of title. Okay, now we're ready for the fun stuff!Isn't it neat how many effects you can get from playing with your filters on your own titles? These are pretty straightfoward titles, of course. Try it out!And then post your creations up on THIS THREAD in the forum!Your fearlessly filtering PollyJulie … [Read more...]
Add Fear to Your Photos (just in time for Halloween)
Mwahahaha!Let's do some diabolical photo manipulating of your favorite photos. Let's turn them scary and creepy! Are you ready? I'm ready! Hopefully you've seen the example I posted up in the blog thread and/or in the gallery. I totally love what happened to this image of my son! Let's see what we can do. Here's another picture:This is a part of a statue I found along a bicycle path in Burbank, CA. It's not too scary. But we'll see if we can change that. *cue evil laugh*Okay, here we go! Here's the recipe I used for this picture:Layer one: the original untouched photographLayer two: I converted the image to black and white > went into Photo Effects in my Style Palate and chose a gray-green color > THEN I set the layer to DIFFERENCE at 100%Layer three: I added a free scratched up texture layer by Shadowhouse (Black Magick Texture Layer), set the layer on … [Read more...]
Don’t Fear Your Filters! This Week: Cutout!
What is Cutout, and what does it do?I took this photograph, taken a few weeks ago at the Nethercutt Museum in Sylmar, CA, and sicced Cutout on it.Here's the original. Cool staircase, right? It floats, which means it's a Spiral Staircase with no support, just its own structure. (note: I did have to balance the color out and tweak it a bit, but this is the photo before I did anything to it) Here's what my screen looks like when I have the Cutout Filter selected, and the photo up on that workspace.In the upper right hand corner, you can see the three controls: number of levels, edge simplicity and edge fidelity. To simplify things, I left the edge fidelity control alone. Below, here are three different combinations of the controls. Just like last week, I copied the original tweaked photo layer so that were two layers. I used the filter on the top layer only.On my image, … [Read more...]
First & Second Flash Curtains: Bwha? And what the heck is Slow-Synchro?
Depending on what type of digital camera you have, you might have noticed in the Flash Menu, a choice between "First Curtain" and "Second Curtain". Also, "slow synchro". What the heck do those mean?Well, okay. I had to read a bunch of articles to understand what was going on (and at least one article said the opposite of all the *other* articles, so there you go) with these flash settings.The camera I currently work with is a Canon SX-20is. It's a couple years old. Other camera brands such as Nikon don't use the term "first" or "second" in their menus. Nikon uses "front" and "rear curtain synch" instead.Here's my camera so there's a point of reference:I love my Canon! (image from canoncompact.com) Note the Flash button on the left side on the top of the camera body.First Curtain flash is typically unlabeled as such in most point & cameras. It's the default setting. But … [Read more...]
“Fall” for Hybrid!
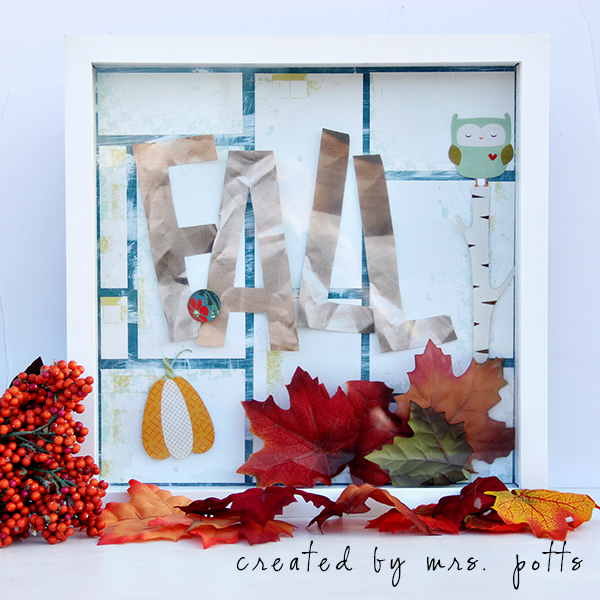
Cooler weather, creamy soups in the crockpot, leaves crunching under your feet. Can you feel that fall is just around the corner? Unfortunately here in my part of Texas our fall doesn't happen for a few more months. Even though that is the case I still love to bring the atmosphere of fall into my home. As soon as September hits I start burning a pumpkin spice candle. Last week I started looking around my house though and realized that I don't have very many fall decorations. I decided it was high time to rectify that by making a fall hybrid decoration. Today I have a short tutorial for a fun (and simple) fall shadow box. Lets get started!Supplies needed:12 x12 shadow box12 x12 chipboard canvasAcrylic Paint (Delta North Sea & Americana Snow White)Foam brushA Bit Worn Alpha Valorie WibbensThe Savannah Ombre Papers by The Ardent SparrowLeaf Peeper Basics … [Read more...]
Adding Blur Motion in PSE
What if your camera is a simple point and shoot, and you can't get those neat panning shots?You can get that same look with a nonblurry photo in PSE (and PE) easily!First, let's look at a neat variation of a blur with a radial blur--this is an effect you can get in camera IF you've got a DSLR with a lens you can manually move.Here's the original photograph:It was taken from a moving car, so the background isn't blurred. There's little sense of movement.With this blur effect, the central object is obviously focused on with the blur moving inward.And here is an example of a panning-style blur using the motion blur option in the Filter menu.In this screen shot you can see the window that pops up for the Motion Blur effect. You can change the angle of the blur and the length of the blur, too. The top layer copy of the photo shows how much of the subject (the boy on the … [Read more...]
Friends Don’t Let Friend’s Fonts Float!
Hello, Polly Anne here, yep, a real bonifide Polly! Doing a little happy hop at the Lily Pad about this title! I so enjoy the Pad, and now am a permanent fixture. heee heeeA few weeks ago, in the Art Journaling challenge thread, I included a quick tutorial, that was used by many. I received a few messages asking if I would blog on it so more people would take on the challenge to help each other. Because Friends Don't Let Friend's Fonts Float! (artistically, you can if it needs too!)So.........here we go:Let's talk about putting words behind onto the paper, not floating on the paper... oh please, friends don't let fonts float!Mini tutorial on putting your words on your paper, like ink would, or paint.thenFonts or Paints in real life don't always cover exactly even. Using your FX, and then Blending option (the top choice in pull down menu)At the bottom of the Layer Style … [Read more...]
Wooden Doll Tutorial
Greetings, Happy Scrappers!Polly Liana (PolLiana?) here, with a tutorial on how to make fun wooden dollies for dramatic play with children. I've been teaching kindergarten for 20 years and anyone who knows me is aware of how much I dislike cartoon princesses and blond, leggy dolls with tiny waists and huge boobs. I'm not a fan of their general lack of diversity, skewed body image and inflexibility of character. As a mother of two awesome young girls...(insert gratuitous photo of fabulous daughters here) ... I wanted dolls that are diverse with realistic body forms and are neutral enough to play a variety of roles-- vs. a character from a movie, who is difficult to imagine as a surgeon when she's wearing a huge, sparkly ballgown. I also didn't want to spend a ton of money and I wanted something that would last (no tangled hair or limbs that pop off). Enter the peg … [Read more...]