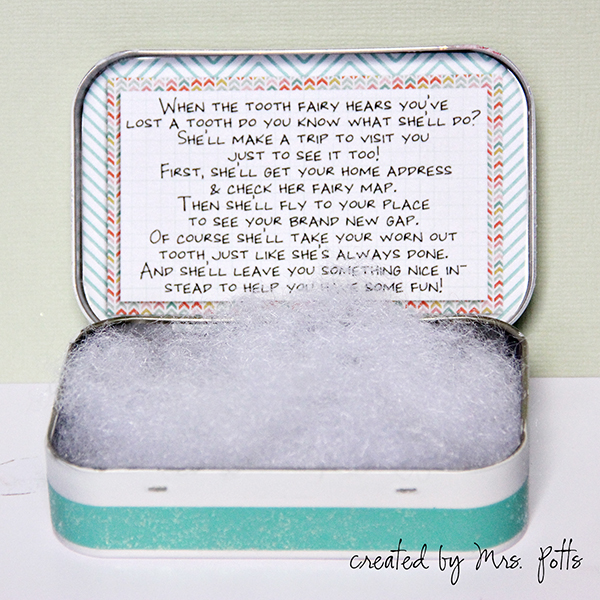
Hey all, Polly Jewelle here! As a hybrid scrapper I find myself collecting things while thinking in my mind, "Hey, I could use that for a project!" Today I'm going to give you a very quick walk through of how you can take something other people would see as trash and turn it into a wonderful treasure. This trash to treasure story starts with my little five year old who went into the dentist the other day and she came out telling me that she had several loose teeth. She instantly demanded that she needed a tooth box. In our family when a loose tooth falls out we put it in our tooth box and put it next to the bed. That way the tooth fairy has easy access to it and doesn't have to wake us when lifting the lid open to leave our surprise. With my daughters declaration of needing a tooth box, I set to work.1. Take an Altoids tin and spray paint it. I chose white because that would … [Read more...]
None Destructive Modifications
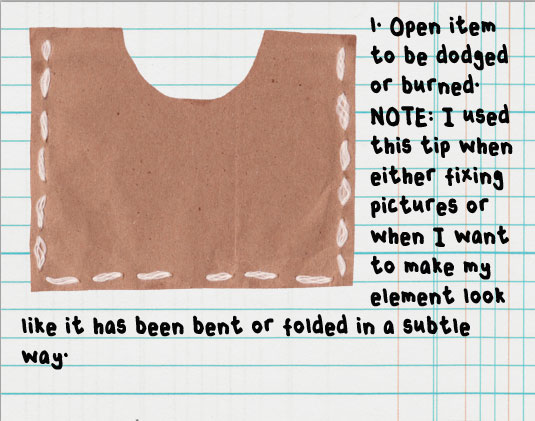
Hi everyone, Dalis here with another short tutorial (big on photos, but short in time... I pinky promise). We often have to modify either a picture or an element to suit our needs or to fix lighting or distracting shadows or objects. I usually play a lot with the dodge/burn tools in Photoshop. I like how easily you can create some dimension with just those 2 tools. Of course if you have ever tried to burn or dodge, you may have done it directly on top of your picture or element. Doing this will change your element or picture. I once was watching videos and saw this guy did this and I thought it was brilliant. He was doing it for other tools but I thought that it would work for my favorite dodge/burn combo.Let me show you how to use the dodge/burn tool without modifying your original element or picture. (At the end of this tutorial, I am sure you can find many reasons and uses … [Read more...]
TRICK – Simple Modify
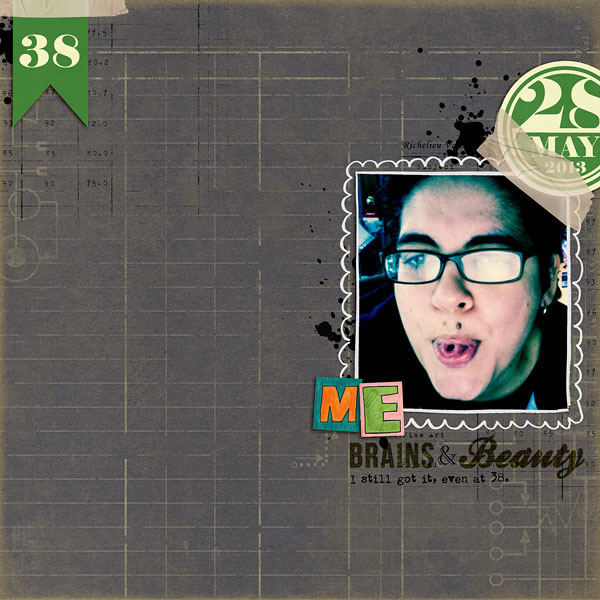
Hi everyone, Dalis here with a pretty simple but powerful trick. Start loving (even more) your word arts! Have you ever bought a kit or an element pack and you wish you could modify slightly a Word Art (WA)? Or buy a date pack thinking it was a number pack? (Like I DID!) I am here to tell you we can modify those WA in no time (at least most of them). I got this super cute date set thinking for a moment that it was a number pack. I was ready to add my age (38) to the page when I realized my problem. Yep, no #38 because there are no month that has 38 days. I immediately started doing my super simple modify trick and then I realize, wait this is a great TRICK... so here it is! Ready?If you are wondering what products I used for my page, here they are. … [Read more...]
Digital Paper Piecing
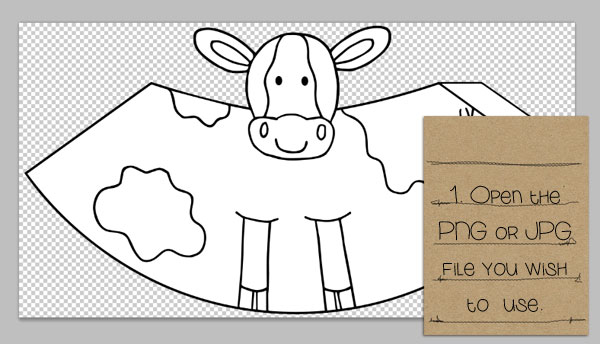
Hi everyone, Dalis here! I used to do paper scrapping and card making before I was sucked in the digital world. One of my favorite things to do was do Paper Piecing using rubber stamps. When I started digital scrapbooking I also did a lot of hybrid, and I wanted the paper piecing look, and this is what I came up with. I hope you enjoy it too! If you have any questions, please do not hesitate to ask.In case you are interested in the super super cute items I am using for the tutorial. I am using Colour In: Nativity by Kate Hadfield and the papers are from Yarn Snob by Valorie Wibbens. NOTE: At this point you might be wondering why we did "LAYER VIA COPY" instead of "LAYER VIA CUT" since we were going to "CUT" the area anyways. Well, remember that step where you did the SELECT-EXPAND and added 2 px to the selection? If you had done "LAYER VIA CUT" you would … [Read more...]
Easy Peasy Vignette Effect

Hi Everyone! Dalis here with another fast and easy tutorial. I love pictures with a light and airy vignette effect, but don't want to spend too much time creating them. I want to spend time scrapping the picture. I have an easy peasy tutorial on how to create a vignette look in a couple of minutes at the most. It is a super step by step, so trust me in a matter of maybe 2 mins you will have your image with a really nice vignette look.This is your end result, you can apply the effect again for a darker vignette look by repeating the steps or just doing CMD+F (for mac) or Ctrl+F (on PC). Go try it and show me your vignette! If you are wondering about that total cute Journal card used in this tutorial, it is this product. … [Read more...]
Merging Templates – Making them work for you.
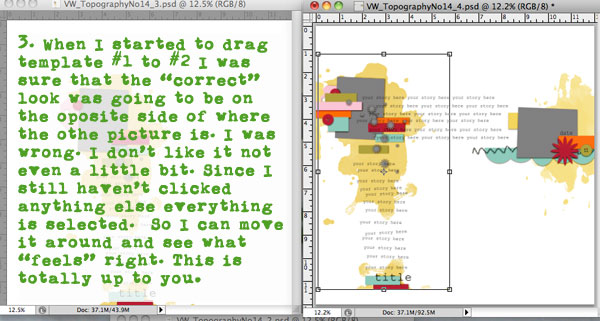
Hi everyone, Dalis here! I love templates, they take me out of my mojoless hole. I am here to share with you one of my ultimate tips/tricks about templates. How to merge them and transform them, so they are exactly what you need.Have you ever wanted to use a template but it's not EXACTLY what you need? It's just missing something. I am here to help YOU fix it. Before we start there are a few tricks to help you merge your templates more easily.TIPs/TRICKs for merging templates. (These are tips/tricks and not RULES, these may be true for some cases but not all, so don't FORCE them, ok?)Merging templates from the same product or set is easily than merging different products.Merging templates from the same designer tends to be easier. Most designers have a "look/flow" that just can be seen in most of their templates.Open more than 2 templates, even if you are merging 2. That … [Read more...]
Decorated Wooden Letters

Hey all, Polly Jewelle here with a quick hybrid tutorial. I've been slowly trying clear out my craft closet of all unfinished projects. Tell me I'm not the only one with a closet filled with unfinished projects?! One project that has been in there for a long time is some wood letters. Each letter is the first initial of my daughters names. I've wanted to find a pretty piece of scrapbook paper to cover them, but my local scrapbook store never seems to have anything that would work. The letters continued to sit in the closet and gather dust. That is until I realized I have 1000's of papers right at my fingertips. Digi papers to the rescue! I browsed through the store at The LilyPad and discovered Gina Miller's Colorless papers. I knew these would be perfect for the job so I grabbed them and got to work. Before using these beautiful papers I needed to create a template of my … [Read more...]
Tutorial | Recolor Digital Journal Cards to Match a Photo

Hi Everyone! Christine here with a quick video tutorial to show you how easy it is to recolor digital journal cards to match your photo. I’m using a journal card from Arrow Cards by Designs by Lili. I’m going to put this journal card right next to a photo of my husband in my Project Life album. So I will show you how I quickly recolored this journal card to match the color of his shirt. Enjoy the video! You can watch it right here, or you can click over to Youtube to see it slightly bigger. Christine (listgirl) … [Read more...]
Tutorial Tuesday!
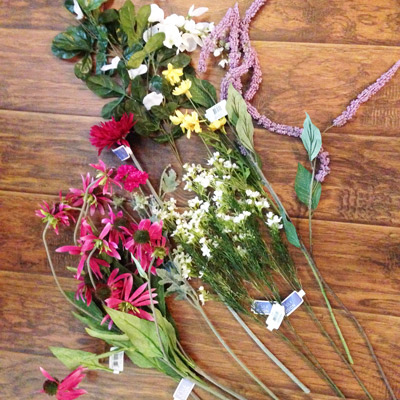
Hello lovelies! Polly Brandi here to share with you an easy Spring/Summer wreath tutorial. It's super duper easy and inexpensive, too! I bought all of my supplies at Joann's.You can get most stuff there on sale or by using their awesome coupon app. Here are the supplies you'll need:A wreath...Pretty silk flowers with stems... Pretty leaves with stems Heavy duty twine (jute)*I only used this because I attached my monogram to the wreath* Of course, if you don't have one of these, then skip this step! :)You will need a pair of cutters to be able to cut through the thick stemsof the flowers and leaves... Don't forget your glue gun!(and watch out... it GETS HOT! I burned my thumb pretty bad :( ) All you have to do is cut your leaves and flowers so you're left with a short to medium length on the stemso you can stick it through the … [Read more...]
Christmas All Year Long: Part 1

Did you start a Document Your December (December Daily) or holiday album back in December? Did you finish it yet? Personally, I am the Queen of Good Intentions. I get excited about projects. I get excited about the IDEA of projects. I might even start projects. But I have trouble finishing projects. This is why my One Little Word for 2013 is, in fact, FINISH. In the spirit of trying to finish more projects this year, I am starting a recurring series on the blog called “Christmas All Year Long”. Every couple of months, I will blog my progress on my December holiday album using digital, hybrid, and some paper supplies. And what better day to kick this series off than today, which is actually my birthday! :)Some time back in December, I had gathered all my supplies, both digital and physical, with the intention of starting and making my album. It never happened. December is one … [Read more...]