Hey scrappers! Polly Jewelle here with a tutorial for you today! Mini album's are probably my favorite hybrid creation to make. Mini's are great way to share photographs with family members or other special people in your life. Today I am going to teach you how to make an according mini album. Some of the steps my seem a little daunting, but I promise they are quite simple. Let's get started!1. Grab a solid color piece of 8.5 x 11 cardstock. Lay the cardstock landscape orientation and score the paper at 3, 6, and 9 inches. 2. Flip your cardstock to portrait orientation and cut three strips each being 2.75 inches.3. Repeat steps one and two with a the same type of cardstock.4. Fold along score lines alternating the direction of the fold with each line. Next we will glue our strips together, however first take notice on each strip of cardstock you have a division … [Read more...]
Wonky Cutting in Photoshop
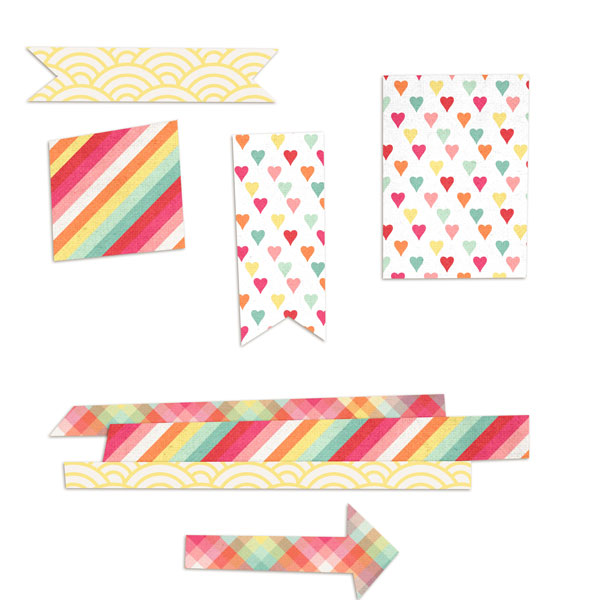
Don't worry, no real scissors necessary! But if you like that slightly imperfect, hand-cut look to your paper blocks, strips, banners, flags, etc., then read on. Today I'll show you step-by-step how to use the Polygonal Lasso tool in Photoshop to quickly cut out any shape you want, in just a few clicks. The beauty of this kind of "cutting" truly is in the imperfection of it, so don't worry too much about getting perfectly straight lines or even sides! To give you a few ideas of how you might use this technique, here's a bunch of paper shapes I "cut out" of my digital papers in just a minute or two (all papers are from Lauren Grier's Rainbow Joy paper pack):To cut out your own shape (pretty much anything with straight lines), choose your paper and then select the polygonal lasso tool.Now click once on your paper where you want to start "cutting." You should see a line … [Read more...]
Hybrid Cutouts
Hey all! Polly Jewelle here with a hybrid tutorial for you. Cutouts on digital pages are all the rage right now. Seeing that paper peeking through a cutout always brings I smile to my face. I love taking trends I see in digi and using them in my hybrid projects. Lets make a card that uses these cutouts!1. In Photoshop create your card including a shape that you would like to make into a cutout. Keep all layers accessible. For my card I used Just Be Paper Pack and Just Be Elements by Amy Wolff Designs.2. Create an 8.5 x 11 document to place your card pieces on.3. Back on your original card, select the item that you wish to turn into a cutout. Press control + left click on the layer so that you have marching ants around your item.Now select the paper layer that you want the item to be cut from. Hit delete. You have a newly formed cutout! {I've turned … [Read more...]
Tutorial | Coloring In Digital Doodles Using Photoshop
Hi Everyone! Christine here to show you a fun tutorial on how to color in digital doodles using Photoshop or PSE! Since Valentine’s Day is almost here, I’m using Kate Hadfield’s Colour In Valentines to make a cute and colorful Valentine’s card. Here’s the before. The card comes as a black and white line drawing or doodle.Here’s the card after I colored it in Photoshop. Digital coloring is easy and fun! Watch the short video below and you will be an expert in coloring within the lines! :)http://www.youtube.com/watch?v=Gei6TDFM2uI Happy coloring!Christine (listgirl) … [Read more...]
Hybrid Mailbox Tutorial
There is just something special about receiving a handwritten note from someone you love. With Valentine's Day just around the corner it is the perfect time to get a few notes ready for you to hand out to those you love. I'm getting some ready for my husband and daughters! But this Valentine's season I wanted to extend the love fest to more than one day. I came up with the idea of providing each member of my family with mailbox. Each day in February my family members will receive a little note from me in that mailbox. They also have the option of giving each other notes! I dressed up my mailboxes for the occasion and thought I would share a tutorial with everyone so you can have your own mailboxes!1. Buy a mini mailbox at your local craft store or Target Dollar Section. I've seen these made out of metal and card board.2. Create an 8.5 x 11 document in Photoshop. Using the … [Read more...]
Stepping Outside the 12 x 12 Box
Whenever I mention to someone that I do hybrid projects, one of the most common responses I get is "Oh wow, I could never do hybrid projects!" I always feel so sad when people say this because the truth is that anyone can do hybrid. Today I want to demonstrate how easy it is to take the jump between digital and hybrid. Cards are a great way for someone to dive into the hybrid. I recently saw Templates: Shaped Up - Triangles by Amy Martin in the store and just knew these templates would make great foundations for cards. So follow along as I use one to make a card and hopefully this will inspire more of you to give hybrid a try.1. Open up a digital template in photoshop. I chose this template from Templates: Shaped Up - Triangles by Amy Martin for my card.2. Create a new file the size of your card face. Mine typically are 4 in by 5.5 in. Drag you template onto the new file … [Read more...]
DIY Shaped Bokeh

The holidays are here! What a perfect time of the year to do some fun photography with tree lights! Today I’m going to show you a quick and easy way to make some DIY templates to take some fun shaped bokeh photos! I followed this tutorial at kevinandamanda.com. Why re-invent the wheel, right? Amanda gives step by step instructions on how to construct the paper hood that goes over your lens. All you need are: black cardstock or construction paper, scissors, tape, repositional or temporary adhesive, and some small shaped paper punches. I made this paper hood that goes over my 50mm F/1.8 lens. Yes, the tape is ugly but it works just fine! Then I cut out pieces of cardstock that are bigger than the “window” on the hood. I punched shapes in the middle of the cardstock pieces. The hood fits right over my lens like this. Then I applied temporary/repositional adhesive to one side … [Read more...]
DIY Fun Festive Wreath Tutorial

Hey everyone! I'm so excited to share with you my lovely {Christmas} wreath and how I made it.It's so fun and festive and is perfect for the holidays!It's also VERY quick and VERY easy!Here is what it looks like...Now keep in mind you do not have to have the wooden monogram that I have in mine.(I do switch it around to each wreath that I create, it's not permanently glued in there, hence why I use twine)What you will need:and of course your GLUE GUN!:)Start gluing...Then add your ribbon and your picks.With the ribbon... you can tie in bows, knots, and/or bows and then cut the actual loop so it almost looks like a star.It's up to you!Make it as festive as you can.I chose to leave the left side of the wreath bare because I like the way it looks.And there you have it.Easy Peasy!:)Here is what it looks like on my front door.For those of you wondering what the BSM … [Read more...]
Cinnamon Applesauce Ornaments
Hey Happy Scrappers!Liana here, with a new craft for a new month. Can you believe it's December already?? Well at The Lilypad, we're extra excited about this month because we have an incredible, ultra-fantastic super special collection of kits, alphas, fonts and templates just for documenting every day of this wonderful month. Have you checked out our Document Your December (DYD) area of the store? It's full of everything you could possibly need for scrapping all the days this month. (Last year's DYD collection was fantastic, too!)Here is a terrific craft that I will definitely be including in my DYD book this year. It's easy peasy and a wonderful activity to do with kids of all ages, especially on those days when you're cooped up in the house with nothing to do. It makes the house smell great and the results make great gifts and decorations. Let's make Cinnamon Applesauce … [Read more...]
DIY T-Shirts Using the Silhouette
I posted last year about our annual Elf Party and the party favors that I made using my Silhouette digital cutter. I LOVE using my Silhouette to turn digital into something tangible! We are having our Elf Party again this weekend. This year I decided to make some Elf t-shirts as party favors for our attendees. I found a graphic of Buddy the Elf online, and I opened it up inside my Silhouette Studio software and traced the outline. Then I used the font Bebas and typed out one of my favorite Elf quotes. I moved the text out of the cut zone and cut out the Elf outline, using Silhouette’s Flocked Heat Transfer Sheet in red. I loaded it into the machine with the opaque side up, or shiny colorful side down. After it’s been cut and I removed it from the machine, I peeled away the extraneous parts of the flocking. Here it is, colorful side up with the clear shiny sheet on top, … [Read more...]