“Fall” for Hybrid!
Cooler weather, creamy soups in the crockpot, leaves crunching under your feet. Can you feel that fall is just around the corner? Unfortunately here in my part of Texas our fall doesn’t happen for a few more months. Even though that is the case I still love to bring the atmosphere of fall into my home. As soon as September hits I start burning a pumpkin spice candle. Last week I started looking around my house though and realized that I don’t have very many fall decorations. I decided it was high time to rectify that by making a fall hybrid decoration. Today I have a short tutorial for a fun (and simple) fall shadow box. Lets get started!
Supplies needed:
- 12 x12 shadow box
- 12 x12 chipboard canvas
- Acrylic Paint (Delta North Sea & Americana Snow White)
- Foam brush
- A Bit Worn Alpha Valorie Wibbens
- The Savannah Ombre Papers by The Ardent Sparrow
- Leaf Peeper Basics {element pack} by Laurie Ann
- Sweet Cool Bliss Papers by Kaye Winiecki
- Fake leaves
- ModgePodge
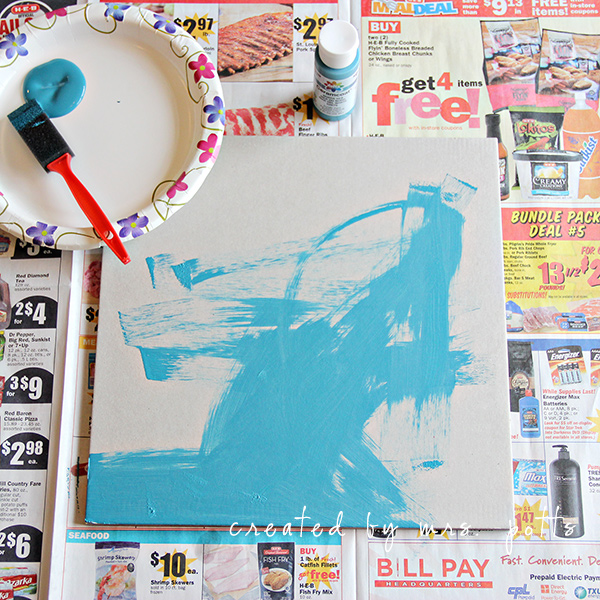
1. Using a foam brush paint your 12 x 12 chipboard canvas with North Sea. Paint as thick or as thin of a layer as you want. For a more art journaling affect I used very little paint so the chipboard would show through in places. I also made sure to paint in all directions for added texture.
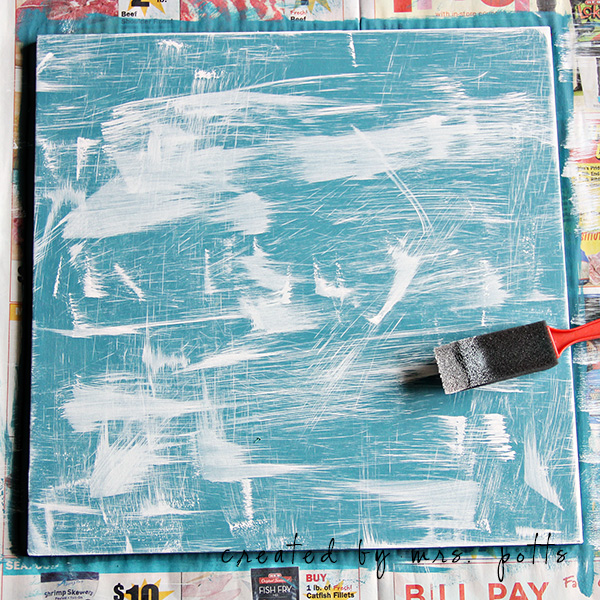
2. Next lightly brush on the Snow White. Leave plenty of the North Sea showing. Don’t forget to use different brush strokes!
3. While your canvas is drying open up a 12 x 12 canvas in Photoshop. Using your digi supplies create a fall scene. One thing I love about creating this part digitally is that I was able to use a paper that had paint strokes on it thus pulling more of that art journaling look into my project.
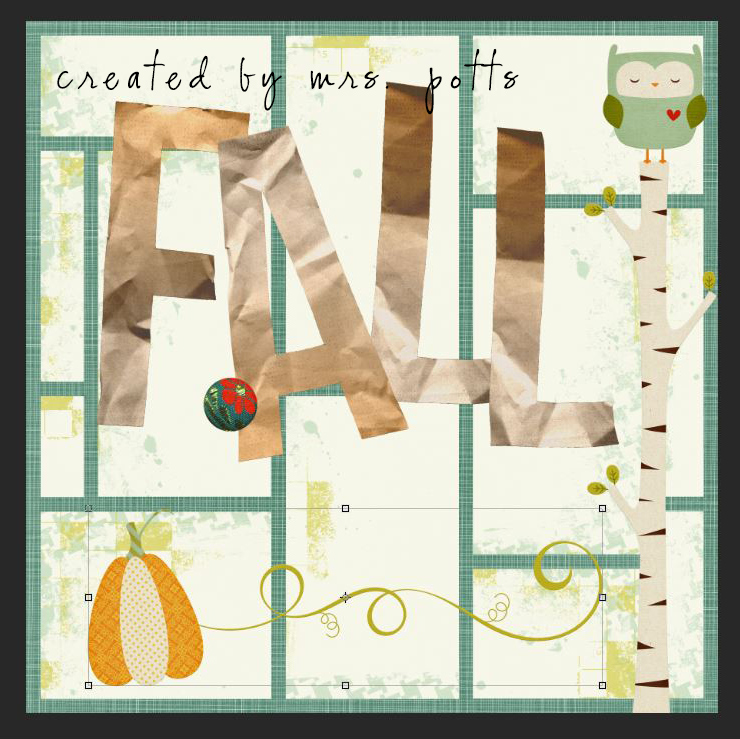
4. Drag all you pieces onto some 8. 5 x 11 canvas’s and print. Cut out your individual pieces. If you have a Sillouette this would be a great time to use the Print and Cut option! ***Please note that the turquoise paper in my preview was just for reference so I would know approximately what my design would look like when placed on my canvas. I DID NOT print out the turquoise paper.***
5. Assemble your pieces on your canvas. Glue down the pieces using a strong adhesive like ModgePodge. To make a few of my embellishments more dimensional I used foam adhesive to pop them up. You can notice this on the pumpkin and the button. Get creative and embellish with crafting supplies to add even more dimension. I added a few fake leaves to my shadow box before carefully laying my canvas in it. Here is a look at my final project.
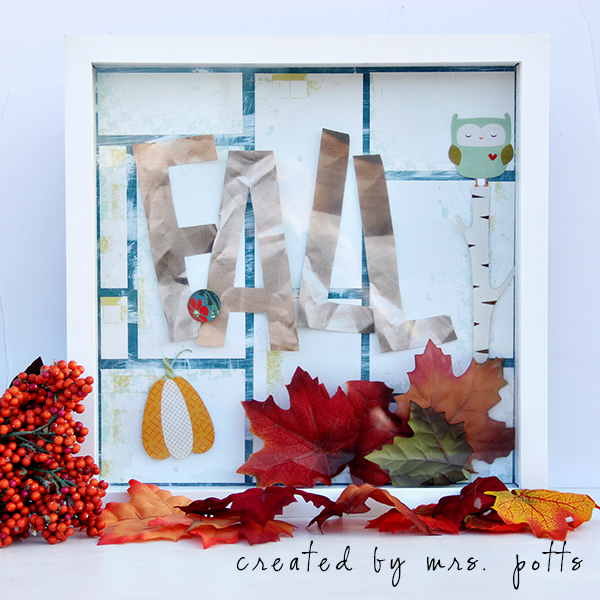
I’ve got this sitting on my fireplace mantel and already it is feeling more like fall. Ready to make your own fall shadow box? A great place to provide some fall inspiration would be the LilyPad’s September BYOC! Lots of yummy fall products there to get your mind thinking! Be sure and post what you make in the LilyPad Hybrid Gallery. We love to see what our members create!


