“Stained Glass” Autumn Leaves
Hi Happy Scrappers!
Polly Liana here, with a fun Fall DIY project that’s great to do with kids. Here in Massachusetts, we’re starting to feel that crisp, cool Autumn air outside. The other day, my daughter and I decided to work together on a project that would make our windows look more festive and get rid of a few lonely, broken crayons in the process. Here’s what we did:
First, we carefully grated orange, brown, yellow and red crayons with a cheese graters. (obviously, I handled the last little nubs so her fingers didn’t get grated!)
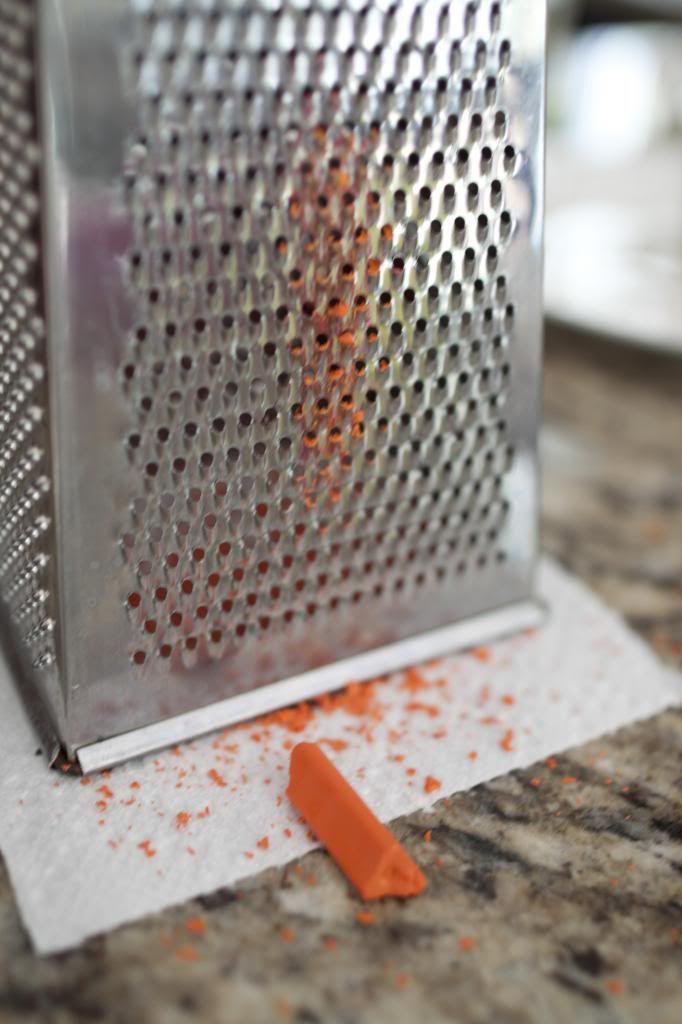
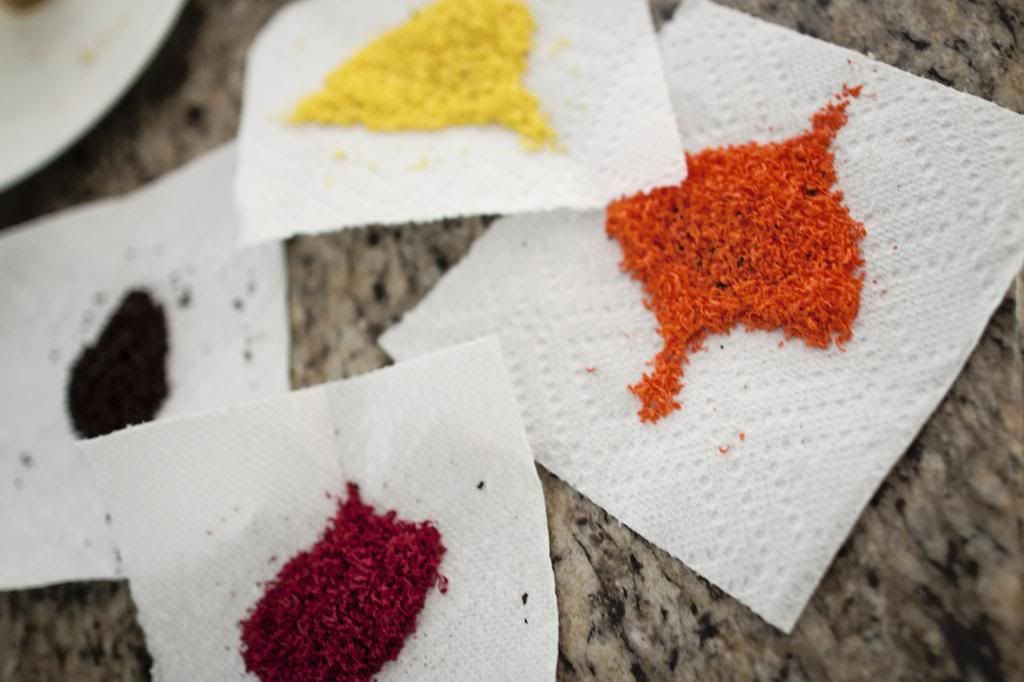
Here’s what it looked like with all of them grated. You don’t need very much, just a half of a thick crayon is good:
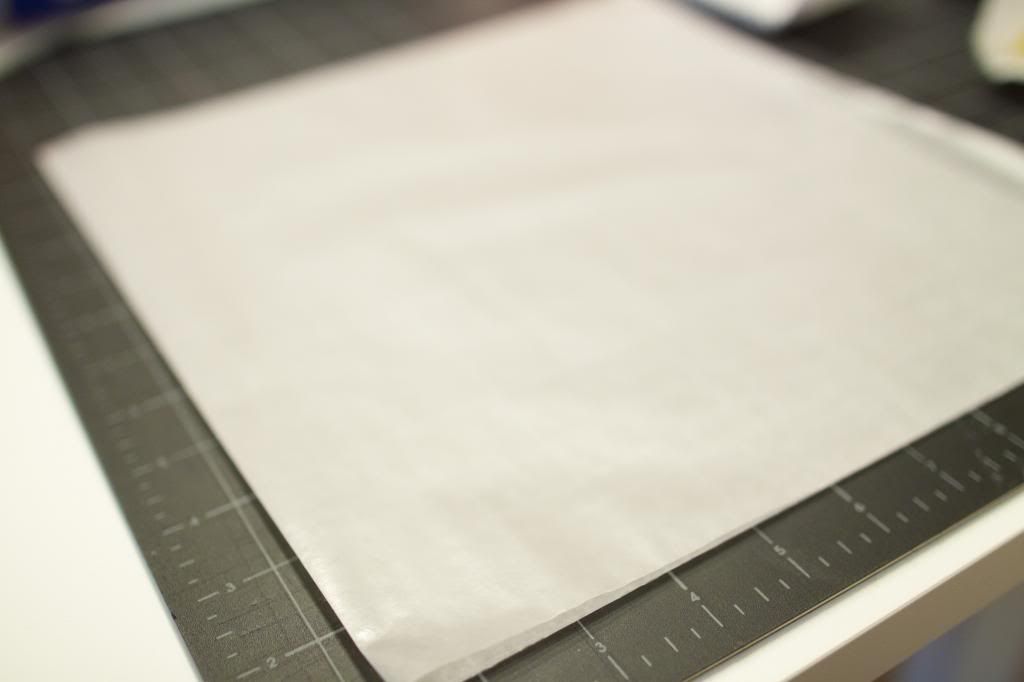
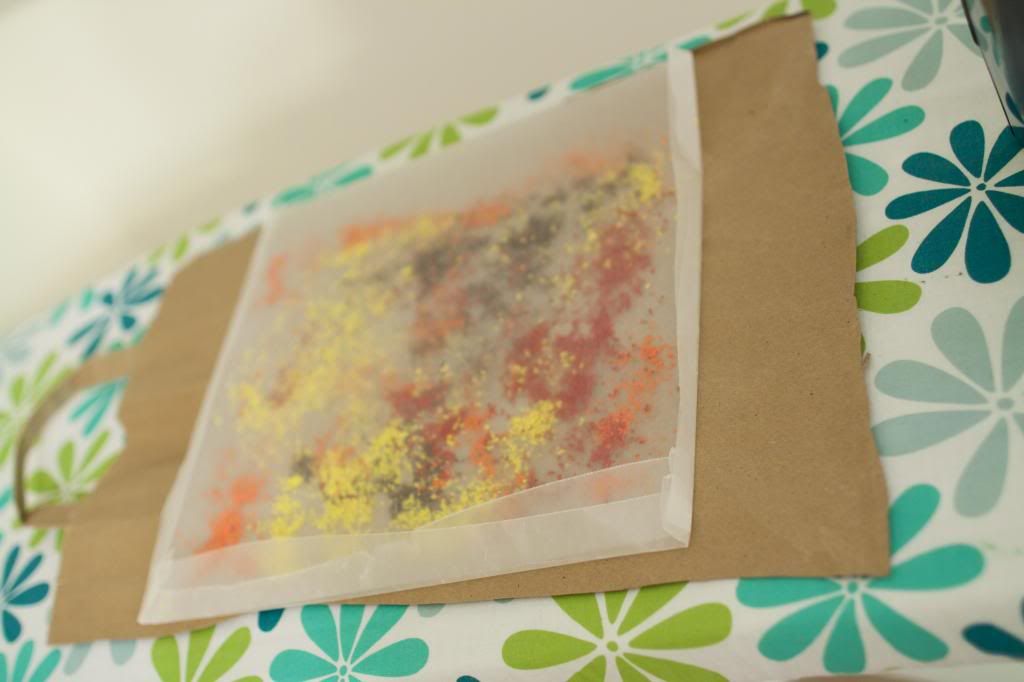
Next, I took a large sheet of waxed paper and folded in half:
Then, my daughter and I sprinkled the various colors around one half of the waxed paper, being careful to spread it evenly (avoid piling):
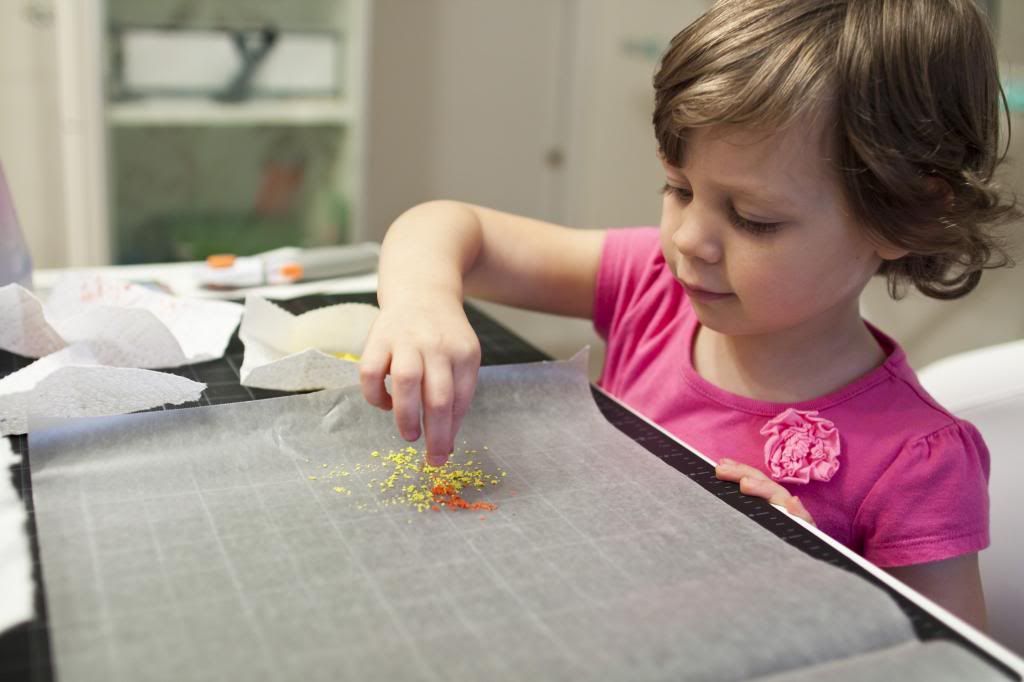
Here’s what it looked like when we were done. If you mix the colors too much or pile it you will end up with a muddied color:

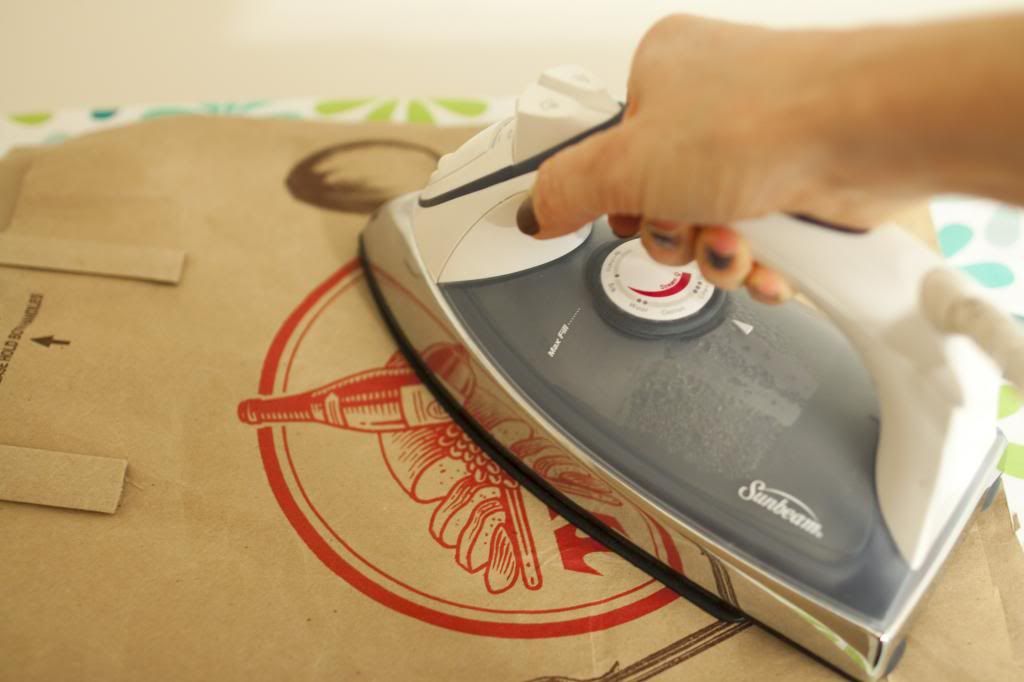
I then folded the other half over the half with the shavings and folded up each side, to trap the shavings in it. Carefully, I laid it on a piece of paper bag that I had placed on my ironing board:
Using a dry iron on a medium setting, I carefully ironed the wax paper for a few seconds at a time until the crayon bits melted. (Again, obviously this is a step only for adults):
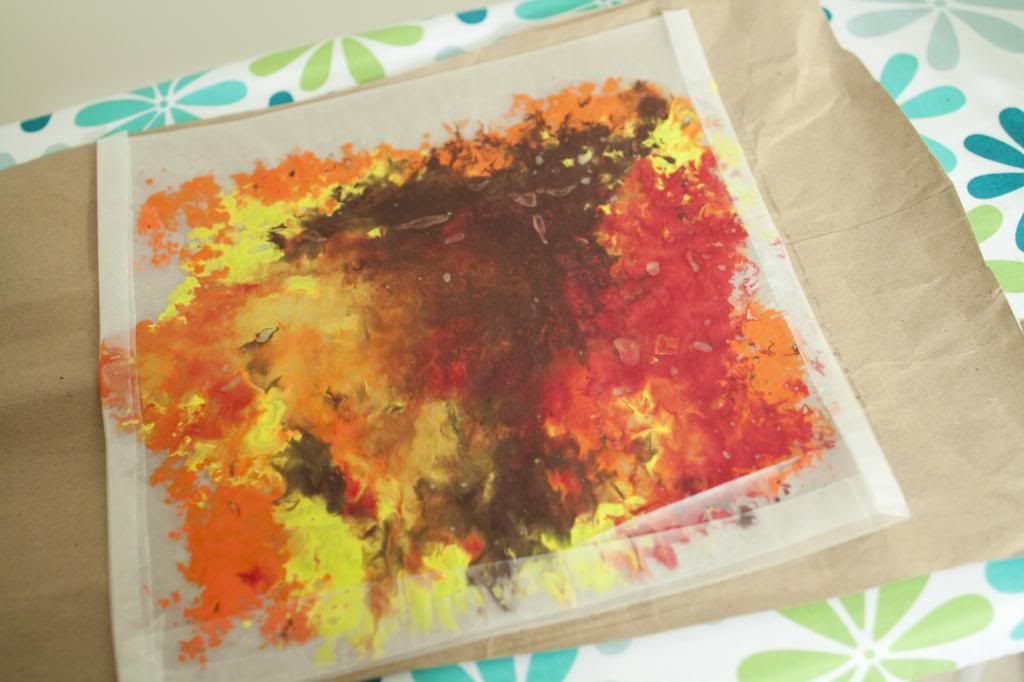
Now, I’m not a hotshot leaf cutter, so I used my Cricut to cut a few leaf shapes in various sizes to use as stencils:
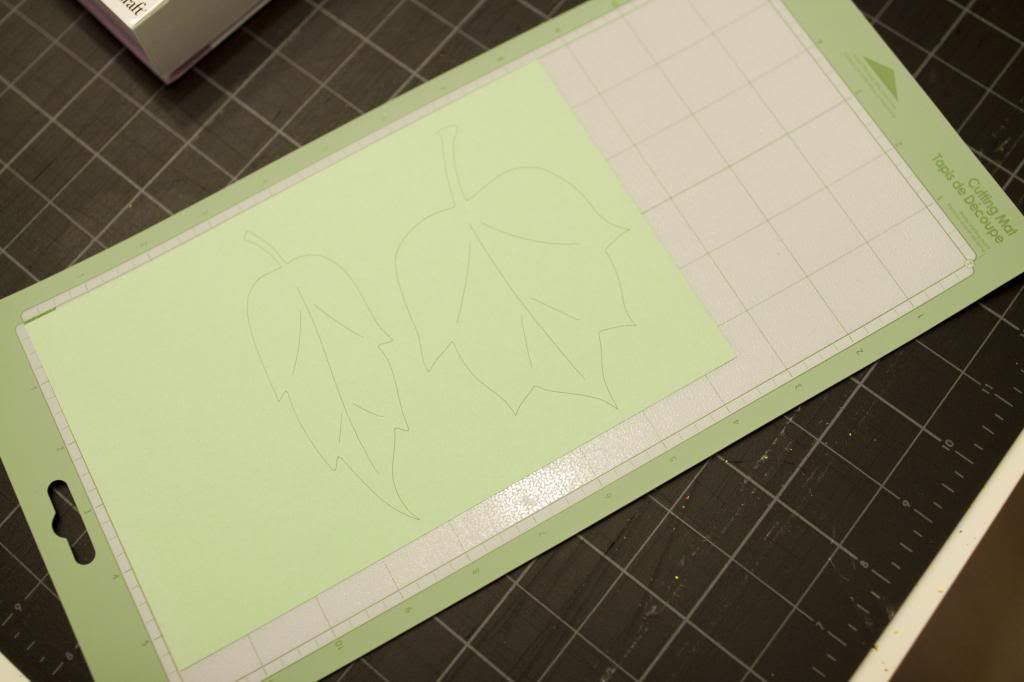
I used the stencils to cut out leaf shapes from my waxed paper, stuck them on my window with double-stick tape and voila!
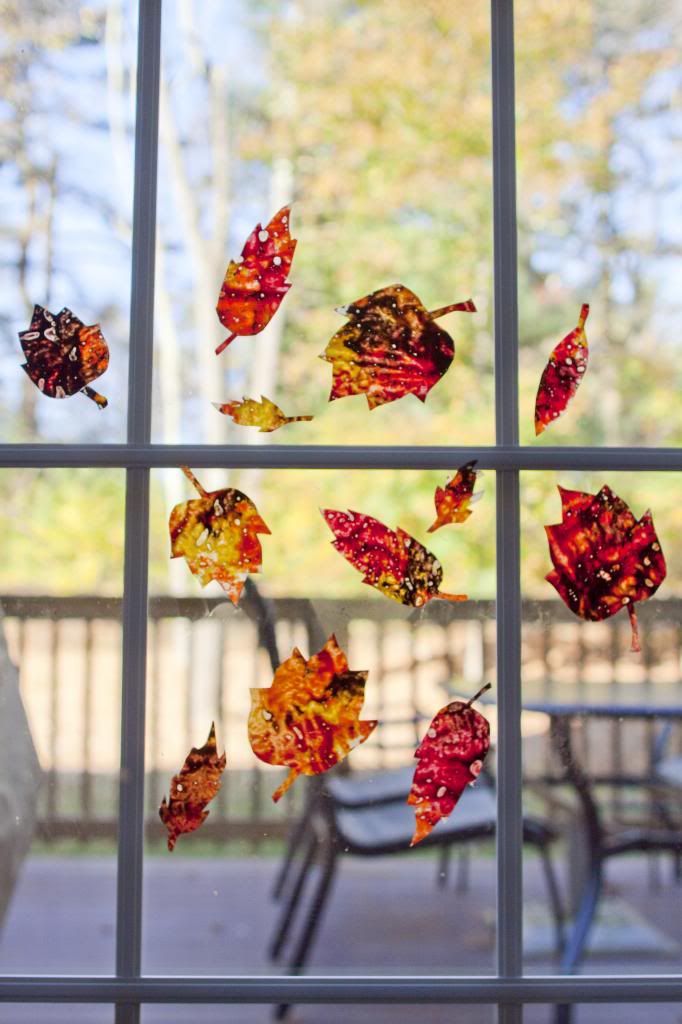
This is an awesome activity to do anytime you need to decorate windows and use up some old crayons. The results are quick and fabulous!
Inspired my the Autumn colors? Check out our latest offerings at the Lilypad for some wonderful kits that will coordinate beautifully with all your seasonal photos.
Until next time, keep warm and toasty.