
Greetings, Happy Scrappers!Polly Liana here to show you a little something I've been working on-- fairy furniture. I inherited my Mom's fascination for fairies at an early age. She used to read to me from a book called "The Glass Harmonica" that was all about fairies and other magical woodland creatures. As a child, I loved the idea of tiny magical people hiding around our house. Now as an adult, my family lives next to the woods and when we go for walks, I always ask my daughters to keep an eye out for signs of fairies. After seeing a few neat fairy houses on the Internet, I decided to make some fairy furniture of my own so I could surprise my daughters in our backyard.First, I went to my local craft and floral shop and purchased several different widths of sticks for my project. I also got some wooden disks and moss. I cut the sticks into similar lengths according to what … [Read more...]
Hybrid Tutorial: Create your own board game
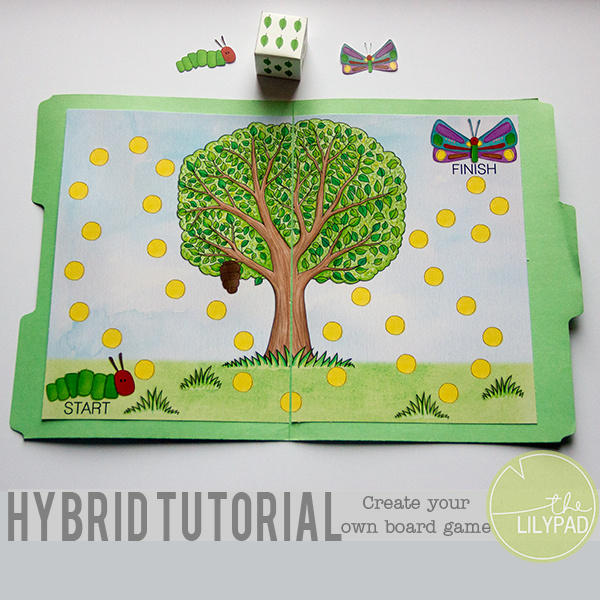
The school year has begun and the big kids are off to school. The mornings are a bit chaotic but things quiet down after they head out the door. That is until my little three year old pipes up that she wants to go to school like the big kids. I of course found a way to oblige her. A few times a week we do school time together. I try to make this time together fun but educational. To spice things up I create activities to go along with what we are learning. One of my favorite activities to create are board games! These themed board are very simple to make but the really add some pizazz to learning. Today I'm going to share with you a brief tutorial on how to create your own board game!Supplies Needed:Sunday Morning Element Pack by Jacque LarsenFamily Tree by Kate HadfieldSketchbook Pages by Kate HadfieldPresentation paperScissorsGlue … [Read more...]
DIY Digital Flair Tutorial

In conjunction with the current Trend Watch, today's tutorial is all about flair. If you haven't already, hop on over to the forum and visit the Trend Watch Challenge.There are so many flairs to choose from in the TLP store. One of my favorite parts of the flair from Just Jaimee is that it comes with a PDF file of Printable Circles for creating your very own flair. This really comes in handy for the hybrid creators.Storyteller July 2014 Flair by Just JaimeeI also found an amazing product from Lynne-Marie which makes it super easy to create your very own digi flair.Give it Flair by Lynne-MarieThere are times when you find just the right image that you would like to use as flair. Take a look at the quick tutorial below for a super easy way to create flair. I used items from the Storyteller June 2014 Bundle by Just Jaimee. For the purposes of this tutorial you will … [Read more...]
Simply Hybrid: Greeting Card

Hi everyone! Sarah, here with another installment of Simply Hybrid. This month I've created a greeting card, starting simple and then each step adding one or two elements to showcase a variety of different looks based on the same original card.I chose Shine by Laurie Ann to use for this card. My starting point is almost always something that stands out to me in the preview and in this case it was the label that reads "Lovely is what you are." in the elment pack and the woodgrain paper with the paint spatter in the paper pack. Shine ElementsShine PaperWhen I need a fast, simple card, I'm always amazed at the impact placing a patterned paper and a couple of elements on a card front and printing it off as a single piece piece. For this card I set up a canvas of 5.5" high and 8.5" wide, this is the same as half a sheet of letter paper which folded in half … [Read more...]
Tutorial: Using Over Sized Pics on Your Pocket Pages
When I started pocket scrapping, I thought I would love using only 3x4 or 4x6 photos. It was so easy! Over time, however, I found that I was losing out on some pictures that needed to be shown in a larger space. I wanted to find a way to showcase them in my pocket pages. I knew that traditional pocket scrappers could cut the larger photo apart and put it in the pockets, so I set out to figure out how to do this on a digital template. This is, step by step, how I go about it.First, I open the template and the photo I want to use.Next, I am going to clip the photo to spaces where I want it. I start by selecting one of the layers, and drag my photo on top of that layer. I re-size the photo as necessary.Now, I am going to duplicate the photo so that I can clip it to each of the layers I want it to occupy. For this layout, I want the photo in the top right spot, and the … [Read more...]
Tutorial: Shadowing Doilies
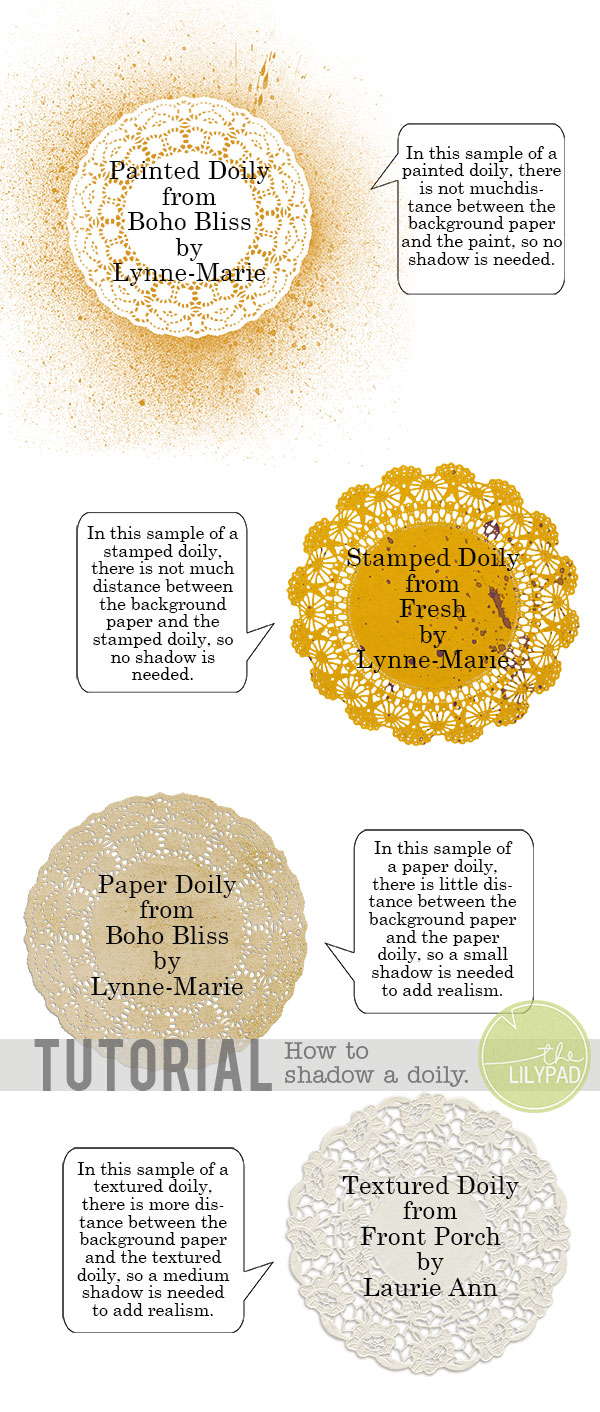
By now you have noticed and possibly shopped the Doily Trend Watch. You might have played along with the Trend Watch Challenge. Continuing the doily theme check out the latest episode of The Hybrid Variety Show where a slew of doilies are on display. Today, you guessed it, more doily talk! I am going to share with you some tips on shadowing doilies. I took photos of both lace and paper doilies as a point of reference for creating shadows. This visual reference will help aid in creating realistic shadows. In looking at the photos you can see that the doilies do not lay perfectly flat. The shadow beneath the doilies varies in darkness and in depth. Let's talk about the different types of doilies that are available as digital products. There are all sorts of doilies available for purchase. The sample image below includes the most common doilies. Now that you have seen the different … [Read more...]
Video Tutorial: Add Transparent Text to Photos
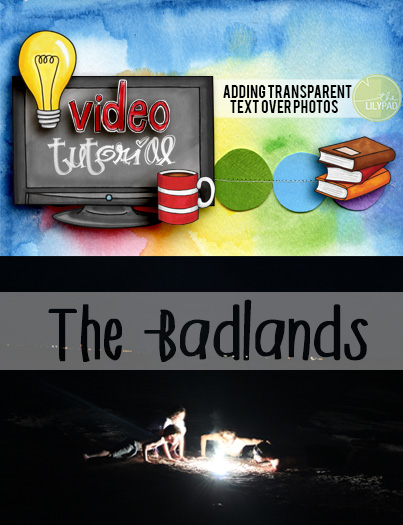
Hi, all! I'm here to bring you a little tutorial on adding transparent text to your photos. If you make it until the end of the video, there are a couple of other little tips as well. As always, there are several ways to do this, but I found a little shortcut so thought I'd share. The video was done with PS CC but has a work around for PSE. I'm sure you can also do this with other programs as well.And once I started playing, I couldn't stop. You'll find that you may just get addicted to this technique. [youtube=http://youtu.be/Thy4uBojvHQ] Be sure to check out the FONT category in The Lilypad store. There are some awesome fonts and dingbats in there and I always seem to find something I can't live without! Let me know your thoughts on this (or anything). … [Read more...]
Creating a Hybrid Layout: My Process
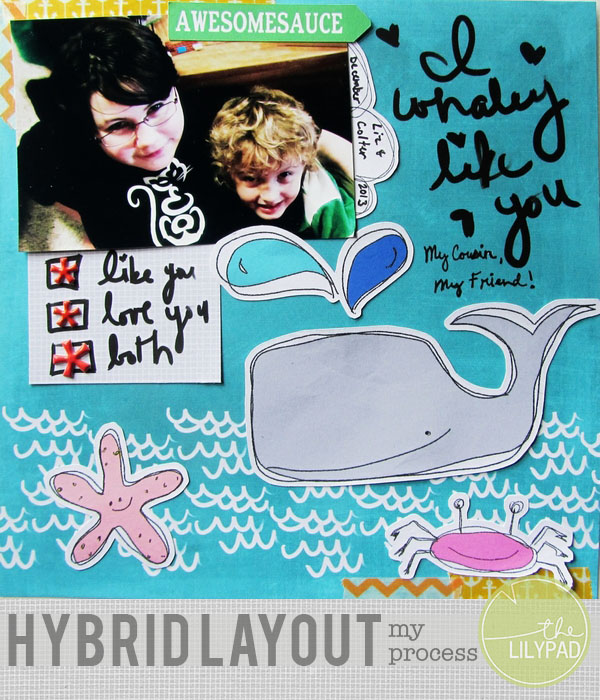
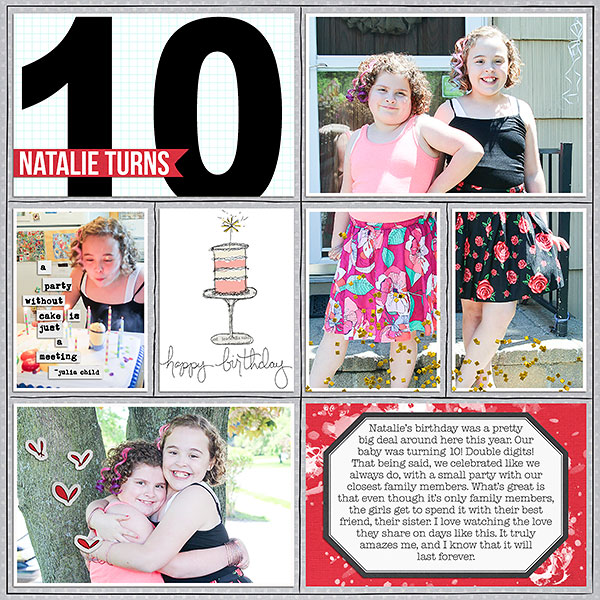
Hi, all! Sarah here! I'm so excited to share my process of creating a hybrid layout with you. Since I'm on creative teams, I almost always start with the product. For this layout I chose I Whaley Like You by Valorie Wibbens. I just love puns and I knew this would be a fun kit to work with. There are lots of elements that are great for print and cut and so many paper choices that I just love.After I choose my kit I begin thinking about photos. If I choose to use a photo I print it on my Canon Selphy. I just love this little printer, and love being able to print on demand. I decided that this photo of my daughter and nephew would be perfect since I haven't scrapped a lot of layouts about just the two of them.My next step is to print and cut my digi elements that I want to use for my layout. I tend to make up my layouts as I go along, so I print out anything that I think I … [Read more...]
Hybrid Tutorial – Printable Treat Bags
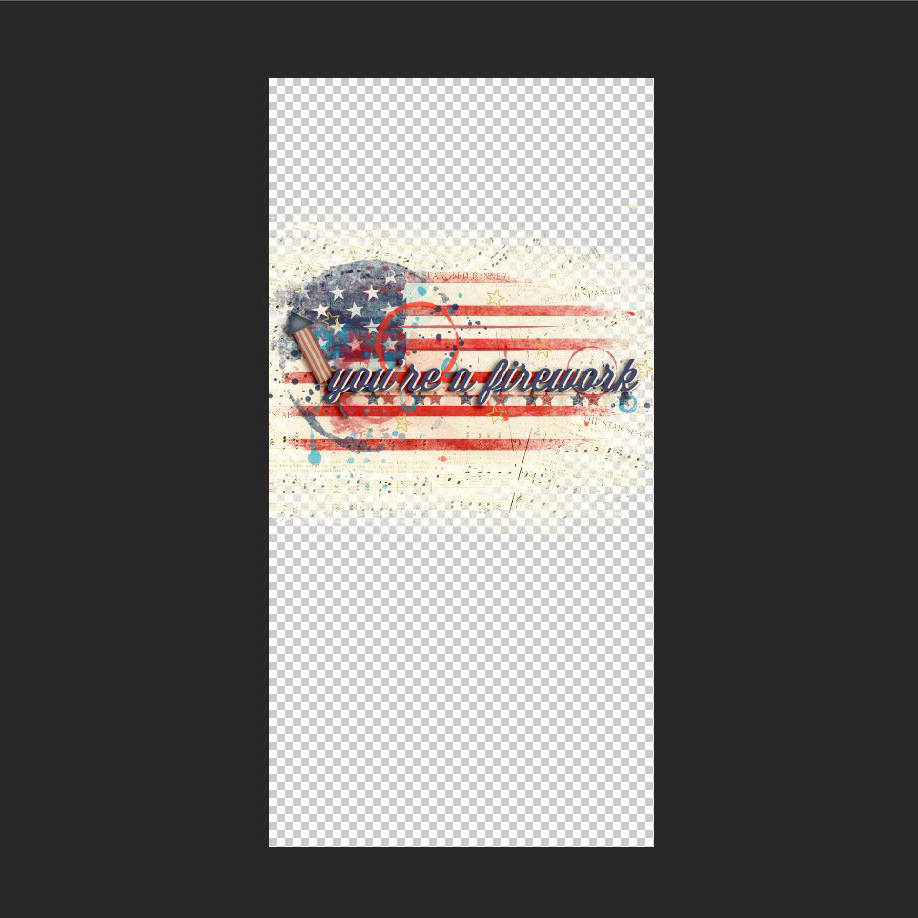
Fourth of July is just around the corner! For those of us who are Americans this is a time we celebrate our patriotism for our country. I've always had a soft spot in my heart for this holiday because my grandpa was in the army during WWII. He was the type of man who cried when we sang patriotic songs or when the flag was presented at an event we were attending. When he was alive he loved to see me dress my kiddos up in red, white, and blue for the holiday. Even though my grandpa isn't alive anymore I try and do things for the Fourth of July that I think would bring a smile to his face. This year I have a few little goodies to give my girls to help them enjoy some the activities we will be doing on the Fourth. I wanted to make something nice for their goodies to be wrapped in before they received them. I came up with the idea to create a printable treat bag for these goodies, and … [Read more...]
Simply Hybrid: Bookmarks
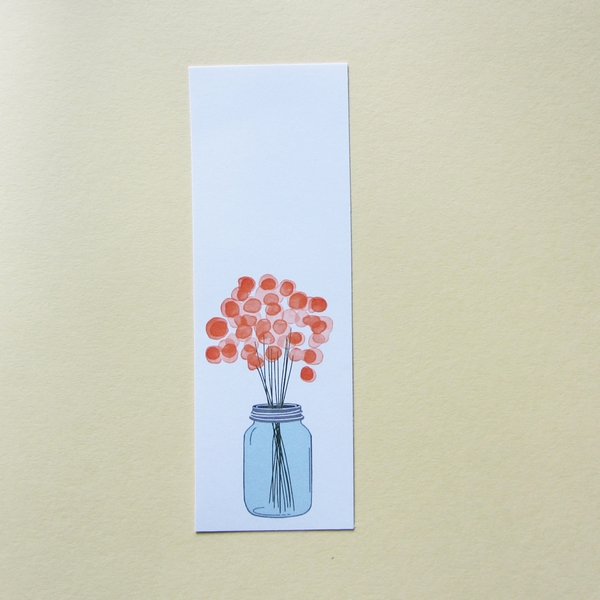
Hi all, Sarah here. Today, I want to share how simple hybrid really can be. For these bookmarks I chose the kit Heart and Hand by Laurie Ann.To begin with I created a really easy bookmark. I fell in love with this little jar of flowers from the kit. For this bookmark I placed the vase of flowers on a blank background and printed it. I love how pretty the flowers are all on their own, so I simply cut a 2"x6" rectangle with my paper trimmer making sure to center the jar the best I could toward the bottom of the paper and leaving it on a plain white background.For the next bookmark I placed a piece of background paper behind the flowers (I just love the polka dots and orange hearts) and cropped it to 2"x6". Once it was printed I cut out the rectangle. I was also inspired by the gingham ribbon in the kit so I decided to add a bit of ribbon to the top of the bookmark. I used a … [Read more...]