Stitch it up…stitching on your hybrid projects
Hey all! As a young child I took a 4H sewing class. I instantly fell in love with sewing. Over the years I have done quite a few sewing projects. I must admit my favorite project has to be sewing this Jessie costume for my daughter. Don’t look too close because that thing was a last minute project after having a baby one month earlier. It was a get it done project, not a get it perfect project.

Recently though my sewing machine has been gathering a bit of dust in my craft room. I just haven’t sewn as much because I’ve been too busy scrapping! A couple months ago though I decided to dust my machine off and do the unthinkable…. sew on my scrapbook projects. GASP! I know a few sewing diehards just had a heart attack, but stay with me, it will be okay. I have always wanted to do this, but I have been nervous about ruining my machine. Turns out my nervousness was all in vain! Sewing on my scrapbook projects was easy as can be, and my machine had no problems with it. I don’t profess to know everything about sewing on scrapbook projects. However, I do have a few pointers for those of you who want to take a leap of faith and sew a little bit on the wild side 😉
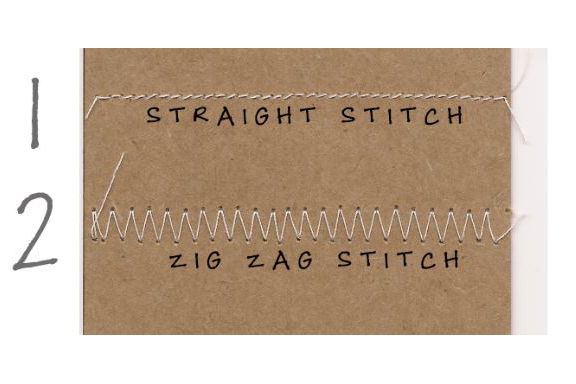
First let’s go over a few types of stitching really quick
- Beginner stitches: These are straight, neat, and easy to do.
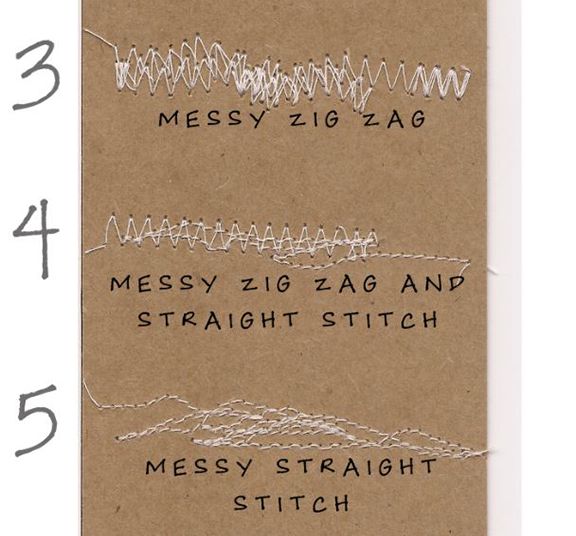
- Straight stitch: You can’t get any simpler than sewing a straight line on your pages. Psstt! Don’t worry if you can’t sew a straight line! Those wanderings will give your project a nice “unique quirk” to your layout. Trust me, my lines aren’t always perfect!
- Zig zag stitch: Something that dresses up the page just a bit more.
- Messy stitches: These are where you get crazy and stitch randomly (aka messy).
- Miscellaneous: Try out new stitches on your machine!

So here are a few things that I’ve learned from sewing on my scrapbook projects.
- Buy a separate set of needles for your scrapbook projects. Your needles will go dull from sewing through the paper. I also clearly marked my needle case so not to get the two mixed up.
- Start simple. On my very first project I used just straight stitching. It was simple but had such a fun effect that I was instantly hooked.
- Venture into the unknown. I had never used transparent thread in all my years of sewing. However, I knew that I wanted to start sewing pockets onto my Project Life page protectors. I bought some of the thread and gave it a whirl. The thread is a teeny bit finicky to use, but oh how fun it is to be able to sew my own extra pockets on to my protectors!
- Use one thread color. Personally, I like white, but I’ve seen lovely layouts with aqua or black thread. Just pick one so you aren’t causing yourself a ton of work by switching out your thread and bobbin all the time.
- For a clean look use washi tape on the back of your projects to tape down your loose ends.
Before I leave you to your sewing (because I know you want to try this) how about a few examples of what I have done on my projects.
These things were sewn down on this layout:
all the labels
the square picture of my daughter
the tab that says “this”
the extra pocket containing the ready to ride tag

Here is what the ready to ride extra pocket looks like open.

A bunch of zig zag stitching on this layout

There you have it ladies! I hope I’ve encouraged a few of you to try this technique out. I honestly can’t wait to start sewing on some of my hybrid cards I make for others. If you try this out be sure and post your layout in the TLP HYBRID GALLERY and leave a comment here letting me know so I can pop over and see what you have come up with!