Hey scrappers, Polly Jewelle here! I’m so excited because December 1st is finally here! I along with many other will be starting to document their December today. Before you get started I have another tutorial to share with you. Today I’m going to demonstrate how to make confetti pockets. I’m going to show how to make a confetti pocket for hybrid albums as well as how to make one on a digital layout. Let’s get started!
Digital Confetti Pocket
1 – Compile your layout including a clear pocket for confetti. On my layout below I used the clear 3 x 4 pocket in Pear Tree {confetti} by Sara Gleason.

2 – Add scatters inside of your pocket. To do this all scatter layers should be BELOW your pocket layer. Spend time spreading your scatters out so they aren’t all bunched together.

3 – Add shadows to the scatters. Keep in mind how each type of scatter will have a different size of shadow. For instance, the wood veneer in my example has a much larger shadow than that of the plastic Ho Ho Ho wording.

4 – Add a shadow to your clear pocket. This is probably the trickiest step of this whole process. Because the pocket is clear you can’t add just a normal drop shadow. A normal drop shadow will create a gray undertone to the pocket. To achieve a realistic shadow for my clear or acrylic digital pieces I use a shadow tutorial by our own Krista Sahlin.

Your confetti pocket is finished! Pretty simple huh?! This same technique could be used on digital pocket pages. The possibilities of digital confetti pockets are endless!
Now lets talk about how to do this for a hybrid album.
Hybrid Confetti Pocket
1 – Begin by taking an extra pocket page protector and cutting one of the 3 x 4 pockets from it. I had an extra Becky Higgins page protector on hand so I used that. You can see in the picture below that I have cut my pocket out and slid it to the side.
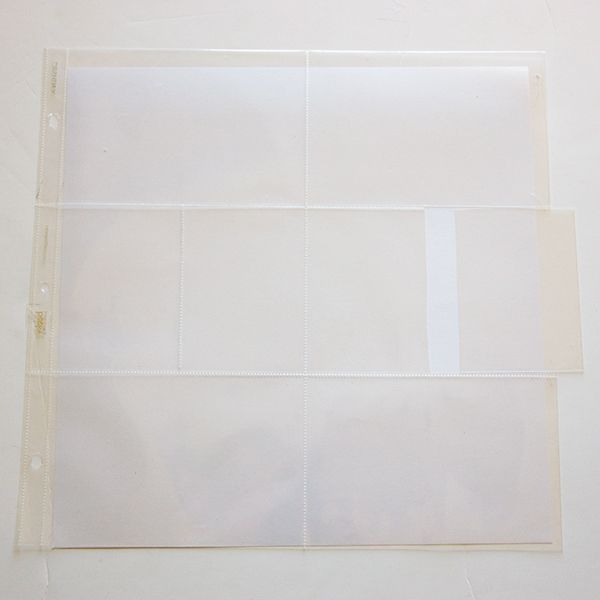
2 – Take your trimmed pocket and slide it into the pocket that you will be using for your layout. Make sure you trimmed pocket fits. If it doesn’t fit or is difficult to slide in and out, trim a small bit off one side. Repeat this process until you are satisfied with the size of your pocket.
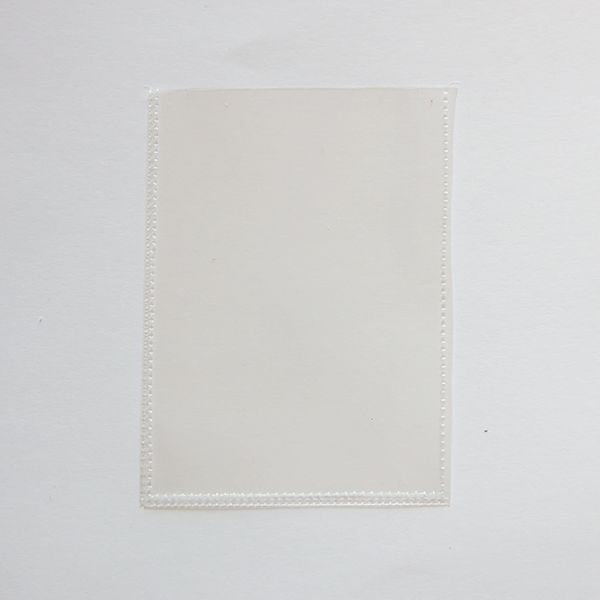
3 – Using a sewing machine, sew up the two long sides of the pocket and also the bottom of the pocket. Be sure to leave at least 1/8″ of a seam allowance on each side. This seam allowance will ensure that your pocket does not break open. I used clear thread on my pocket, but any color of thread would work.
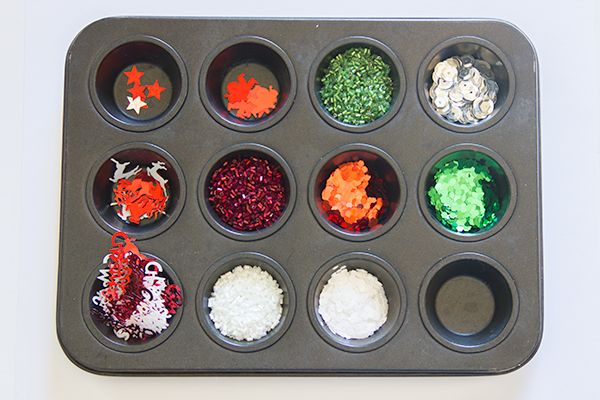
4 – Pick your assortment of confetti that you would like to fill your pocket with. Almost anything can go in a confetti pocket! I separated my confetti out into a muffin tin for easy access.
5 – Fill your pocket anywhere from 1/4 to 1/2 full of confetti. To make this easier {and less messy!} you can use a funnel.

6 – Sew the top of your pocket closed, again leaving 1/8 of a seam allowance.
7 – Slid your confetti pocket into your pocket page protector and enjoy!
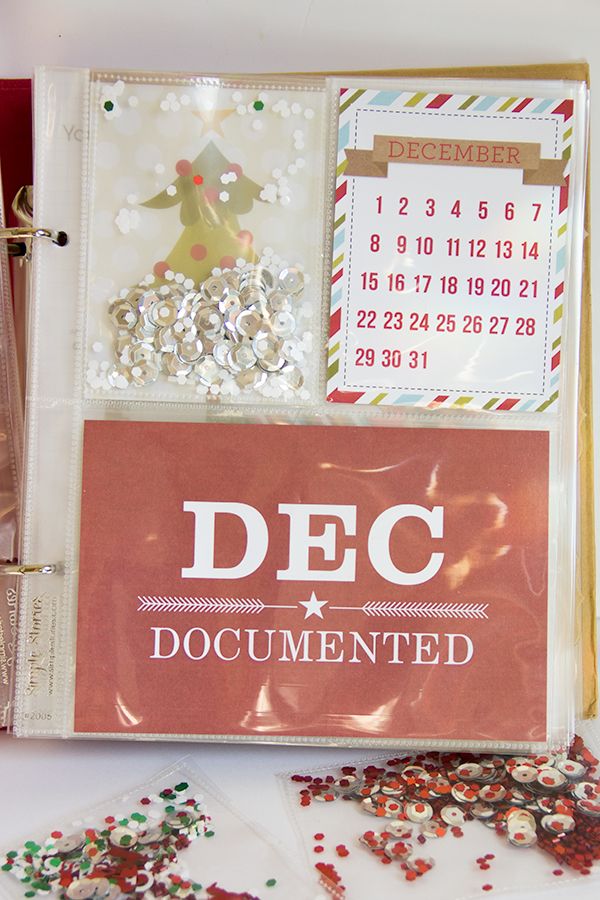
I love how these confetti pockets let you peek through to the next page! I made several of these pockets to use through out my album. We hope you enjoyed this inspiration and tutorial. Stay tuned for more DYD inspiration and encouragement from the Pollys. If you were inspired by this blog post, please share your goodies with us, we would love to see them!
Oh so cute Jewelle. I will definitely have to try this in both hybrid and digital.
u rock – this was an awesome digi and hybrid tute! TFS!