Duplicating Clusters
Creating clusters with digital products for your scrapbook layout adds interest and depth to your scrapbook layout. While you can create multiple clusters for your page, you can also create just one cluster, duplicate it, then copy and paste it to additional areas of your layout. You can modify the clusters to give each cluster a unique look.
This saves a lot of time, not having to start a new cluster from scratch. You have all the products already chosen so it’s fast and easy to move them around and turn layers off and on, to give the new cluster a different look.
Create your cluster with as many layers as you like. I like to start with a few flat base layers using non-dimensional products like paint, brushes, overlays, etc. I often go back and add in more later as the cluster design comes together but 1-2 non-dimensional products give me a starting point for placement. Then I start building up the cluster by stacking products on top of each other, often moving up and down between the layers to insert into the cluster, not spending too much time deciding how to stack up the layers because once I have finished creating a cluster it’s easy enough to go back and move a few layers around, if desired.
I like to add my shadowing in when my cluster is finished or almost finished. This will show me the depth of the clustering as I add the shadowing styles. I often separate a few of the shadow styles from a product and put it on its own layer so that I can warp the shadow without affecting the product itself. On the product layer, click the layer styles icon (to the right of the layer name, in Photoshop) and right click on the shadow layer to open the drop-down menu, then select “create layer”. This will place the shadow style onto its own layer, separate from the product layer. Now you can warp the shadow to create a more personalized shadow, to your liking. I like to use Edit>Transform>Warp which is a fast and easy way to move the shadow a bit.
Here are the products I chose to create my cluster.
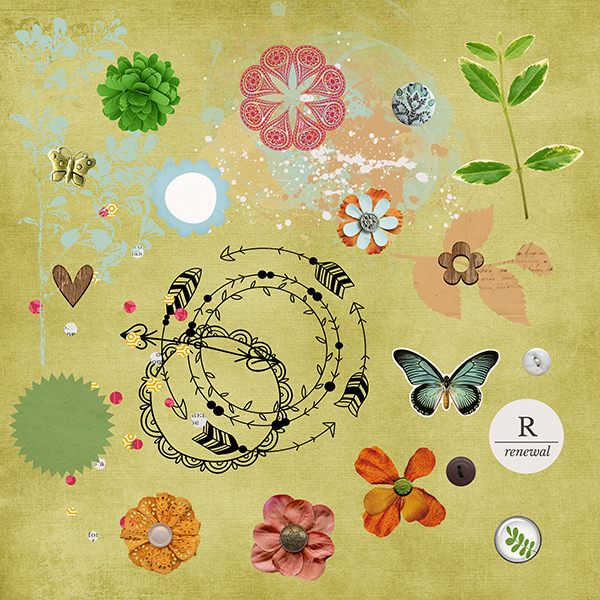
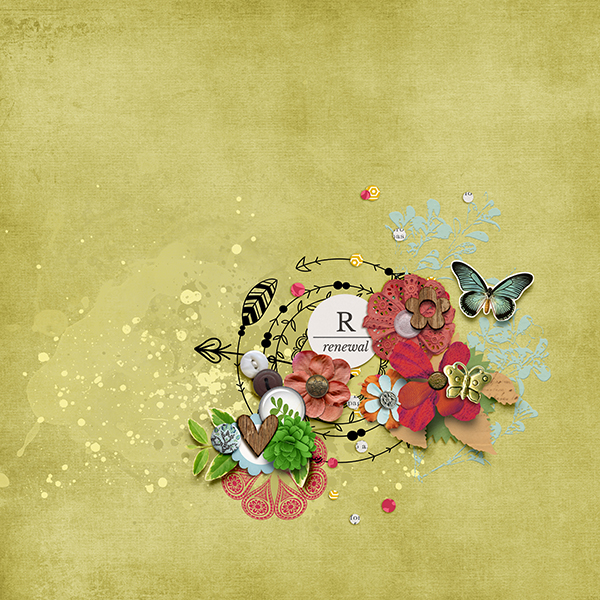
I built my cluster, then highlighted each layer and clicked “Control + G key” together to create a group in the layers palette. This collapses all the cluster layers inside one layer, which tidies up my layers palette and makes it easy to copy and paste the cluster group elsewhere on my layout. Clicking on the group layer arrow (to the left of the group layer name) will open and close the layers inside, so you can access all the layers, turning each one off and on, or to manipulate, as desired. Here is my cluster created with all the products shown above.
For shadowing, you may create your own shadows. I like to use styles created by some of the amazing designers at The Lilypad. I don’t have a favorite as they are all great, each slightly different, so by owning a few different style products, it gives me a large variety to choose from. Here are a couple of the ones I use.
Sahlin Studio | Realistic Drop Shadow Styles
One Little Bird | Shadow Like Me
Amber LaBau Designs | My Shadow Box Layer Styles
I copied and pasted the cluster group five times, moving them around my layout, sometimes only using a bit of a cluster along the paper edge. I duplicated the paint layer, cascading it vertically down the page to help direct your eye from top to bottom of the layout. The clusters help to draw your eye down the page also, from the title, the journaling, across the photo, and then to the journaling at the bottom of the page.
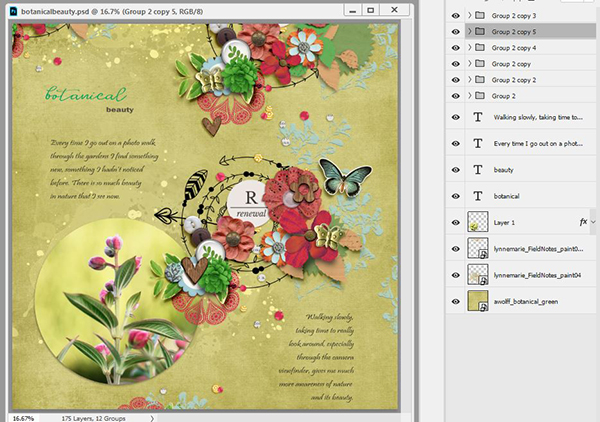
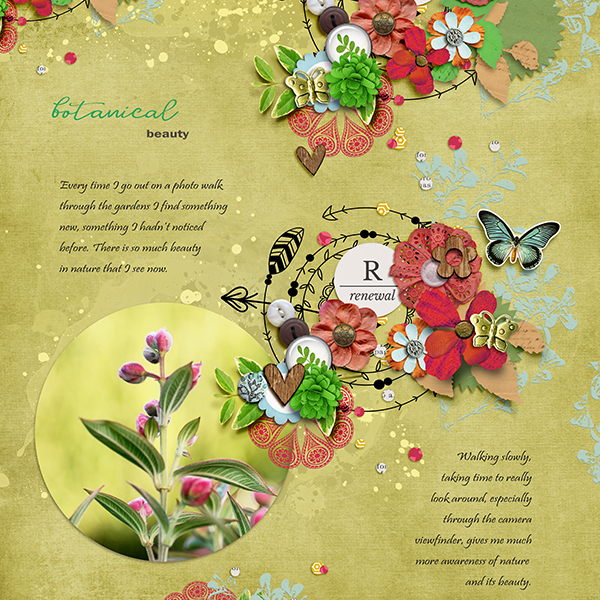
As I duplicated each cluster group, I turned on and off layers as desired, I re-colored (hue/sat adjustment layer is fast and easy) and I moved some of the layers inside a cluster to create a new look. At first glance, I bet you didn’t know that each cluster is the orginal cluster, duplicated. For this layout, no additional products were used aside from a base background paper.
I hope that I have inspired you to create your own clusters and try duplicating them, then manipulate them to create a new look, personalized just for you, for your layout design. Have fun!