
Hello friends! Did you know that each month The Lilypad offers you a free template for your digital scrapbooking enjoyment? You can find the freebie in the monthly challenges section of the pad's forums, and they are always awesome! I love using templates when I'm in a creative rut and I *really* love modifying them to make them a little more unique to my scrapbooking style. I tilt, rotate, enlarge, shrink, add and delete items on the template as desired to discover what will fit best with that I'm envisioning - I like to think of it as a creative puzzle that I play with to come up with a new look for my layout.Sara Gleason designed the August template challenge freebie and it is such a great design! It is perfect as it, but I had a few photos I wanted to scrap so I decided to take this freebie and see how I could make it my own with really only a few changes.This is the template … [Read more...]
Template Tuesday | BIG Photo Backgrounds

Hello Scrappers,Kayla, aka keepscrappin, here again with another Template Tuesday quick tip to stretch your template stash. It's no secret that I love BIG photos. I always say go BIG or go home! One way I like to use BIG photos is as the background for my layout. It's such an easy way to get a different look from your templates and it really helps showcase the photo.For my example today, I used the first template in Press Play #5 by our talented Lynne-Marie. I've been eyeing this template pack for ages and was so happy to finally come up with an idea to scrap a layout with it that would do it justice. Don't be afraid to modify the template a bit to make it work with your BIG photo. I selected all the template layers above my photo and used the arrow keys to nudge them down a bit so they wouldn't cover my eyes. I clipped some papers to … [Read more...]
Template Tuesday | Split Backgrounds
Hello Scrappers,Kayla, aka keepscrappin, here with a Template Tuesday quick tip to stretch your template stash. I'm all about the ease of scrapping with templates and love to re-use templates in different ways to get a different look. An easy way to do that is to add another paper on top of the background paper layer of the template to create a split background look.I used the bottom center template in Recyclables 77 by Scrapping with Liz to get the split background look.Notice that I lined the extra paper up along the bottom of the horizontal paper strips in the original template. This helped my layout in three ways. First it let me use more of the wonderful papers in the kit and second it created a bolder foundation for my photo cluster to rest. Third, it gave the layout a different look. It's always best to look for natural points to split … [Read more...]
Mosaic Magic

Hello Scrappers,It's Kayla, aka keepscrappin, dropping in today to show you a quick trick to get some mosaic magic with your photos.I used Scrapping with Liz's Multi-Mini templates which are 50% off in today's SOSN sale for my layout. These templates work great for scrapping multiple photos, but did you know they also work like magic as a mosaic photo overlay for a single photo?Here's my layout using some products that are discounted in today's SOSN sale. Click on layout for full credits.It's easy to get the mosaic magic look in just a few steps.1. Duplicate and merge (ctrl, alt E) all the photo layers into one photo layer.2. Move merged photo layer below all the individual photo layers and rename it - all in one photo.3. Clip a photo (ctrl, alt G) to the all in one photo layer.4. Turn off the visibility (click eye on layer) for some of the photo layers, … [Read more...]
Template Tuesday : Adjusting No Photo Templates
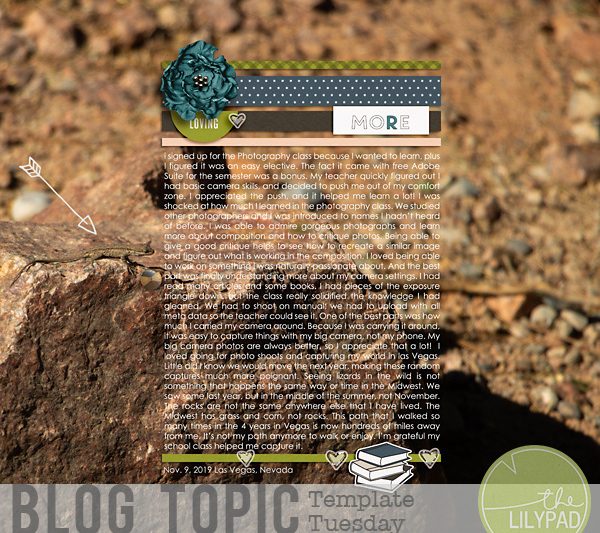
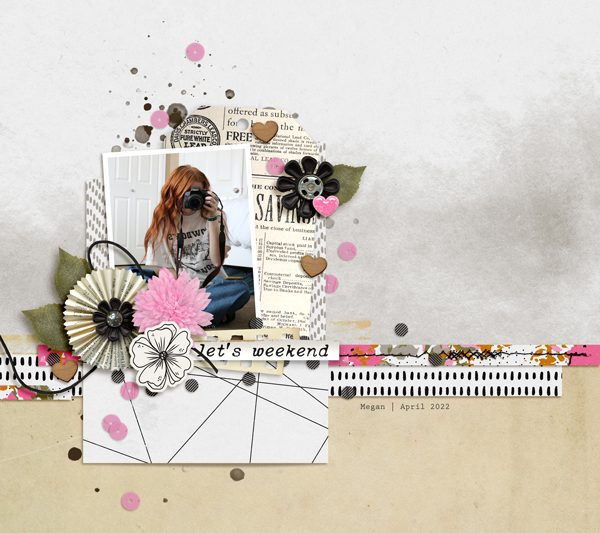
Sometimes, when I'm looking for a template I find one that either fits my journaling or fits my photos but not both! The Preserved Set by Sara Gleason has lots of room for journaling on the templates. But the one that caught my eye for the length of my story had no room for a photo! So, time to adjust.The photo I wanted to use was taken with my DSLR and is quite large. When I pulled it onto the template, the photo automatically resized to fit the longest dimension. I changed the background to grey so you could see the adjustment. I like this feature normally since I don't often do full size photos.On this page, that wasn't the look I wanted at all, so I deleted the photo on the template, then pulled the photo into photoshop, and added it to the template. There are many ways to have the photo show up in full size, this is just the one I chose. Now the previous photoless … [Read more...]
Template Tuesday: Double Page Layouts

Hello everyone! For 2-22-22 Tuesday, we are going to talk 2’s as in two pages at once!I love to take photos, especially when we go places like museums, sports games, trips, or to big events like graduations or weddings. This means I have a lot of events with many, many photos! One of the ways I handle these photos is to do double page layouts.There are awesome templates out there that are set up for 2 page layouts in the store to make creating Double Pages easy. This Ring on it template set by Lynn Grieveson Designs includes two templates made to go side by side.But sometimes, I want to use templates not specifically set up as a double spread layout. And here’s some of my tips for making that work. One option I will do is combine a template spread that highlights 1 to 3 of the photos, and use a pocket type layout on the opposite page. This lets me highlight … [Read more...]