
How to Make Fall FlairFall is certainly on my mind. I am longing for the cooler weather and all of the beautiful colors. Living in a warmer climate, it is sometimes necessary to create my own little bit of fall. Today we are going to use fall as the gorgeous backdrop for creating this DIY fall flair. I was inspired by the beautiful fall colors in The Lilypad Designer Collab, Capturing Fall.Supply List:Cardstock, white1" circle punch1" epoxy stickersImages (resized to 1")PrinterScissors -------------------------------------------------------------------------------1. Visit The Lilypad, or your digital stash, to find images to print and resize to one inch. I used Capturing Fall, a Lilypad Collab.2. Print images on heavy cardstock.3. Cut images into strips.4. Use a 1" circle punch to cut out all of the images. Tip: Turn the punch … [Read more...]
How To Make Your Own Stencils
How to Make Your Own StencilsMaking stencils is made easy as well as affordable when you follow the steps in today's tutorial. Let's gather our supplies and get started. Supply List Digital images from The Lilypad of course! Silhouette Cameo or other digital die cutting machine Silhouette Studio Software or other die cutting software Stencil material (or plastic dividers from local Dollar Store) Card stock Various inks and paintsFor this tutorial I am using Storyteller February 2014 SVG Cutting Files by Just Jaimee-----------------------------------------------------------------------------------------1. Open Silhouette Studio Software and edit the new document to "Letter" size. 2. Drag images onto the blank document and resize the images to fit the cut area. Keep adding images to fill the document.*Tip: Keep images away from the right edge where the holes … [Read more...]
How to Make Your Own Enamel Dots
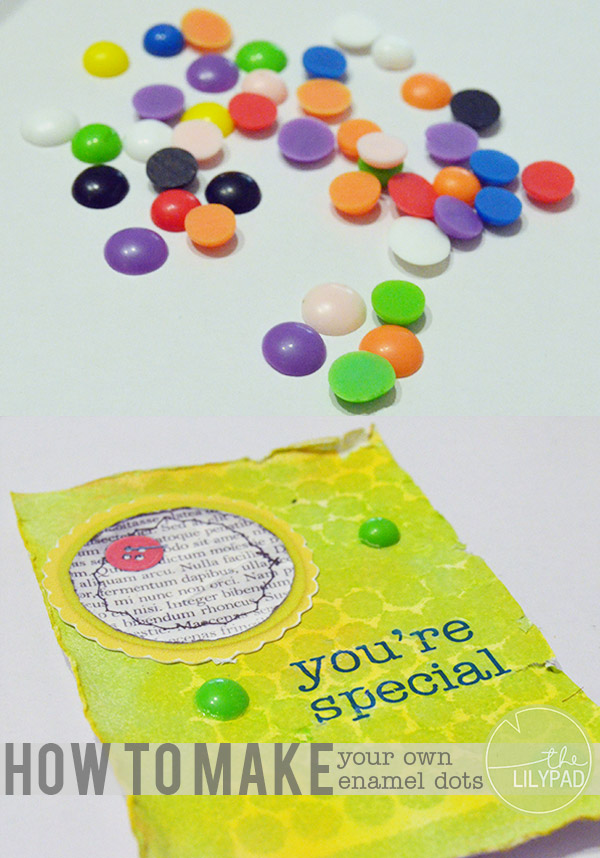
How to Make Your Own Enamel DotsToday I am going to show you how to make your own enamel dots. I just love DIY crafts. There is something so satisfying about putting your own personal touch into crafting. These enamel dots are super easy to create and can be very addicting.Supply List: Perler beads Scissors Metal Tray or cookie sheet Oven Mitt Parchment Paper Toaster Oven1. Set toaster oven to 350° F and allow to preheat.2. Use scissors to cut parchment paper to fit in metal tray.3. Place perler beads about 2 inches apart on a parchment lined metal tray.4. Carefully place metal tray in oven and set the timer for 6 minutes. Due to variations in ovens melting times will vary.5. Use oven mitt to remove the metal from the oven.6. Let cool for one minute. Dots will slide off of parchment paper. A few final … [Read more...]