Playing with Layer Styles in PS
Hello my creative friends! I hope everyone had a fabulous iNSD over the weekend and you found some time to be creative. I am dropping in today with another tip for using the Gradient Overlay Style in Photoshop. Last week I talked about how to use a multi-colored Gradient Overlay to add some pop to a sketch. Today, I want to show you a quick trick for using a gradient overlay to make the edge of a paper or photograph look like it has curled upwards. Cheryl of Fiddle-Dee-Dee Designs has some fabulous templates with this effect applied. I used a template from her new Singular Sensation 2 {Dressed Up} set to make this page:
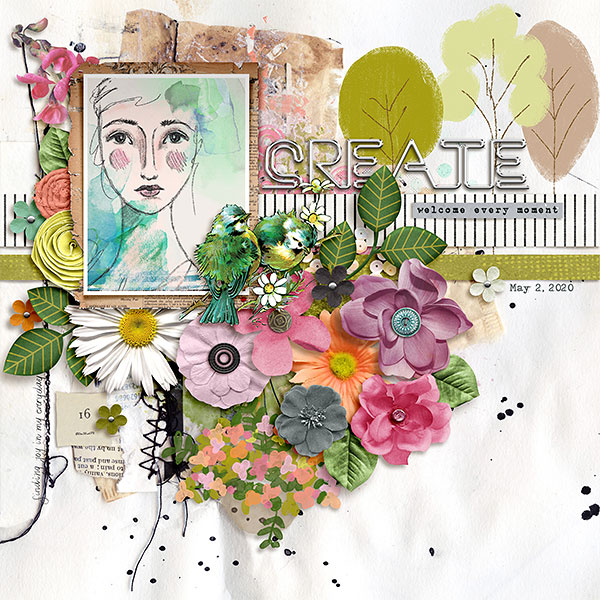
Notice the curl on the upper part of the photo and the torn paper mat beneath it? It was accomplished through a gradient overlay. Because she is so awesome, Cheryl includes the gradient overlay style with many of her templates, so all you need to do is clip your photo to the placeholder to see that effect appear. I am going to show you how to take that effect and transfer it to another element (as I did with the torn paper on my layout). I will also show you how to save this effect as a style so that you can use it on any page with any element.
Let’s start with copying the gradient overlay style to another element on the same page. To copy the gradient overlay to the torn paper mat, all I have to do is right click on the photo layer that has the gradient overlay style applied and choose “Copy Layer Style” from the pop up menu. Now, right click on the layer that you want to apply the gradient and choose “Paste Layer Style” from the pop up menu. That is all there is to it! You will see the gradient overlay appear on the new object.

Keep in mind that to get the full curled effect, you also need to add a warped drop shadow under the photo. Cheryl includes a warped drop shadow on many of her templates, but because shadows are tied to the shape and dimensions of the object it is not easily transferred to another object. Here is a comparison illustrating the progression from a flat drop shadow and no gradient overlay to a warped drop shadow with a gradient overlay applied:

As you can see, the combination of gradient overlay and warped drop shadow give you the greatest curling effect.
Did you know that you can also save the gradient overlay style to use on other pages? How cool is that?! To save it, just click on “Gradient Overlay” in the effects that appear just below the layer in the layers palette. The Layer Style box will pop up with the settings for the gradient overlay. Click on “New Style” on the right hand side of the box and assign a name to it in the pop up box that appears. I named mine “Edge Curl Gradient.” Now this style will appear in your styles menu (along with any shadow or other styles you have saved), and you can apply it with just a click if you want to use it on another page. (If you do use it on another page, please remember to Credit Fiddle-Dee-Dee Designs for the gradient.)

The new gradient style will appear at the end of the styles you have loaded. If you want to move it to a new location in the styles menu to make it easier to find and access, you can easily do this. Open the Styles menu by clicking on the horizontal lines icon in the top right corner of the Styles palette. Select “Preset Manager” from the pop up menu. The Present Manager box will show you all the styles you have loaded. Simply click and drag it to the new location. I moved mine to group it with Cheryl’s other fabulous shadow styles so that I could find it quickly.

While you are in the Preset Manager, it might be a good time to organize all those shadow styles you have to make them easier to find while you are scrapping. As you can see, I organize my by element type (paper, flowers, butterflies, etc.). This might also be a good time to clear out those styles you don’t use anymore. Loading too many styles can slow down the program and requires more available space for Photoshop to run. I hope this information helps boost your creativity!
Until next time ~
Judie (HeyJude)


