Flipping Text Elements in Photoshop
Hello all my artsy friends! I’m just dropping in today with a tip for flipping digital text elements. Many of you may already be familiar with the horizonal flip function in Photoshop and Photoshop Elements – which works perfectly for photos/elements without writing. However, it is a bit trickier when you want to flip the orientation of an element with writing on it.
Take a look at the Dracula and Werewolf cards on the layout below:
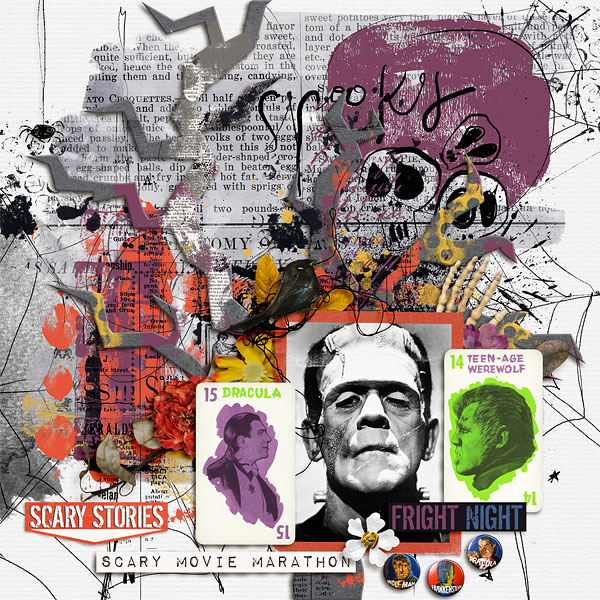
I wanted the cards to be positioned so that they each looked into the Frankenstein photo in the middle. However, the Werewolf card was actually facing the same direction as the Dracula card in the kit (click on layout above for full credits).

Normally, I would just use the horizontal flip function to quickly change the orientation of the element. However, if I flip the entire card, the writing will appear backwards.

Never fear, though, because there is a quick fix for this situation. Just follow the steps below:
1. Place the element on your page and make a copy of it on the layer directly above (“CTRL/CMD > J” is the shortcut for this function in Photoshop).
2. Activate the top card and put it in Transform mode (CTRL T). Flip it horizontally by right clicking on the card element on the page and choosing “Flip Horizontal” in the pop up menu. This will flip the entire card (words and photo) and it will look like the “flipped” card pictured above.

3. At this point it is best to lock the two card layers so that they stay directly on top of each other. Select both cards in the layers palette and click on the chain link icon to link the layers together.

4. The last step is to add a layer mask to the top layer so that you can hide the backwards text and numbers and reveal the text on the card below. Add the layer mask by activating the top card in the layers palette and clicking on the layer mask icon (rectangle with a circle in the middle).

You should now see a white box next to the top card. Click on that box to activate it and select a small round brush (“CTRL/CMD > B” is the shortcut for the brush menu). Make sure the foreground color is set to black (the “D” shortcut will do this automatically) and paint over the text on the card in the layout to hide the flipped font and reveal the correctly oriented font on the card below. Do the same for the numbers and you are all set!

Here is another look at the flipped version from the layout:

I hope you have fun playing with this technique!
Until next time ~
Judie (HeyJude)


