
Recently I have been using the MPM(Memory Pockets Monthly) to work on my backlog of pocket pages that need finished. I was excited to see that the MPM’s came with SVG cut files. The cut files have been designed to work as a print and cut! I knew that my Silhouette Studio Designer Edition software was meant to handle this. However when I tried to use the SVGs I couldn’t figure out how to use them. I took my problem to the designers of the MPM. They quickly taught me how to use them and it was so easy! Today I want to share how to use SVGs to print and cuts in Silhouette Studio software.
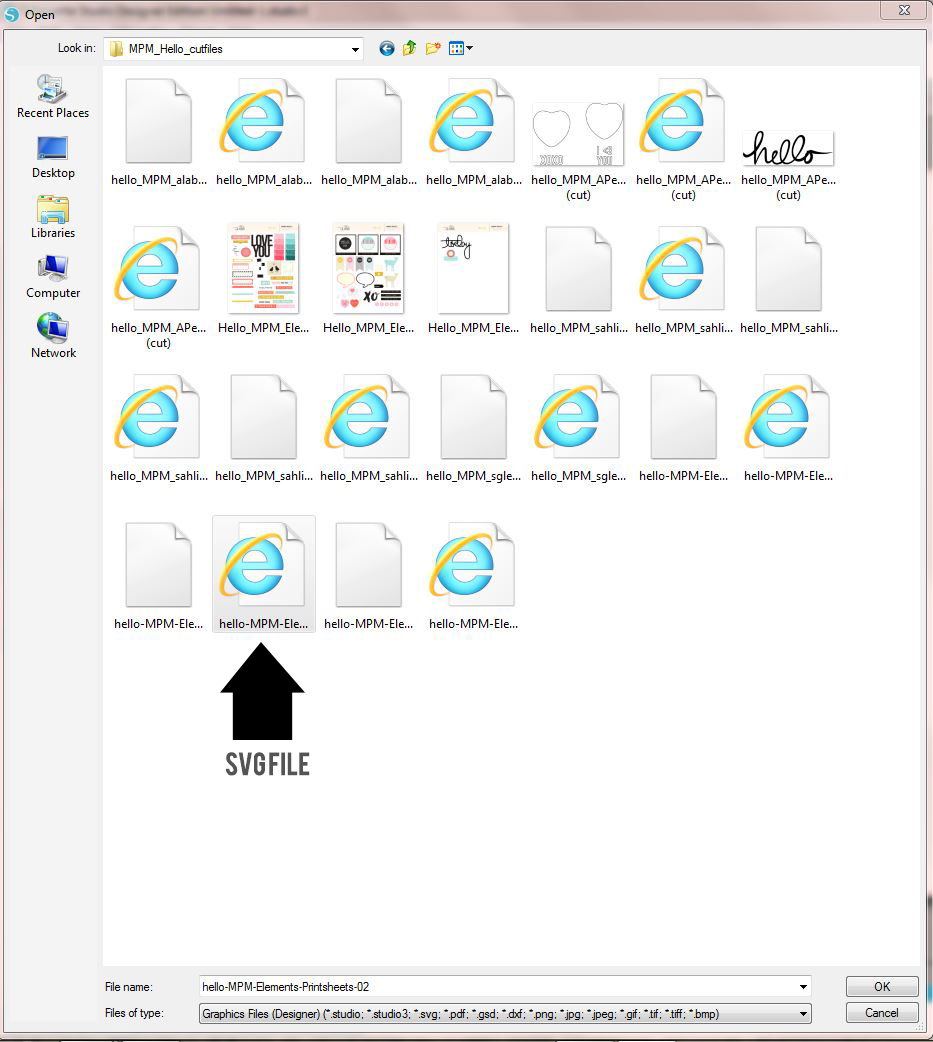
1. Open up the SVG file in Silhouette Studio. Typically you will know you have the right file because all the shapes are black. (Please note: This will only work if you have the DESIGNER EDITION!)
2. Open the Cut Settings window and change the setting to Cut. Now you will see the red cut lines around your SVG.
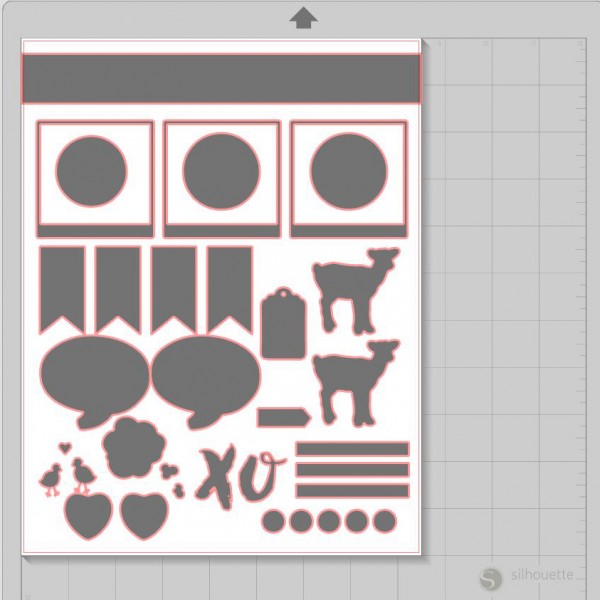
3. Go to file—-> Merge—->Select the Print Sheet that matches your SVG—-> Click Ok. Align your PRINTSHEET so it is lined up with your SVG below it. No black should be showing or peeking from underneath.

4. Open the Reigstration Marks Window and turn on your registration marks.
5. Select all layers and resize them so they fit within your registration marks.

6. Print.
7. Send to Silhouette and cut.
I hope you have enjoyed this tutorial and found it useful! Be sure and share any of your MPM creations in TLP gallery!
[…] Using SVGs to Print and Cut – 1 freebie(s)? […]