Last month we discussed the idea of pocket scrapping out of order and the freedom it can bring to the scrapping. The next question many people ask is, “How do you go about scrapping out of order?” Today I have a tip for you to get started pocket scrapping out of order. Although I primarily do hybrid pocket scrapping I believe this tip can work with digital pocket scrapping as well. Lets get started!
Tip#1 : Edit and print your photos.
I know this is a super simple tip, but let me explain how this can streamline your pocket scrapping process. I really like to edit my photos. I don’t do a lot of editing to them but I still enjoy watching my pictures become the best they can be. However, when I have to edit my pictures then scrap those pictures, I’ve run out of time. Not only am I out of time but I find myself out of inspiration as well. I took this into consideration and decided that I needed to start batch processing my pictures. I dedicate Sundays to this job and can blow through a bunch of pictures in an hour. I send those pictures out to be printed and I’m then left with the rest of the week to scrap! When my time is dedicated to scrapping I get more done! To give myself more freedom to scrap what I want I typically work on a month from the past year/years that I haven’t completed. For instance right now I am working on April 2012, January 2012, March 2013, and December 2013.
Now because I like my pictures to be organized and not all over the place I’ve implemented a system that keeps my photos organized until I can scrap them. Here is the system I use:
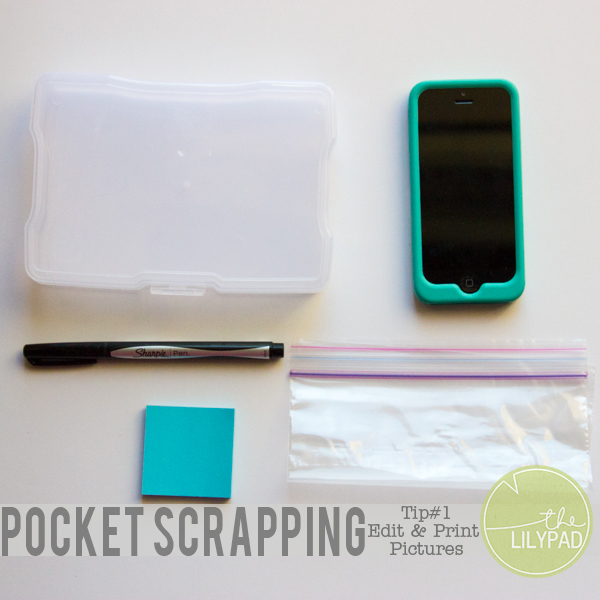
1. Gather the following supplies: Iris 4 x 6 storage case, black sharpie pen, sticky notes, plastic baggies, and my cellphone (for viewing calendars on it).
2. Sort photos printed by corresponding week. I usually look at my Lightroom catalog for this.
3. Once sorted write on your sticky not the week #, the year, and the dates for that week. Stick the note on the back of a picture so your picture does not get sticky. Slip that weeks pile into a baggie and seal. Below you can see the backs of my weeks 14 & 15, and the fronts of week 16 & 17.

4. Place all weeks from one month into your Iris storage container. I order them according to the calendar. So the earliest week in the month would be on top.

5. Label the outside of the box with the month and year it contains.
When I scrap I pull out a box, select a baggie and work on that week. Currently I’m trying to stick with only having five boxes in rotation at a time. That way I don’t end up with too many physical products waiting to be scrapped. I would rather keep most of my unscrapped pictures on my hard drive then having to store them physically. Now if you are a digital pocket scrapper I have heard of other scrappers prepping their templates in a similar way. They edit their photos and plop them onto a template which they save to work on later. Whatever way you scrap getting ahead a bit is always helpful!
I hope this tip has given you an idea on how to get started pocket scrapping out of order. Next month I plan on bringing you several more tips to help with this process. Be sure and check back then!

Leave a Reply