Trashing Perfect Paper with Torn Overlays
Over the years (cough: decades) I’ve been a scrapbooker, I’ve gone through phases of valuing perfectly flat papers (carefully bringing them home from the bricks and mortar store without so much as a dog-earred corner) then preferring highly textured ones (the bumpier or more creased, the better but I’m sure it would spike my blood pressure to mess it up without the safety of the ‘undo’ button) and then every degree in between. If you have a stash of ‘perfect’ solids, you can make them less perfect in a variety of ways, all without losing your original perfect digi paper.
You can:
- tear them (just one edge or around the whole paper border or just a section to let whatever you place beneath it show through)
- crumple them (that scrunched or random unironed clothing or just rolled out of bed look)
- warp them (where you make them wavy like it’s been wet and then dried again so the paper will not sit as flat)
- fold them (more deliberate and linear ‘perfect’ crease lines )
- dog ear them (so part of the ‘back’ of the paper if it was real and double sided would be visible)
Today I’m playing with a few products that can give papers one of those imperfect effects and bringing you along for the ride. If you don’t already know, I overthink and analyse everything so consider yourself warned but hopefully you find this interesting or learn something.

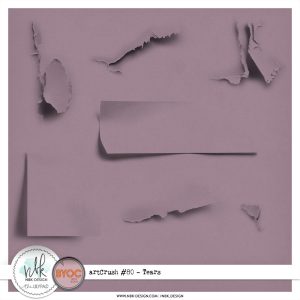
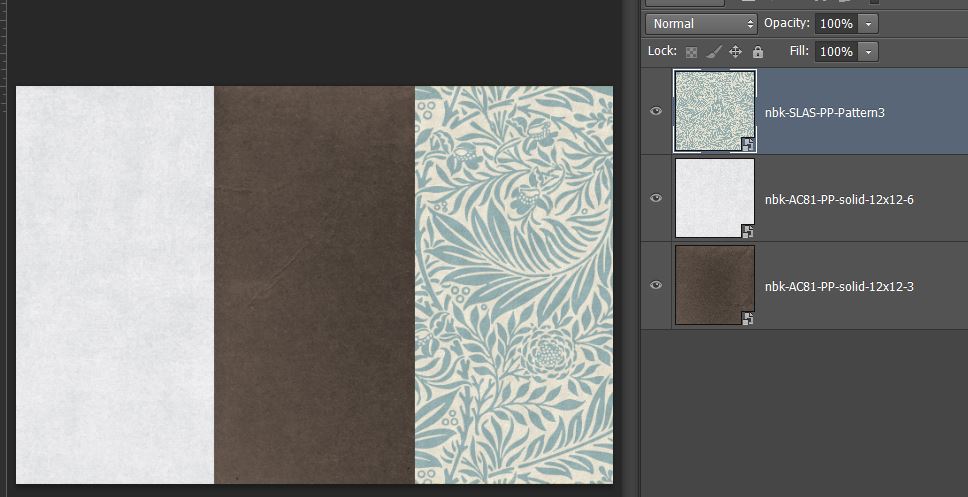
I’m starting with a a dark and light solid from artCrush 81 Paper Mix and a pattern from Shine Like A Sunflower, both from NBK Designs and her artCrush 80 Tears pack that was discussed in the forum recently.
Now I’ve just dragged in a few of the AC80Tears. They’re all on normal blend mode at 100% just how you would see them yourself after dragging them in from the file folder, so now I can start to think and play.
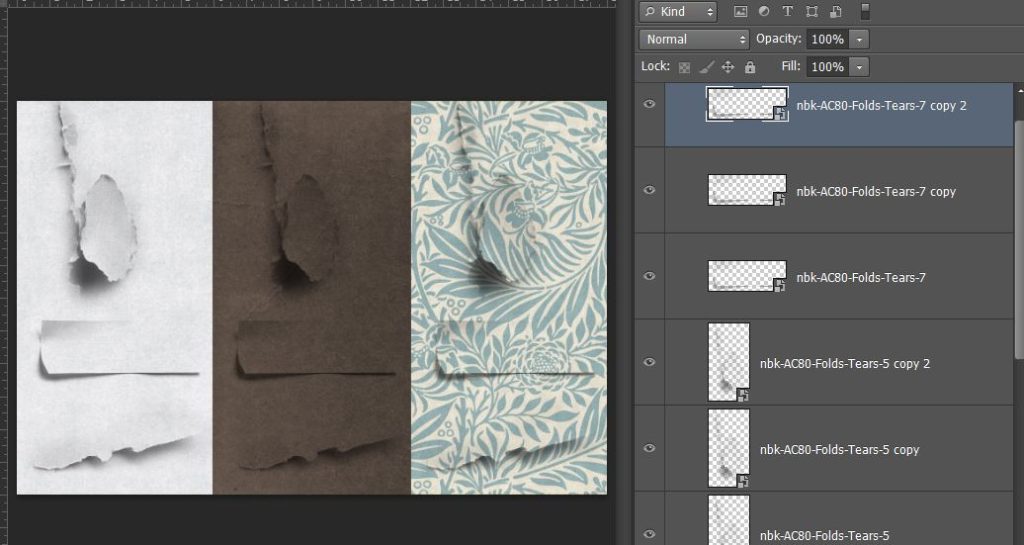
First thoughts: Even on the pattern paper, where I anticipated they wouldn’t work easily, I think they are quite convincing with the shading incorporated into each PNG.
If you’ve seen any of my process posts like this one , you know I can go through stages where I ‘hand shade’ edges with brushwork and tweak shadows in the pursuit of realism. Especially bearing in mind that while we are creating in our editing programs we are hyper-focused on details, like these tears, way more than the observer in the gallery or someone that might flick through your printed album, and additionally we would not generally have these as standalone but with extra elements or photos etc, I feel like they can quickly add to the texture of a paper.
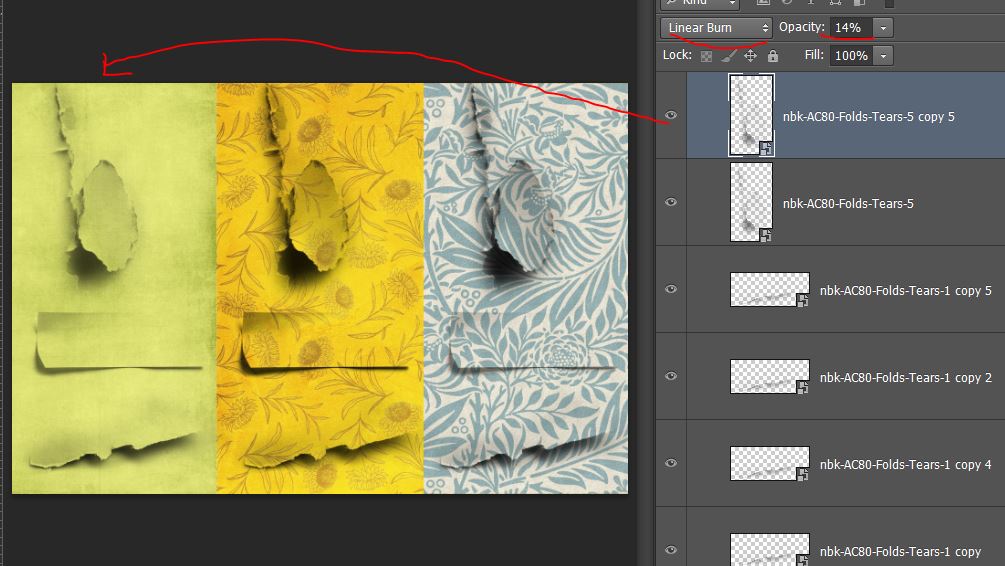
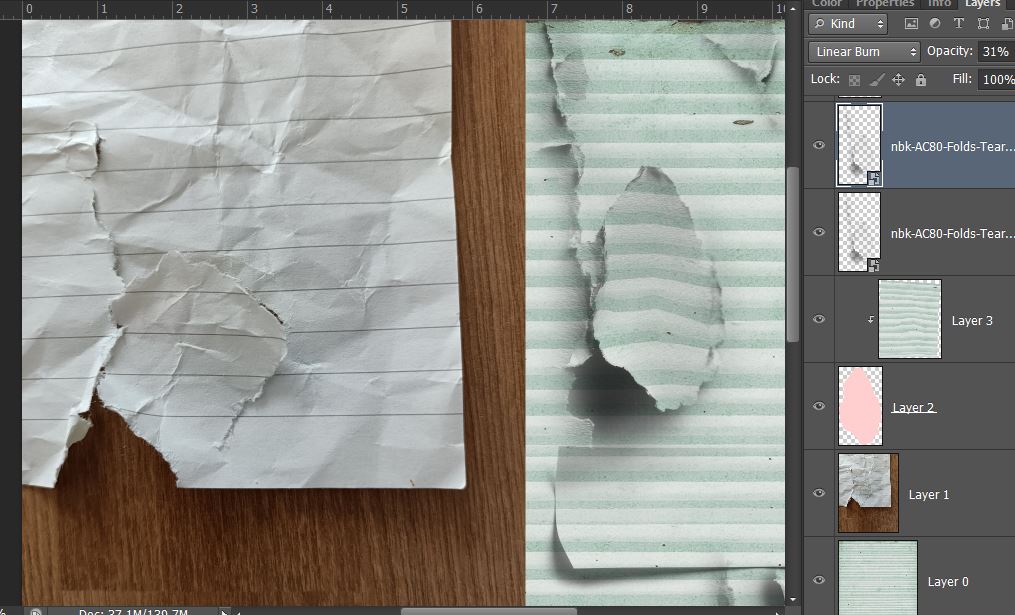
I played with blend modes but ‘normal’ or ‘linear burn’ worked pretty equally to my eyes because the PNG tear files are all black & greyscale to begin with.
All I did after this was duplicate each tear so they were darker (which may be a personal preference issue – it’s obvious in the next screen shot) The only real issue I had was with the top tear, overthinking the actual shape of it. See that really dark shadow at the bottom? I felt like if the paper were really torn like that, creating such a shadow, that section would have a hole in it, and then something on a layer below the paper (a paper or element ) should show through, at least partially, so that part of the leaf pattern from the paper wouldn’t be there. My mind kept going to wallpaper (probably because I would quite happily paste this paper on my walls). If my hanging wallpaper was torn like that, would i see the wall through that bottom shadow bit? Does it matter? Well if it does to you, you might understand why this post isn’t finishing here.
The bottom tear on the patterned paper felt more realistic in it’s tear and shading on the left end but towards the right, where the paper is more separated and shadowed, I felt like again, something else would show through there, or if it were torn, I’d be inclined to tuck a flower or tag or something in there, which can’t be done with a PNG as it is. I tried this on a few other papers from Shine Like a Sunflower that I had in my stash while still over-thinking this.
For this one to try to get the shadows to lean more green, I changed up some blend modes. Maybe that’s being fussy but it also lead me to the next real life test.
Mentally the reason I couldn’t see these working on a pattern is that a tear should disrupt the flow of the pattern, stripes for example, even if the two torn parts are pieced back together again because the ‘flatness’ of the paper has been disrupted, would the stripes look right? This lead me to testing this in the real world with a sacrificial piece of lined notebook paper. Here’s a photo of my paper after crushing it in my hands and then trying to smooth it back out again. I dragged the aqua guide lines in from the ruler in Photoshop to serve as a visual comparison for the ‘straightness’ of the writing lines after crumpling the paper. The red parts are harder to see on the wooden table area but that is me marking differences in the aqua lines versus the notebook lines
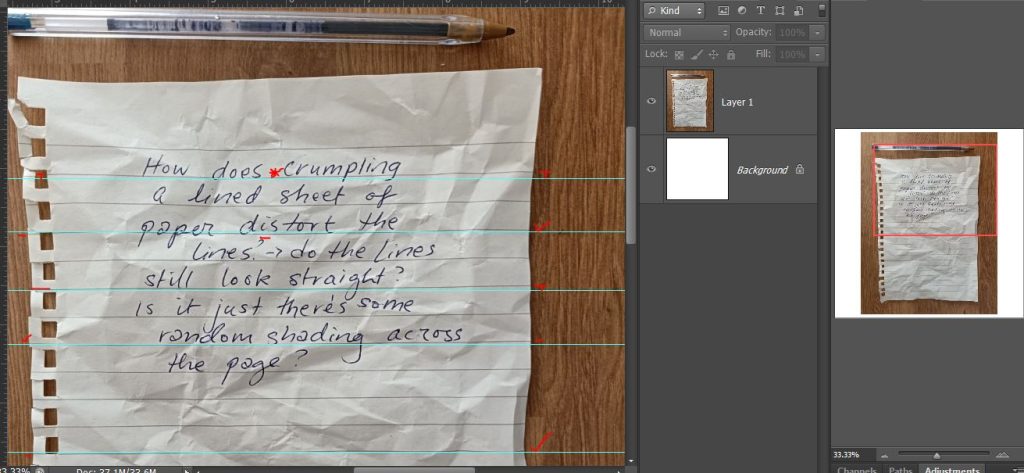
As you can see, they’re inconsistent. Some of the original notebook lines cross the corresponding aqua lines and others touch it then dip away again, but the writing still looks like it lines up ok (maybe handwriting and handwriting style fonts are the most forgiving?) but in my head (that aims for realism when scrapping digitally) this experiment has reinforced that a crumped overlay would disrupt a pattern, so my thinking then heads to either 1. i shouldn’t mess with a flat striped paper (or i should tear it in a different way) or 2.if I’m going to crumple a striped paper, maybe I need to do an extra step to make the pattern itself more distorted…. so then I learnt about Displacement Maps but that’s a whole other post in itself. (Does everyone already know about these? Is it something I should write a post on? Let me know in the forum or comments)
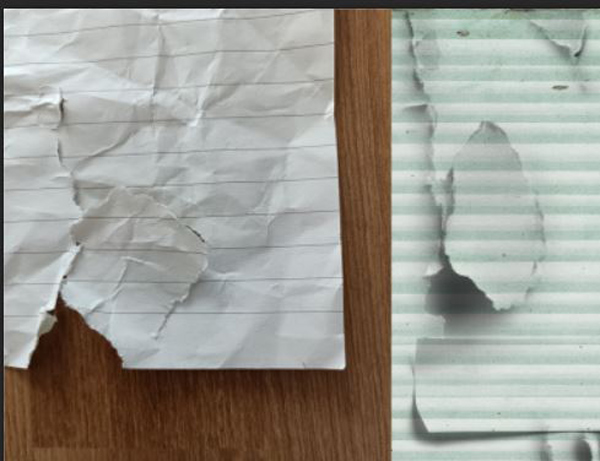
I then tried to re-create that first AC80 Tear to look at the shadowing and I found a striped paper in artCrush 81 PaperMix so here’s my real life (albeit crumpled) test versus the digi version comparison. My wooden table and note paper have natural light from a window coming in from the top but there’s not much shadowing at the bottom and it again feels like I shouldn’t see the green stripe through that bottom portion on my page but the top tiny tear and rectangle piece seem fine.
so my takeaway from this experiment was when using these Tear PNGs with a pattern paper, placement and the pattern itself play a significant role in how successful they are.
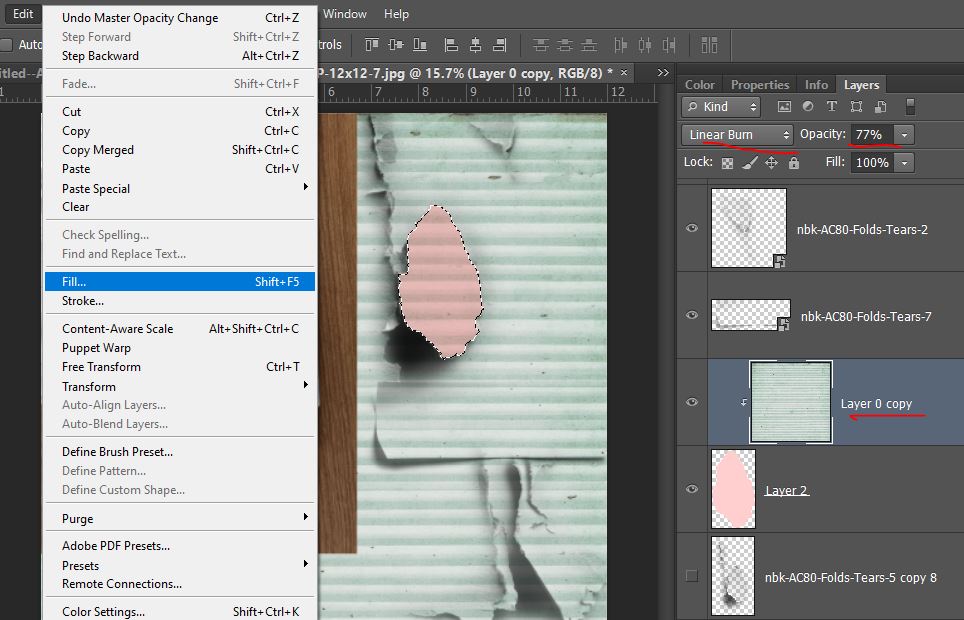
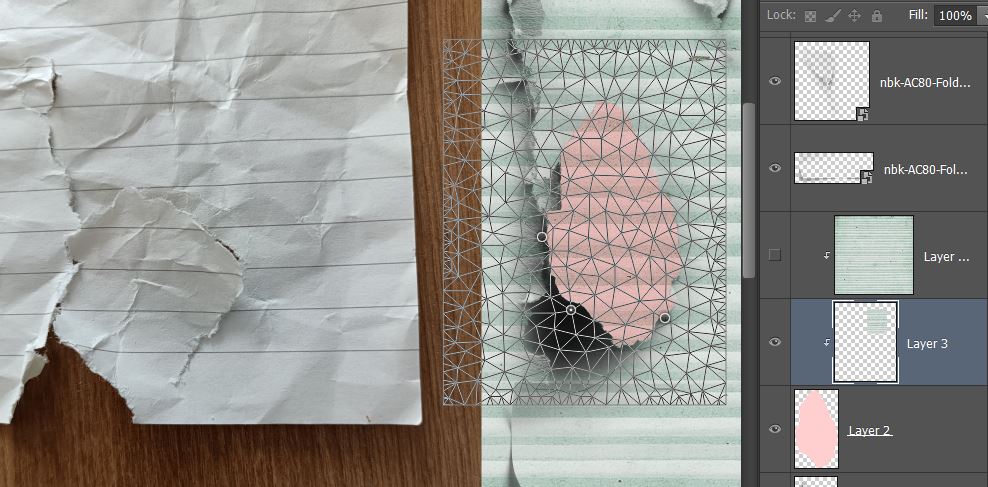
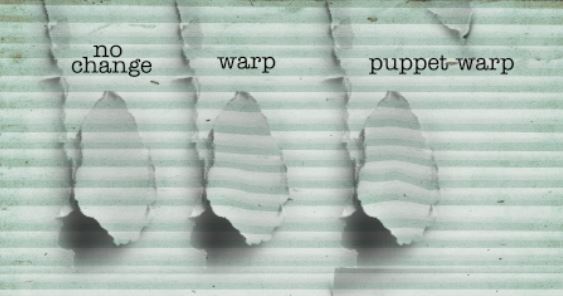
After some more thinking I had a go at distorting the digi stripes with 2 Photoshop tools. Warp and Puppetwarp that I’ve talked about previously here. Initially I used the Magnetic Lasoo to create a shape that I could clip the paper to before distorting it. (I went with Magnetic Lasoo after unsuccessfully using MagicWand and Quick Selection in my program CS6, there may be an easier way in newer programs). I filled that shape (in pink so it could be seen on a new layer above the Tear layer). Clipping a copy of the stripe paper to it, I changed the blend mode so I could see the pink boundaries.
I cut a smaller section of the stripe paper and put it on a new layer, clipped to the pink shape and activated the Puppet Warp mesh grid,
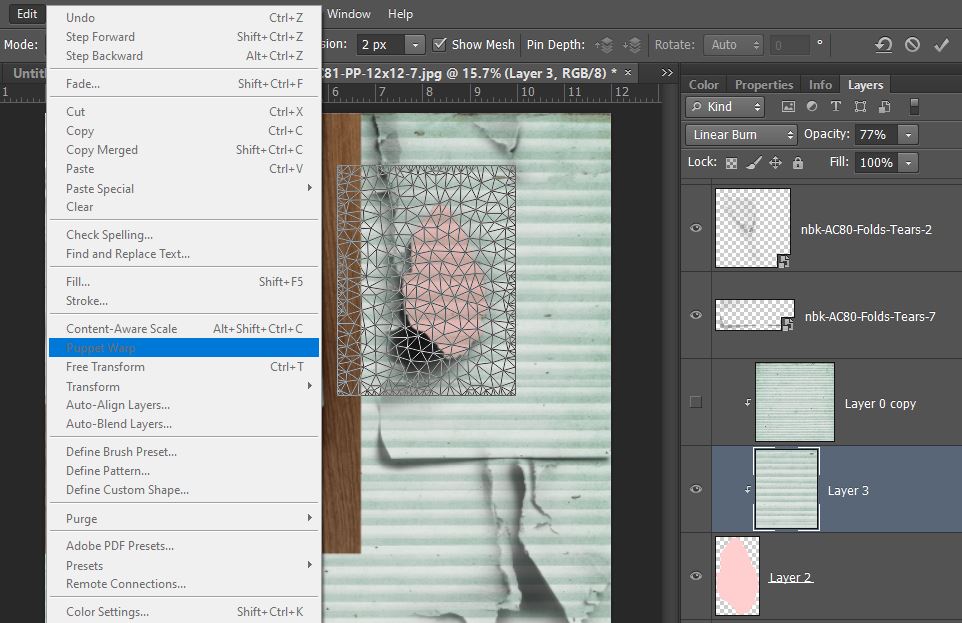
and used the anchor points (the circles) in Puppet Warp to limit my end points using my notebook paper image as a guide.
This is what tugging on the mesh in a few points gave me, a wave through the middle. It looks dodgey now but wait until we move the layer back under the Tear PNG layer.
Much better with the shading and edges. The puppet warp right now felt like it was worth the extra step.
 But as with everything in Photoshop, there’s multiple ways to achieve a similar end point. Using Transform > Warp is another alternative after making a clipping shape. Just make sure that the pink shape stays covered by the stripe completely so you don’t have random pink solid areas showing through after warping. I used ‘undo’ doing this step once and just went and cut a slightly larger, more forgiving piece from the stripe paper.
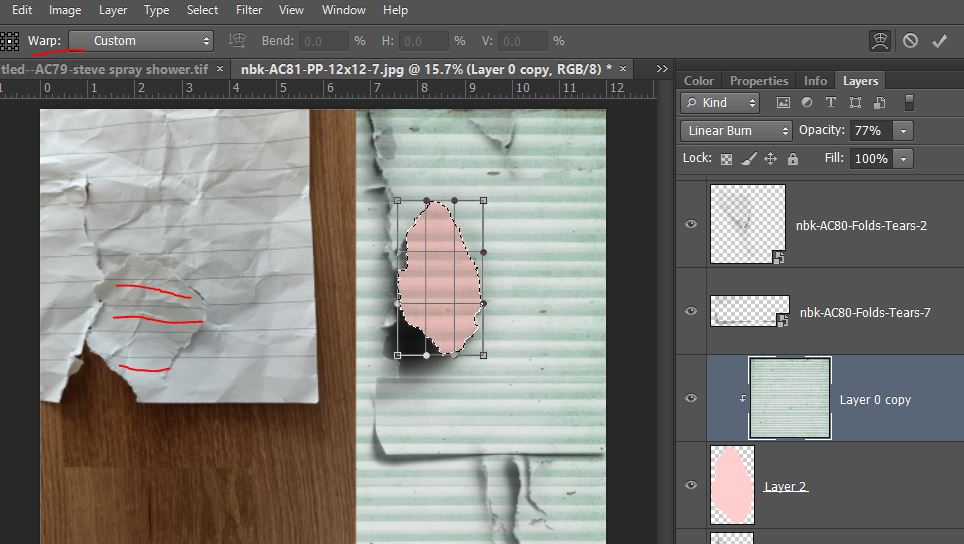
And here they are side by side. I think I like the warp one most, with these changes sometimes less is more and I feel like I pushed it too far with the middle section of the puppetwarp one.
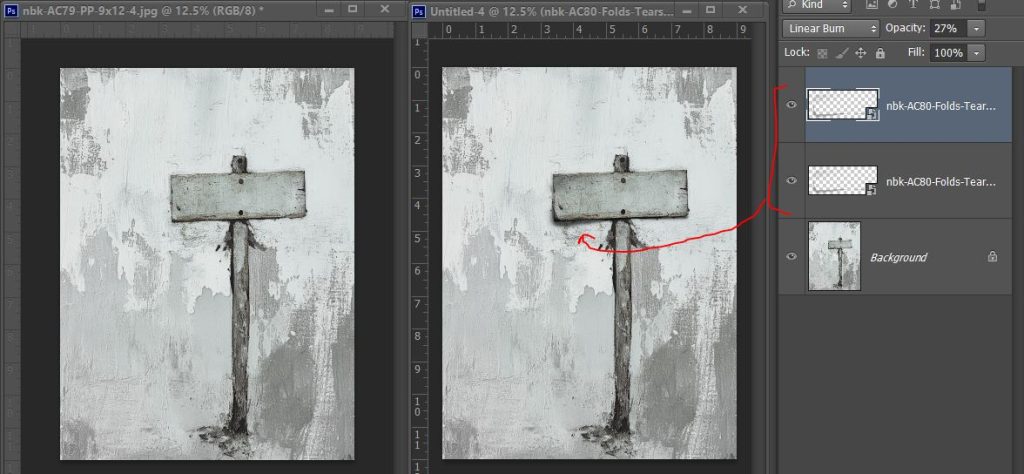
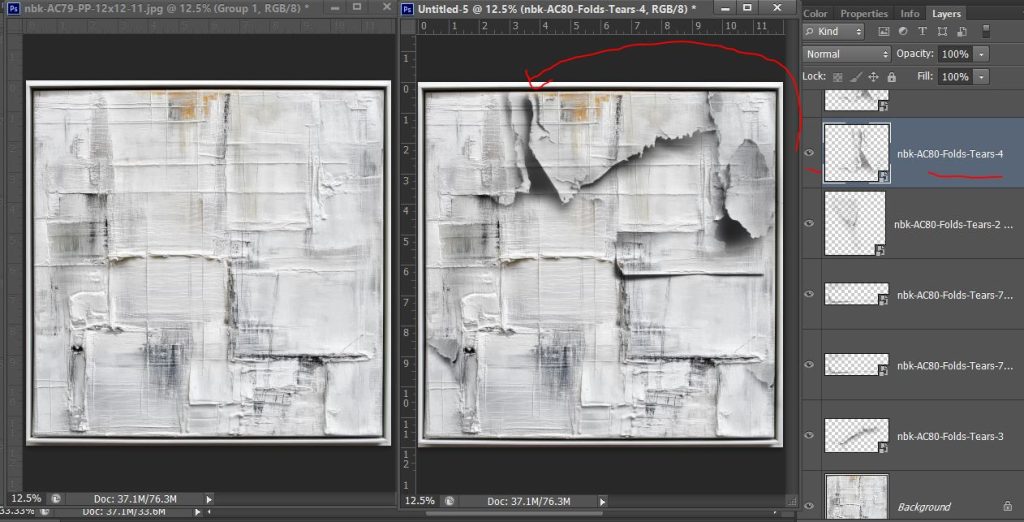
So seeing the wider potential of these now with patterned papers, I pulled some more specialty papers from my stash and had a go at using the Tears PNGs with them and I think now it’s maybe a matter of placing them later in the scrapping process or using them selectively to enhance textures within a more complex paper.
These show the original paper on the left and the version with tear/s added on the right. This first one gives the sign some added depth. I used the ‘transform’ handles to squish the Tear PNG to fit the sign rectangle on the artCrush 79 paper.
And this one is a bit spot the difference. For the most part, I trialled the PNGs in various places, matching up end points or natural breaks in the paint lines on the artsy paper. With Tear 4, the strong horizontal lines continuing through where the tear has a strong shadow and would ‘bend’ the paper bugs me but the overall busyness distracts me from seeing that more than before. I thought about ‘warping’ the paper in that section to follow the contours of the torn PNG more as a next step, but y’know I had to sleep at some point over the weekend.
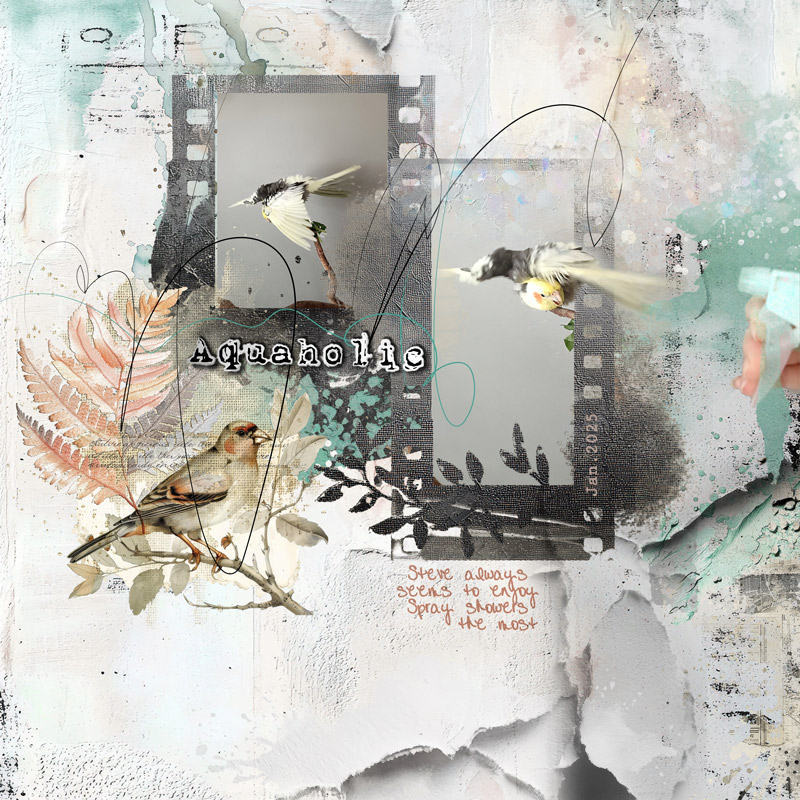
I did eventually make a page using various products and some of the AC80Tears too for NBK’s Designer Challenge for February using Sylvia’s sketch in the forum. Check it out here. Integrating them in with a mixed media paper that already had different textures and then adding paints and masks, looking for creases that were already there to extend turned out to be easier than all that thinking made it seem!
Thanks for sticking with me to the end. If you made it this far, you will already know today’s take away lesson:
- Some things take time to figure out and maybe instead of overthinking, sometimes just doing is the way to go.
- Playing and experimenting and the results help us learn and find out what we don’t know (if you don’t know what exactly you don’t know, you can’t identify what to learn next and add to your current knowledge so that’s always valuable to me). When things don’t work the first time digitally, it’s not the end of the world. There’s plenty of ways to modify a paper (and sometimes you come out with a cool result just from experimenting). Which one should I cover next?