Project Life – tutorial #2
Hi everyone ! Guest Polly Gaelle here to show you how to make a pocket page using your phone/tablet and your favourite The Lilypad products.
Last month, I introduced you to the Project Life app and showed you how easy it is to create a page. You can read (again) the article here.
Today we’re getting together to decorate our page a bit more by adding a few embellishments, because when we’re scrapbooking we like to put little elements all over the page.
Unfortunately, the Project Life application doesn’t allow us to add embellissements. We’re going to need another application : Studio. It’s available free for iOS and Android for phones and tablets. However, you’ll need to create an account the first time you use it. All you need to do is enter an email address.
Last time, before starting the Project Life app, we prepared our pocket cards. Well, we’re going to do the same with our embellishments. Unfortunately, Studio doesn’t communicate with Dropbox and you’ll have to save your embellishments directly to your phone / tablet’s memory or to iCloud Drive if you’re on iOS. I can’t tell you how it works on Android.
This stage is a bit of a pain because you have to transfer files from several places, and I can understand that it doesn’t make you want to do it.
Here’s how I do it: on my computer, I create a folder in which I put the elements I want to use, then I compress them. You never use all the elements in a kit, especially on a Project Life page. I then transfer my compressed folder to Dropbox (still from the computer).
Once the transfer is complete, you need to switch to your phone/tablet and open Dropbox to save the compressed folder containing your embellishments on your phone/tablet. Don’t forget to unzip after.
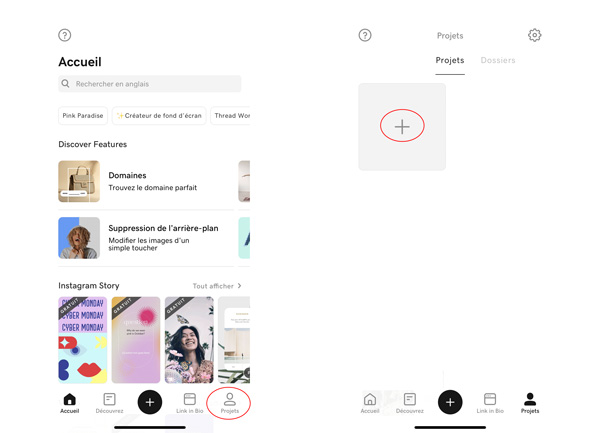
Now we can launch the Studio app. We need to create a new project. Touch the Projects menu (my application is in French, but I’ve put a copy of my screen so you can see where it is).
Then touch the little + to create a new project.
We’re going to set the background and format of our page. I always choose a white background ; then you can select the format. Many of you make square pages, so this is the first one suggested, but you can choose other formats (I use portrait format but not in the example).
However, the size is wrong, the application suggests 2048 x 2048 and we are working in 3600 x 3600. So we touch the size, change it and confirm.
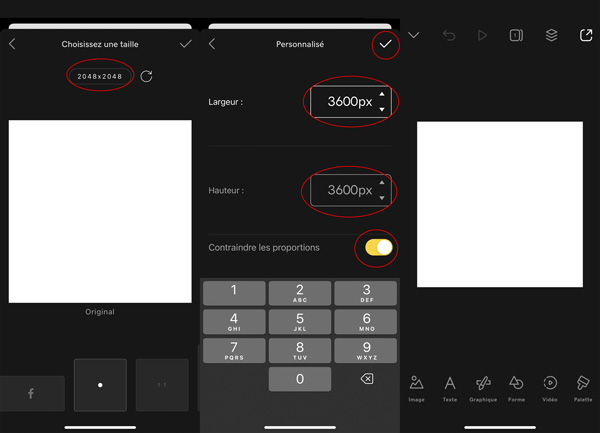
Your project is created and ready.
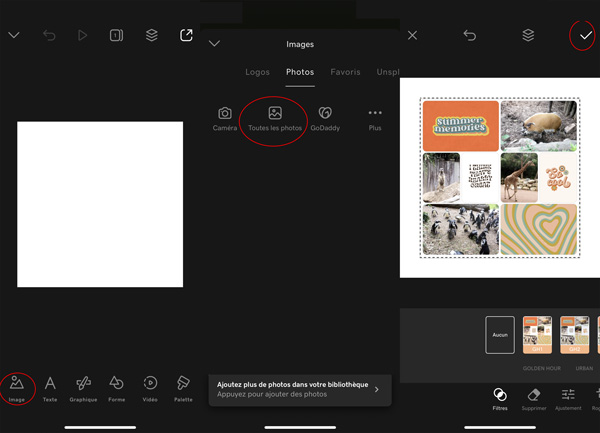
It’s time to go and get our project life page, the one we made last month.
Touch the image icon and then search our page.
If you touch the All photos icon, you’ll find the images/photos from your feed.
If you’ve saved it in Dropbox, you’ll need to put it in your photo feed, as Studio unfortunately doesn’t communicate with Dropbox.
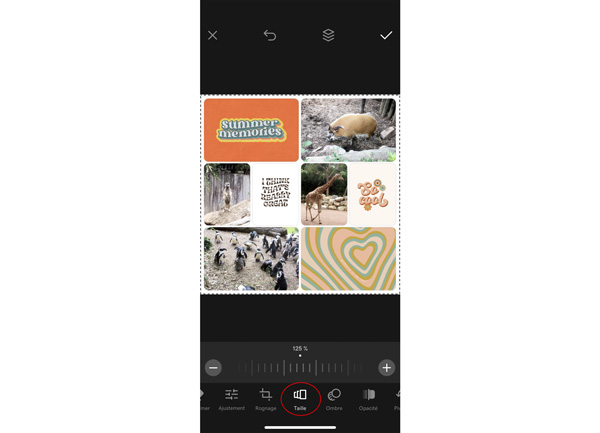
Enlarge the page (size 125%) so that it covers the whole square and confirm.
Our page is now ready to receive these embellishments.
Touch the Image icon (again), then the More icon with the 3 little dots. You’ll find yourself on your phone’s memory and you’ll need to search for the folder we added at the beginning (the zip that came from Dropbox 😉 ).
All you have to do is choose your element, resize it and validate (as we did for the page).
You can add as many elements as you like by clicking again on Image and the little dots.
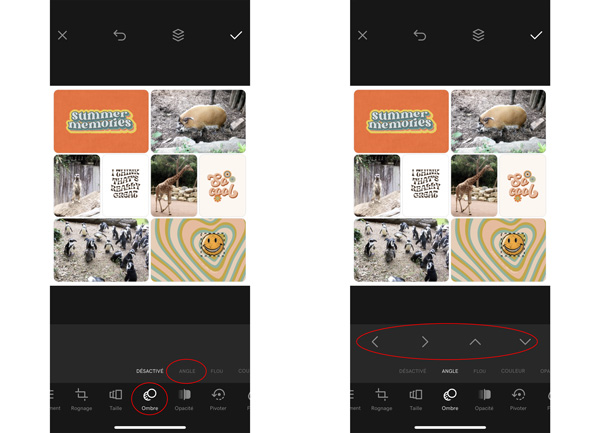
You can also add a small shadow to your element to add a little depth.
To add a shadow, touch the Shadow icon. By default, it is deactivated. To activate it, touch Angle and you will define the angle of your shadow using the little arrows and the blur using the slider. You can also play with the colour and opacity. Don’t forget to confirm.
If you don’t like the position of an element, you can change it. Touch the Layers icon and then touch the layer you want to move. It will reappear on the screen with a dotted outline. Move your finger across the screen to move your element and/or change its shadow, size, etc…
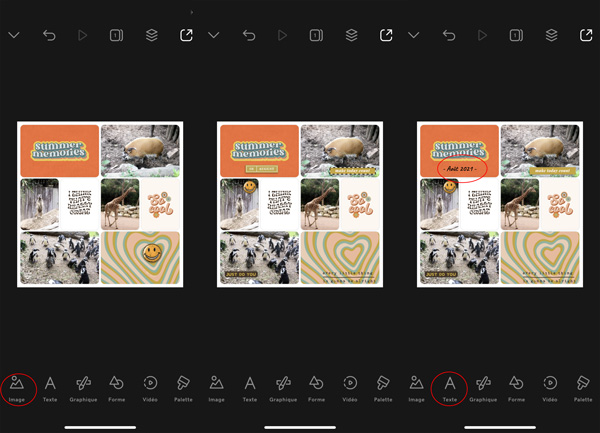
Add as many elements as you like to decorate your page.
The text tool can also be used to add journaling and/or the date.
Do you like your page ? Congratulations ! Now it’s time to save it by touching the icon at the top right with the little arrow ; then touch Save. The application will inform you that your page has been saved to your photo feed. You can now retrieve it and send it to your computer (using Dropbox or connecting your phone as you would to retrieve photos).
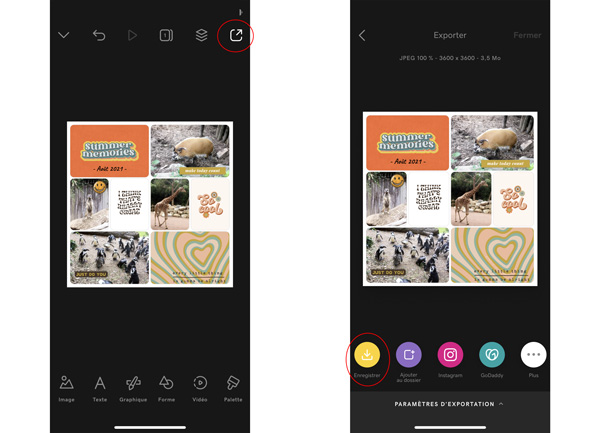
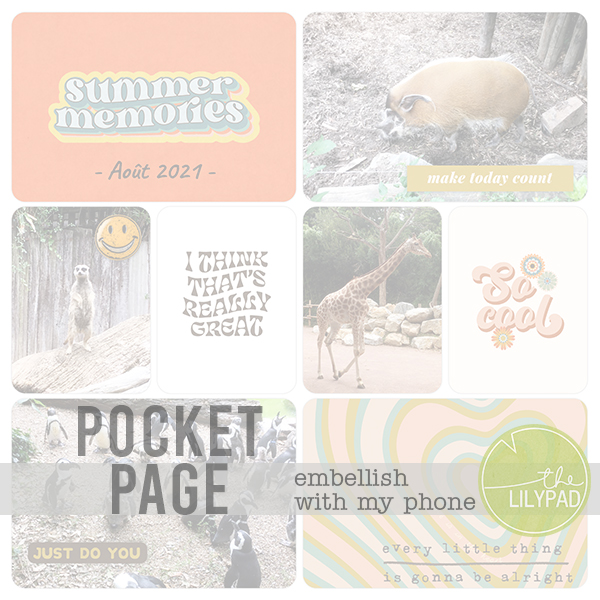
The final result :
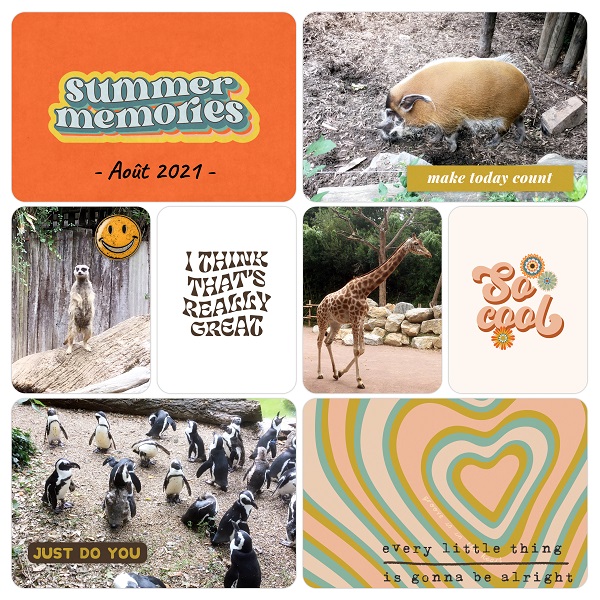
credits :
Memory Pocket Monthly : Groovy . kit
Groovy . kit https://the-lilypad.com/store/Memory-Pockets-Monthly-GROOVY.html
I hope you’ve enjoyed this new tutorial, and I’ll see you next month for my last article in this series (as my guest polly period will be over).


