Pocket Page Workflow
I live for my scrapping time. I love getting my hands messy with my physical supplies or staying “clean” and creating something in Photoshop . I get a jolt of joy each time I see a layout come together. When I first started pocket scrapping last year I assumed the process would be the same…full of joy. Yeah, it wasn’t that joyful at first. I struggled with finding a pocket page workflow that worked for me. I could have gave up then, but I didn’t. Soon after starting pocket pages I recognized the importance of capturing our everyday life.
Back in February my two year old, who is behind on her speech, was pouring over the two measly pocket pages I had finished. I watched her to start pointing at pictures on the page and try to say our family members names. Towards the bottom of the page she came to a picture of her younger sister. She scrunched up her eyebrows and for the very first time uttered her sisters name. With a pleased smile she looked up at me as if to say, “I did it mom!” I started to cry as any mom would. From that day forward I made up my mind that no matter what, I was going to keep going with pocket scrapping. My girls needed it in their lives and more importantly they enjoyed looking at my pocket pages.
Over the next few months I poured over galleries and blogs gleaning ideas on how to create my pages more efficiently. I found several things that helped my workflow go smoother. Today I want to share with you my pocket page workflow. I hope that you might see something that could help you fine tune your process, or make you go “Huh, never thought about doing it that way before!”
Before I share my workflow I thought you should all know a few things:
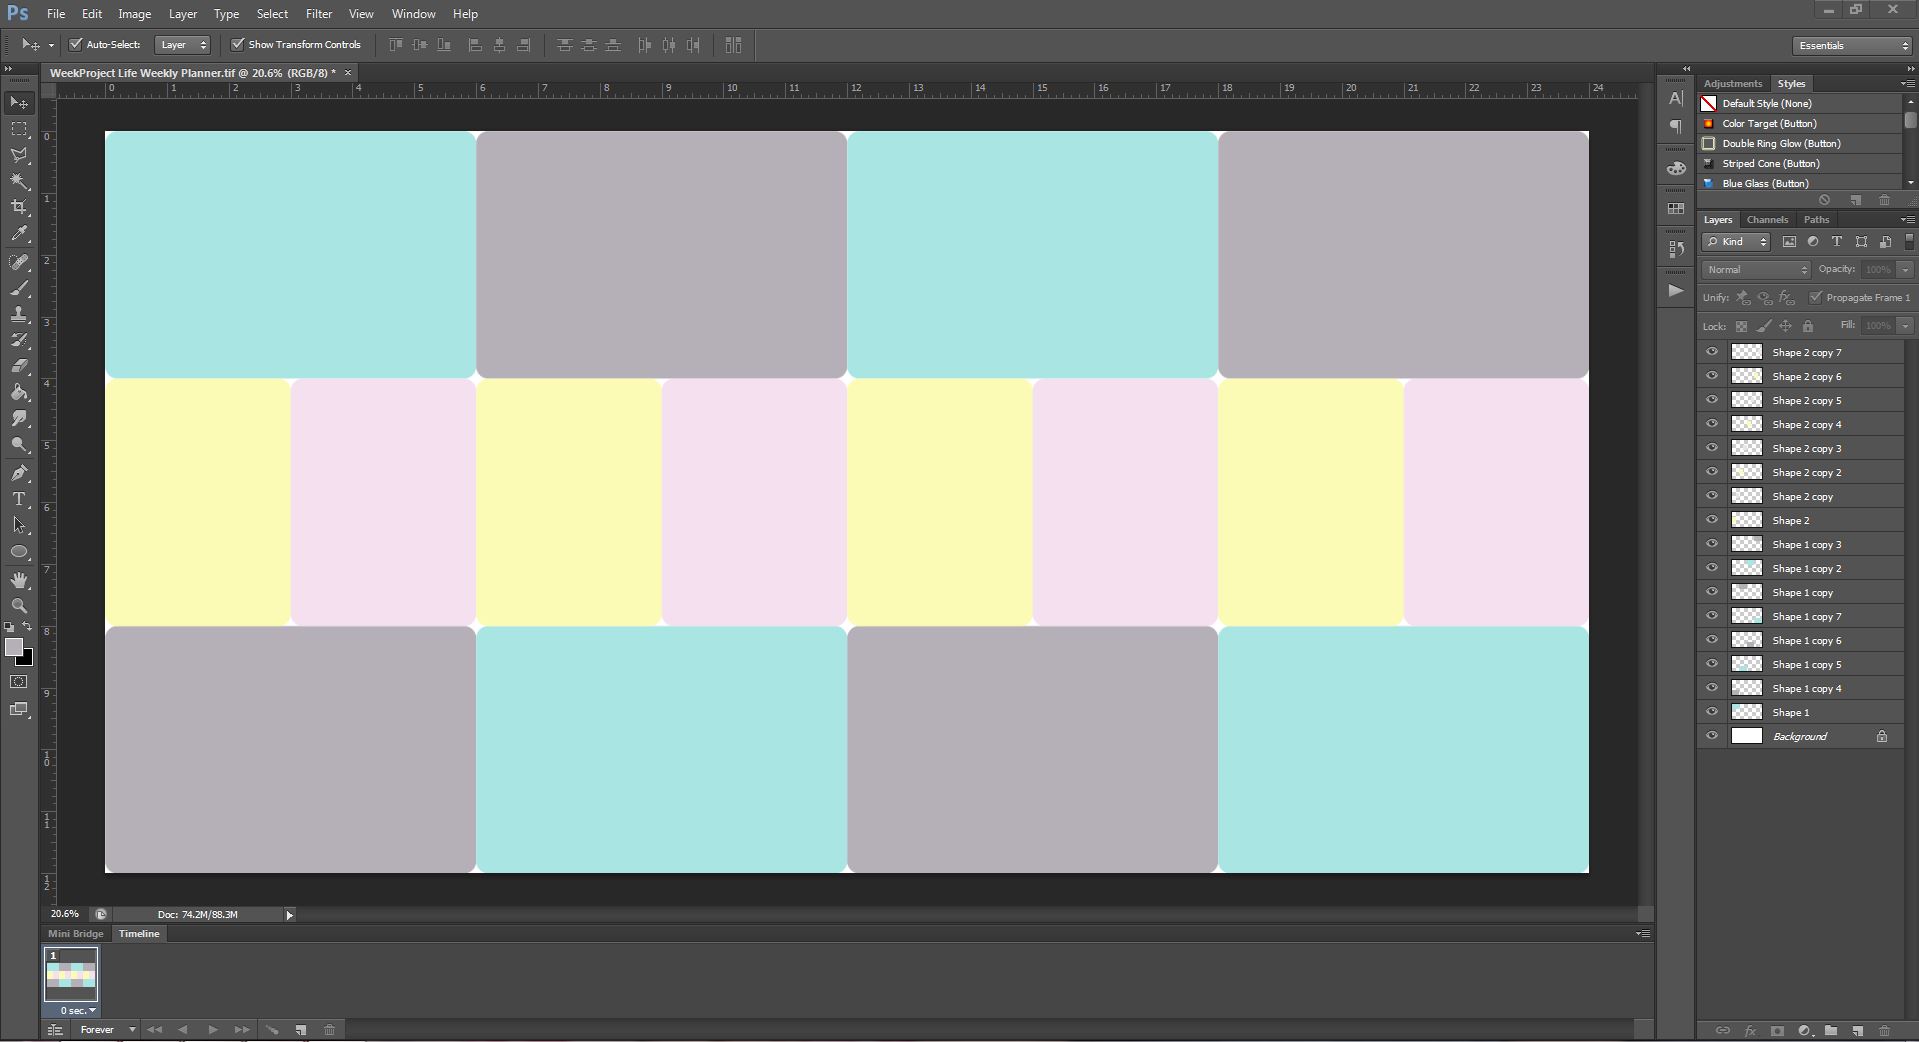
- My pocket pages typically incorporate one week over two 12 x 12 pages.
- My weeks run from Sunday to Saturday.
- I love templates for the sole purpose that they help me visualize what my final layout will look like.
- I do hybrid layouts.
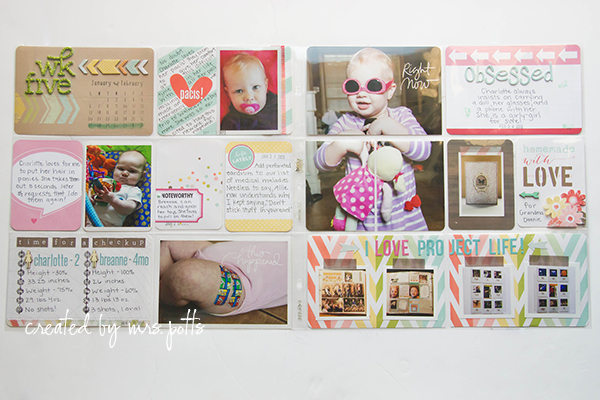
To start my workflow I sketch out my spread. I sit down with a paper template in front of me and my pictures for the week pulled up in Photoshop. I go through my pictures and sketch their placement onto my paper. I am mostly thinking about size of photos and grouping similar photos together. I also add possible spots for journaling and titles. I like to sketch things out because this is a great place for me to write down the names of my photos. I used to find myself looking at several photos s that were similar in content and thinking, “Now which one did I want to use?!” I now can use my sketch to reference my photos when I am building my layout. This is what my 2013 Week 5 sketch looked like when I finished with it.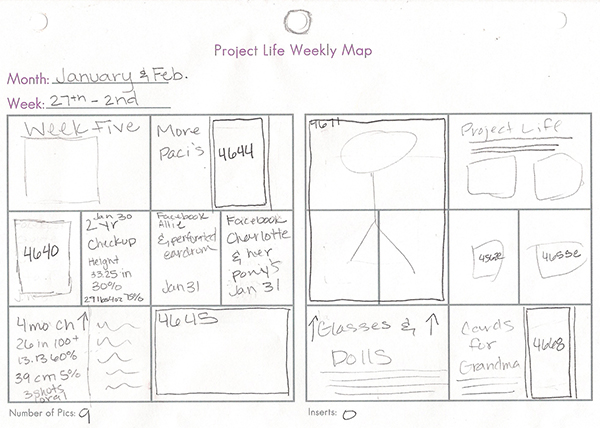
Next I open up a template I made in photoshop. The template is a replica of my pocket pages that I will be using for my spread. I made this by first creating a 12″ x 24″ canvas in photoshop. I used the rounded rectangle tool to create my 4 x 6 and 3 x 4 pockets. Each pocket is its own layer.
 I then begin to resize my photos to match what I have on my sketch.

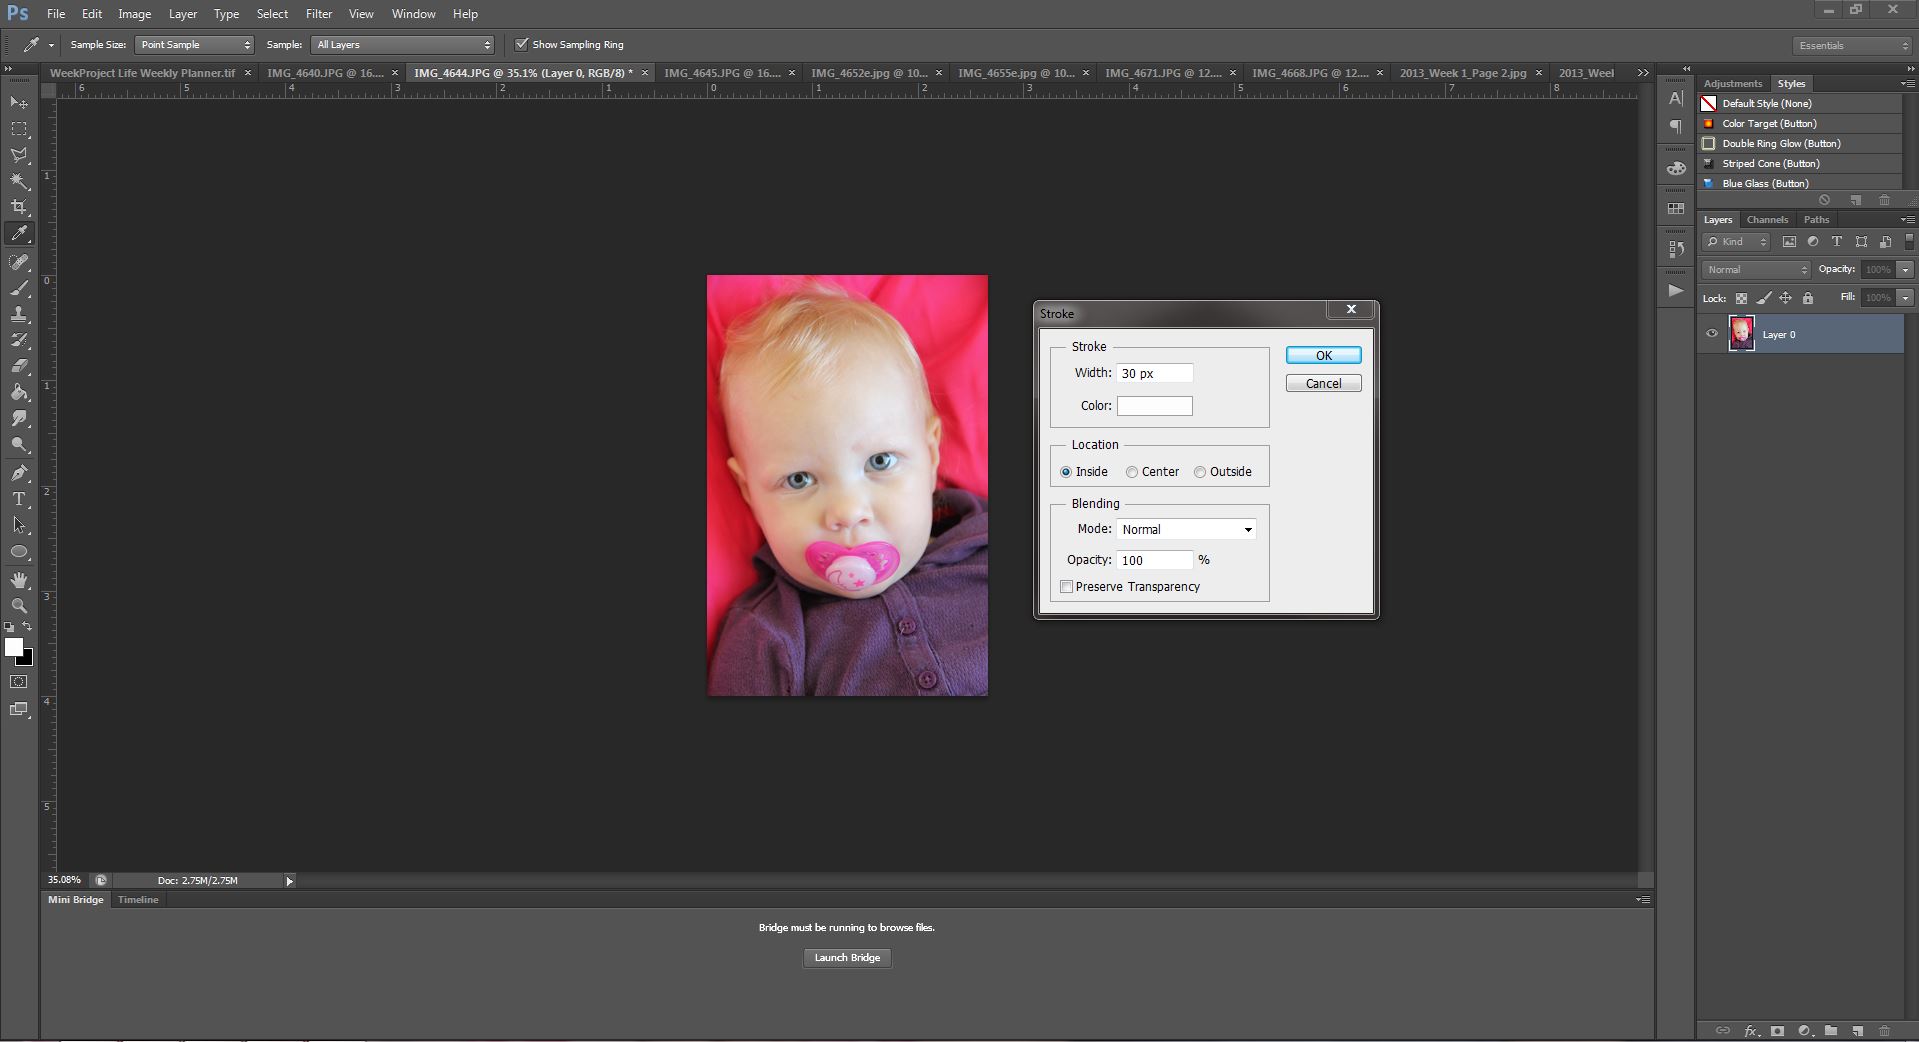
Each photo is then given a white stroke. I like how the white stroke helps my photos to stand out against the background paper they are placed on.
I then drag all my photos onto my template and arrange them identical to my sketch. I clip the photos to each”pocket” it would belong in.
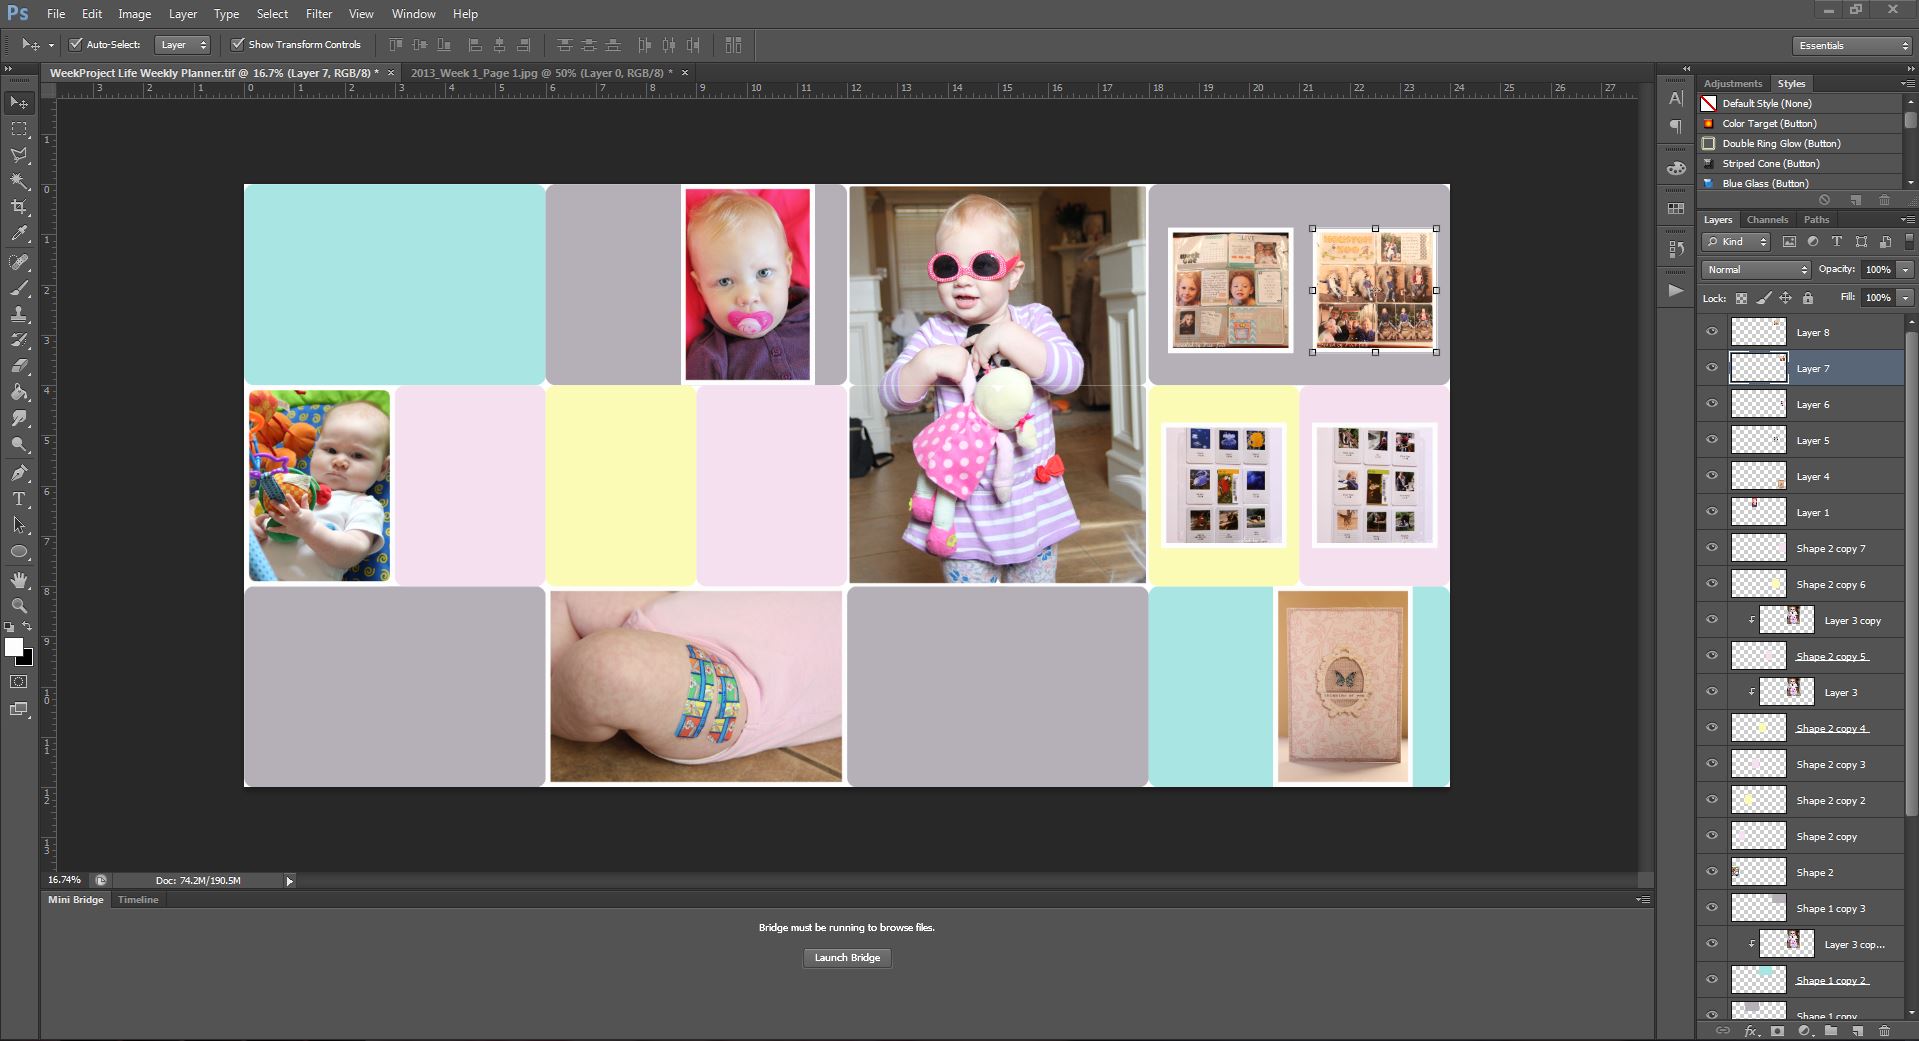 When I begin to place my photos I look for flaws in my sketch. If I notice any I adjust my photos accordingly. You can see that I have moved several photos around on my template because I did not like my original placement of them. This is one of the main reasons I use this template. Before I used it, I would find myself guessing at what size I wanted to print my photos at. I would get my photos back and start working with them only to realize that I didn’t like the sizing I had chose. With the template I can be make more precise decisions on what size of prints to order.

The second reason for using this template is so I can play with some digital supplies. Yay! Typically I have certain digital papers and elements that I have in mind for a specific page. I begin resizing and adding them to my page. I fiddle with them, move them around, and resize them. My layout is beginning to come to life. I also leave spots for where I can add some physical products later on. Below I have used the following digi products: Instafont Phone Art Vol 1 {element pack} by Laurie Ann, Key Notes by One Little Bird, and August Storyteller Journal Cards, August Storyteller Brushes + Stamps, August Storyteller Washi Tape, and August Storyteller Papers by Just Jaimee.
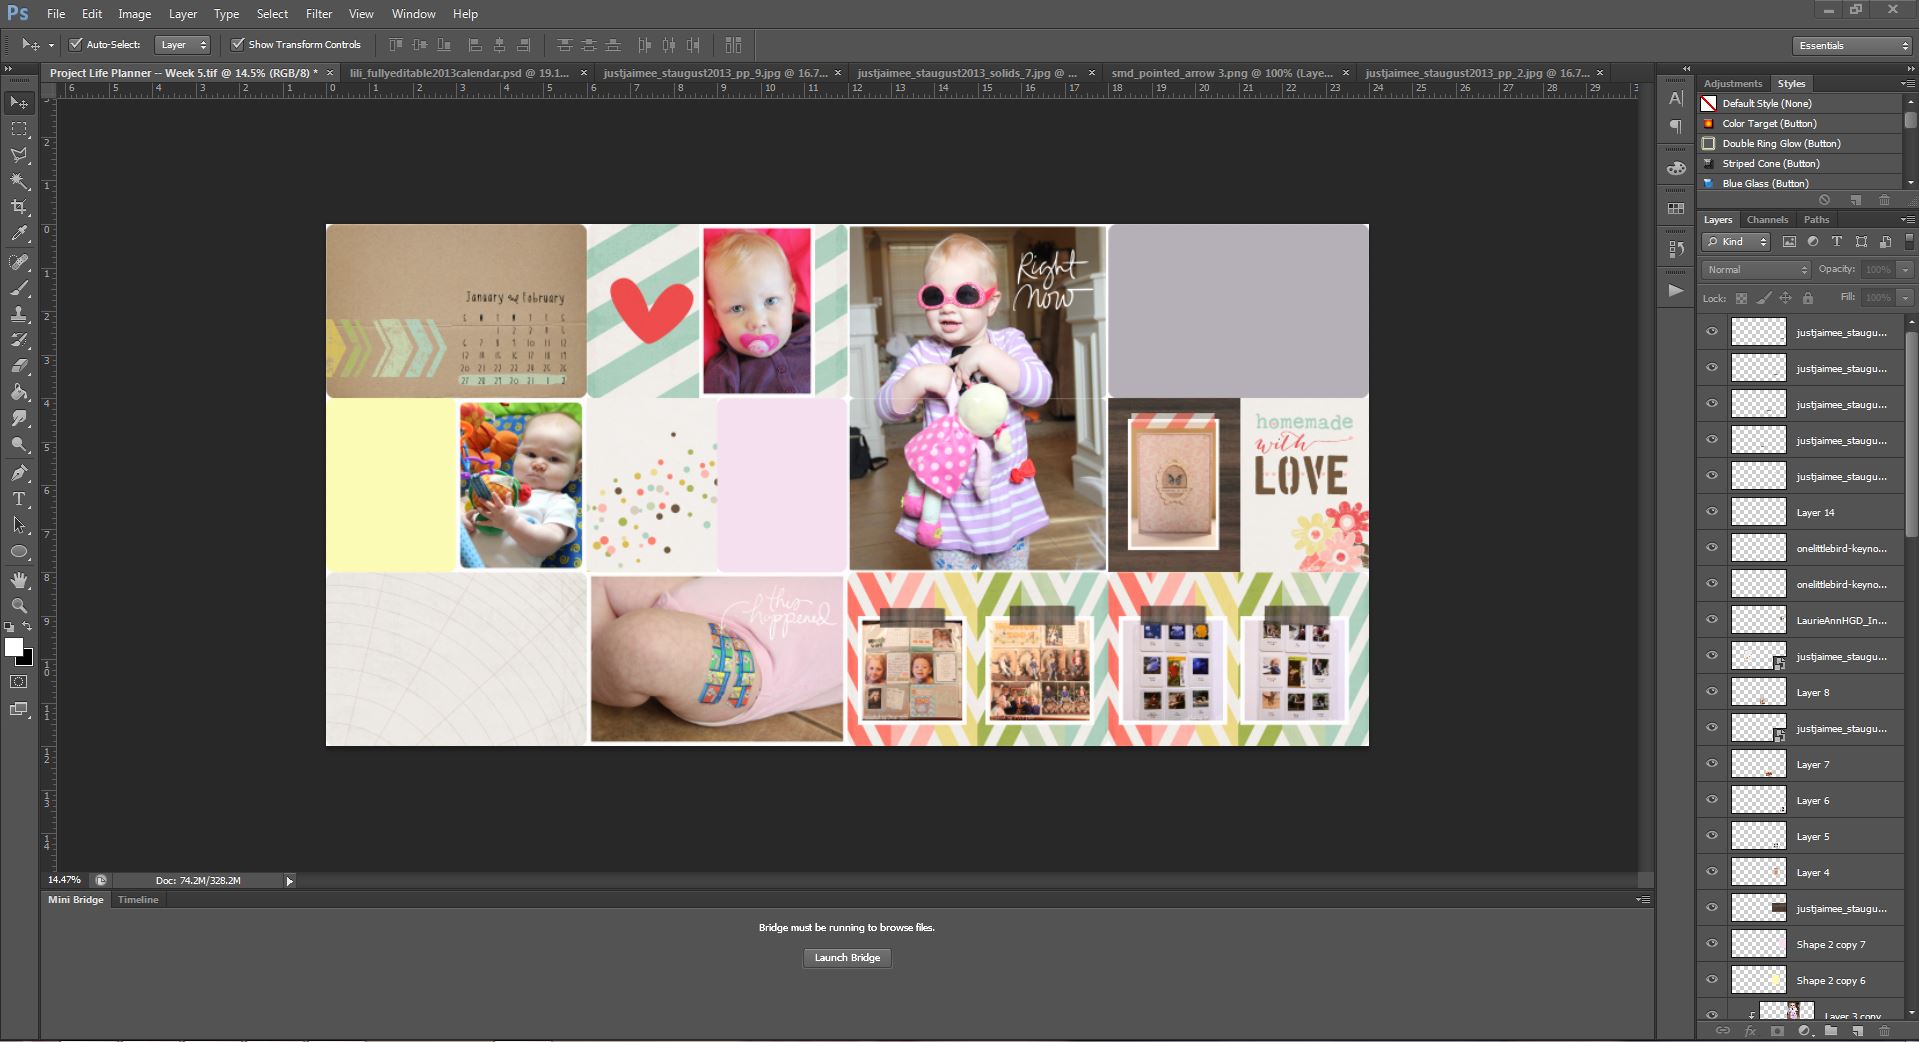
At this point I print all my photos and digital supplies I am going to use. I send my photos off to a professional printer. My hybrid pieces are printed at home and I cut them out by hand. With that done the fun begins! On top of my page protectors I begin to assemble my page. I of course reference my sketch and template I have made! I pull out all of the traditional supplies that I want to use. I play around with the placement of my elements until I am satisfied. I glue everything down, sew where needed, and add my journaling. ! Even though my layout didn’t turn out exactly like my sketch I still believe my sketch gave me a great starting point for my workflow. Another pocket page finished, and much quicker I might add
I hope this has given you some things to think about concerning your pocket page workflow. I know that I’m constantly reevaluating my workflow to determine if it is working for me or against me. Leave us a comment letting us know what you do to make your workflow more efficient! And of course be sure and post your pocket pages in the LilyPad Gallery so we can leave some love on them!