Adventures in Hybrid: Gold Leaf Card
Hi again. Today I’m blogging my experience trying gold leaf (or a foiling technique) for the first time, using digi products from Flamazing by EH Studios and Soco to make a simple printable style card a bit fancier.
I felt like this treatment could work for just about any patterned paper and was keen to give it a try and bought the small pack of approximately 3 x 3 inch gold and silver leaf sheets a while ago on sale, but needed some extra courage and planning before jumping in. (I didn’t want to buy a full roll of ‘hot foil’ because I wasn’t sure it would work without heat and cutting in to something *big* was always an anxiety inducing thing for me as a paper scrapper so the little sheets felt less risky).
If you’ve read any of my previous Adventures in Hybrid posts trying new-to-me hybrid techniques before, you know I try to share the full experience. Not that this needs a language advisory warning, but it’s about to get snarky in here so fair warning.
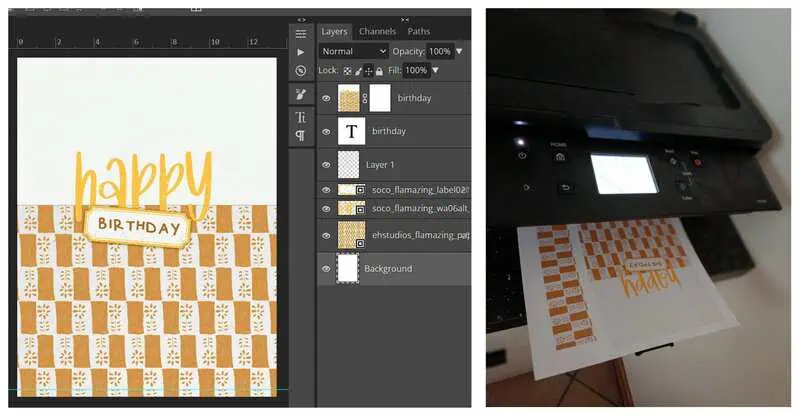
The digi part was easy. I used a ‘happy’ wordart and a tag from the Flamazing kit with a cool repeating pattern paper and arranged that in my scrapping program. I chose a paper that had that ‘perfectly imperfect’ look so if my first attempt with the gold leaf was a bit shabby, the card wouldn’t suffer too much because of that. I also just cut and paste an extra strip of the patterned paper for my printing sheet so I could practice applying the gold leaf to that before attacking the intended card. (In hindsight, that was a good bit of thinking).
So here’s my screenshot of the basic card to the approximate size of a card base, and my printing sheet with the extra strip (when I was full of enthusiasm and optimism):
Here’s what I quickly learnt about gold leaf that seeing it in short videos didn’t really impress upon me while I was fawning over the glam aesthetic:
Gold leaf is both fickle and fragile.
Each ‘leaf’ or small, very thin sheet came sandwiched between wax style papers and I probably should not have taken a whole sheet out at once because the breeze from the fan caught it and it folded back on itself and got stuck like a more expensive version of the clear plastic ‘cling wrap’ we use in the kitchen, that still frustrates me as an adult (not to mention it’s environmental impact) so I use containers and avoid it whenever practical. I can’t imagine having used a larger than 3 x 3 inch piece and having to try to work with that! Gold leaf will stick to anything and it seemed to static cling to even areas with no glue, like my desk. (This was where the optimism started to wane).
Making the gold leaf go where I actually wanted was pretty difficult, even with the fan off. Making disparaging remarks at it was not helpful either. Because it was so fragile and thin, I kept tearing it and I think I ended up with more gold on me, my not-quite-a-year-old phone I was taking photos with, and the (albeit already speckled patterned) desk than on the card despite precautions with the glue.
So here’s my first step, digi design of the basic card, and then printed sheet (when I was full of enthusiasm and optimism).
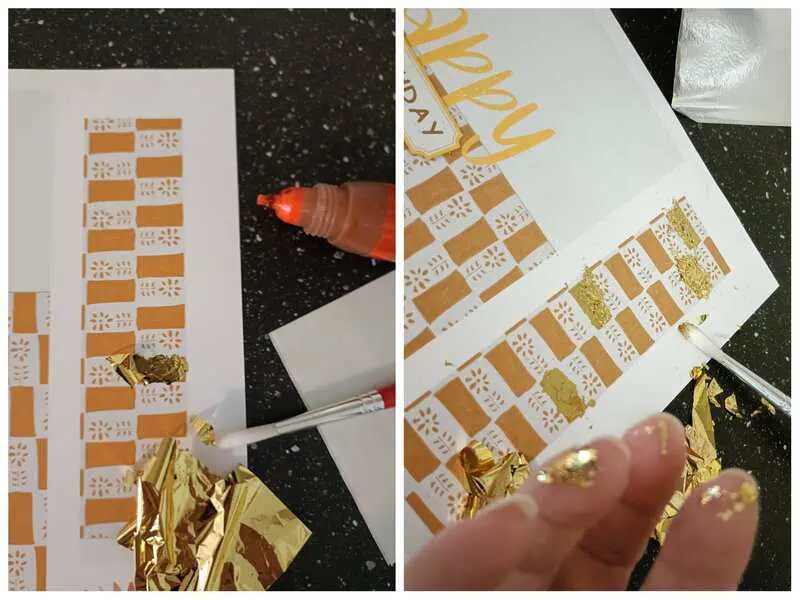
My Process: Using a small paintbrush, I added some glue to my practice strip in just a few of the wonky rectangle spots. I then pressed some of the gold leaf on and brushed away around the edges that should not have adhered to anything with a clean paintbrush.
In the end, I used several paint brushes because the glue kept getting on all of them and on my fingers every time I added it to another rectangle. It looked pretty good though and I was already messy so I was absolutely coming out of this session with a finished card. I just decided to use less foil on the actual card and picked a horizontal section to limit my ‘leafing’ to, except the glue had other ideas so the finished result is a bit more wabi-sabi than I planned but still looks like an elevated basic card (my preferred style).
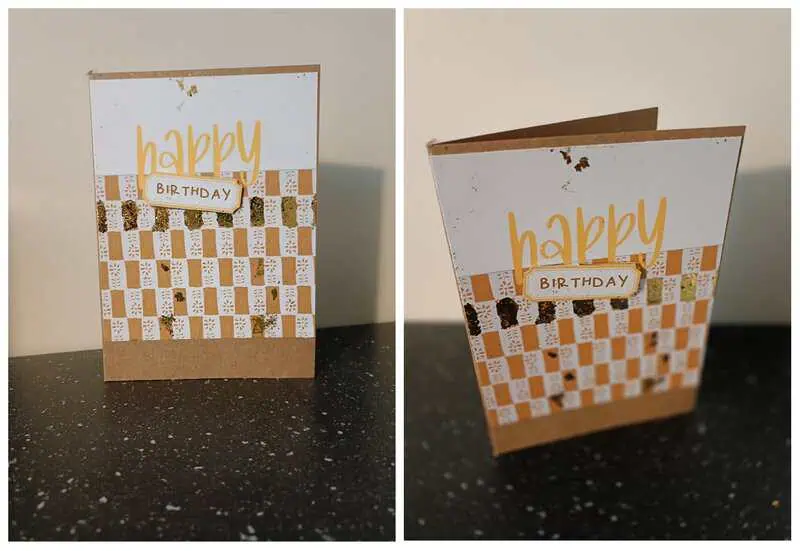
I printed the birthday tag separately and just cut it out with scissors (trying not to smear gold onto either the scissors or the tag, feeling sympathy for poor old King Midas) and stuck it on with 3D foam to add a little dimension after adhering the card to a kraft cardstock base. I then spent the rest of the afternoon cleaning gold off everything, such is non-digi life.
Finished Card:
My live and learn takeaway lessons:
Gold leaf can look great but it’s rather messy and unforgiving and better suited to using on small areas at a time (and it’s hard to photograph, it can just show up as black in certain angles of light) but maybe actual foil would have been easier to start with. Aluminium foil might be a bit thicker and easier (and cheaper) to work with or the hot foil might be worth trying. Snipping double sided tape into the rectangles may have given cleaner results too. I think this still has potential either as more specific spots on elements, maybe flower centers, or to make striking marble style backgrounds, like adding gold veins through a watercolour style solid, which might be a better use of the glue and paint brushes technique. Either way it has potential to literally make a hybrid project shine if you have the patience and time to learn to work with it, just try not to touch your phone or anything else while you have the Midas touch.
If you have any tips about this kind of hybrid, I’m all ears with plenty more gold and silver leaf to use!


I love gold leafing! This is awesome. You have inspired me to find my gold leafing and play. I did giggle at your ‘disparaging’ remarks comment.