Hybrid Stretch Card
Hello! I’m back once again with my simple style of hybrid to help stretch your stash and today I’m literally stretching it.
All I’ve done for this card is cut a digital element in half and put a long rectangle in between those two halves. It gives you a different kind of fold and spot for your internal message or writing.
Here’s a look at the finished effect.
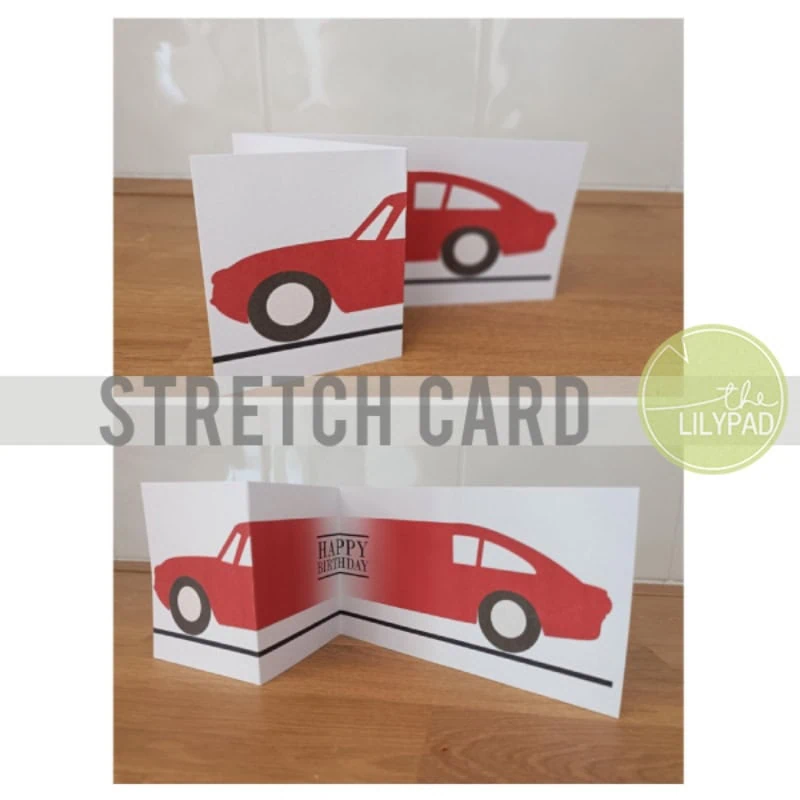
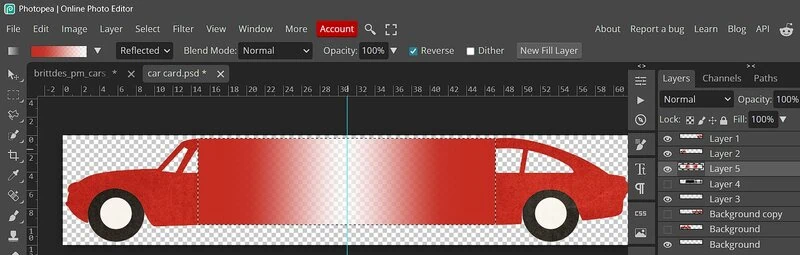
I’m using a somewhat iconic car from the Project Mouse: Cars element pack.

This should work vertically as well- maybe you could give a giraffe wearing a party hat an extra long neck!
Here are my steps and screen shots to set this up for an easy print & a quick fold.
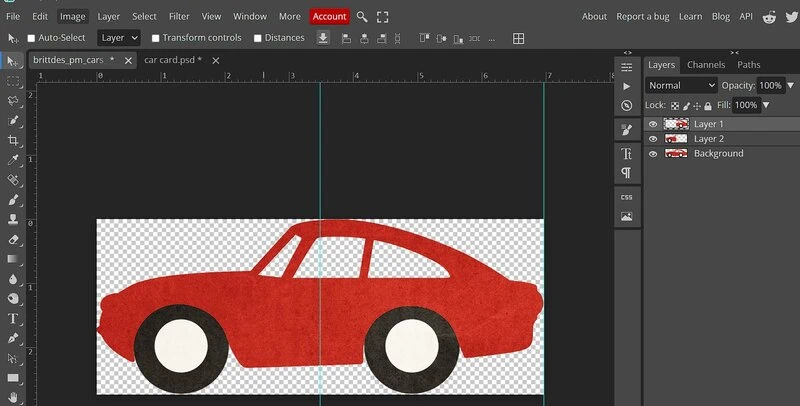
Drag in the element (car) and set up guides that show where you want to cut the element (it doesn’t have to be exactly in half).
Select the rectangular marquee tool and drag a box around your left half, from the first to the middle guide. Copy that (Ctrl C in most programs) & Paste it on a new layer. Do the same for the right half of the original element layer. – So now there are 3 layers. The car still looks ‘whole’ but you have the 2 halves in their original position over the top of the whole original car.
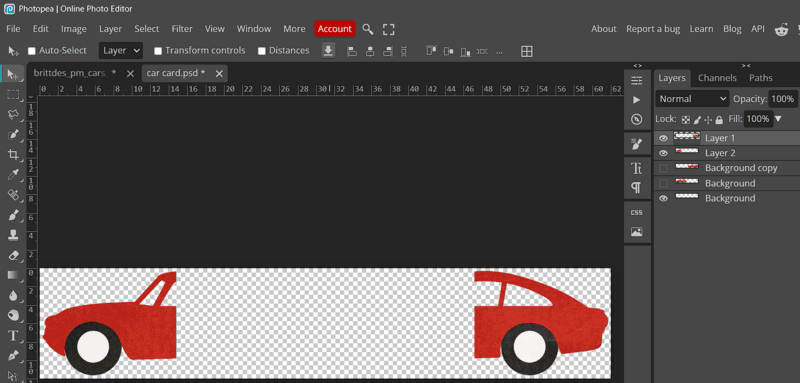
Now go to the Image menu and enlarge the Canvas. Enlarge it only in one direction. I’m making it bigger horizontally. So the ruler in the screenshot above shows my car is 7cms long, in the next one, it is about 60cm. Then move your two car halves to opposite ends of the canvas. They need to still be aligned with each other so they will join cleanly in the next steps, just ‘nudged’ to opposite ends
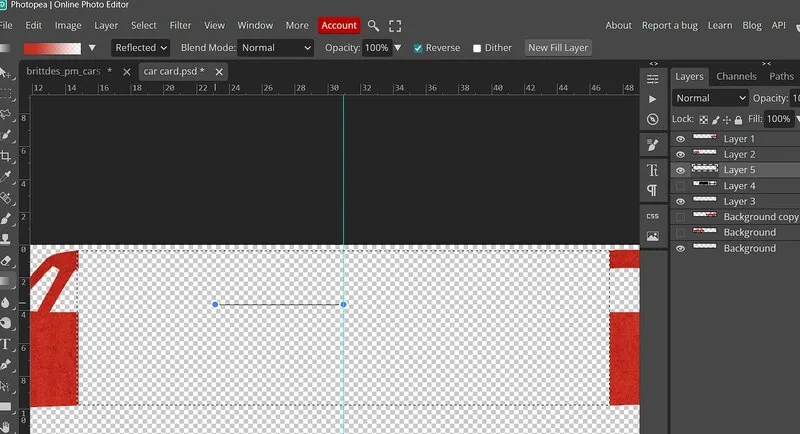
Now I’ve dragged a basic rectangle between the 2 ends. It’s default black and labelled as Layer 4 in the Layers Palette. This could be enough for your element but I decided to use a gradient that matches the car’s colour, so I’ve now switched to the Gradient Fill tool & here’s my gradient set-up. You can customise the colour by just clicking on the bottom square to enable the eye-dropper and clicking on the car or your element.
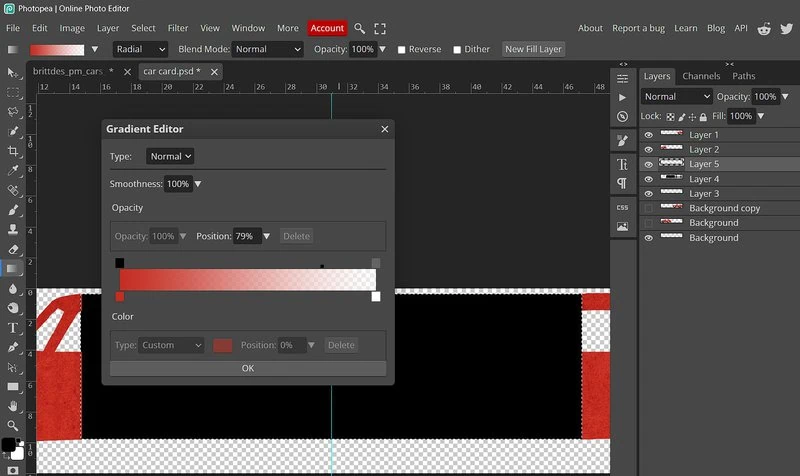
I have the Radial style of gradient selected at the top of the screen above (but that didn’t look so good so I changed it to Reflected and forgot to screenshot it again), and already Ctrl Clicked my Layer 4 rectangle to get marching ants around the perimeter of it & in a second I’ll have a gradient rectangle on a new Layer (Layer 5). Here I’ve turned off the black rectanlge’s visibility and dragged the gradient points while holding shift to create a clean horizontal gradient
and here it is done, ready for whatever sentiment, wordart or handwriting you want to include.
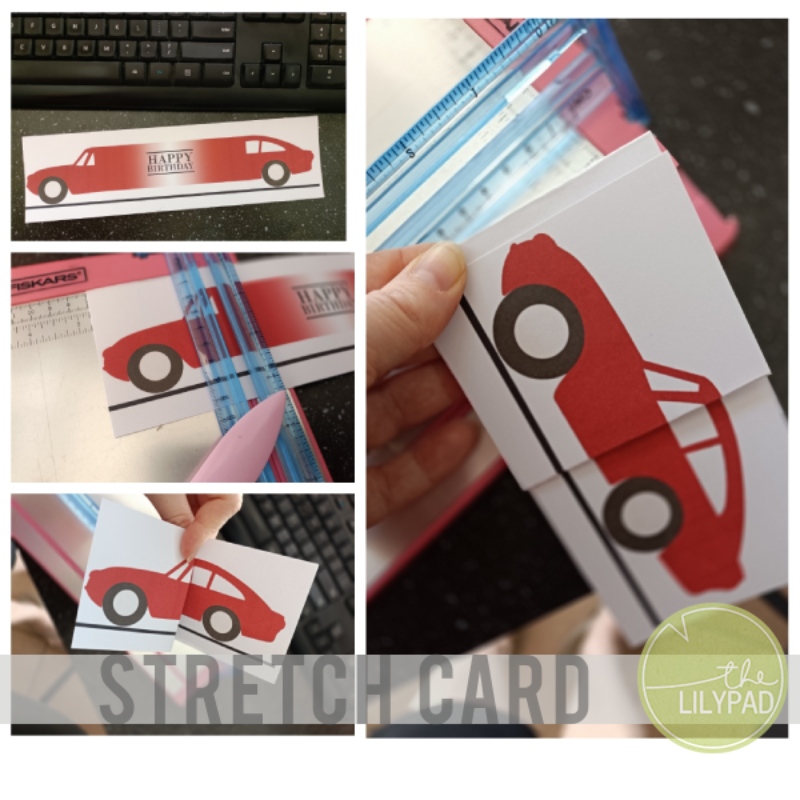
To format this for printing, I flattened the image and saved it as a JPEG after typing in a phrase and putting in a solid ‘road’ line, making sure the length of the stretched car fit on our printer paper.
After printing, I used a paper trimmer to cut it down & the scoring blade to crease and fold it at the end of the gradient rectangles, where the guides were, to reassemble the car and pop it in an envelope.
Scroll back up to the top of this post to see the finished card opened and unfolded again. Happy hybriding!


What a clever idea! That fun red car is perfect for this technique too! Love it!
I love this! What a great idea for an easy technique that makes a big impact!