The Lilypad

The Lilypad
Menu
  • home
  • store
  • forum
  • gallery
  • blog
  • tutorials
  • chat
  • newsletter
  • About
    • About Us
    • The Lilypad Team
    • FAQs
  • contact us

Create a Card: Packaging Technique for Backgrounds

September 15, 2016 by The Lilypad 3 Comments

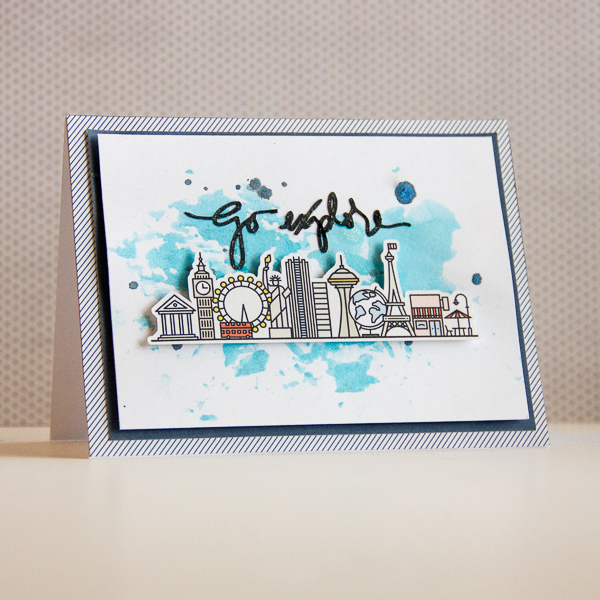
I enjoy giving cards to family and friends.  Cards are perfect way to send birthday wishes, celebrate a special event, or even to just say hello to someone.  I always try to have a selection of homemade cards on hand to give out for any of these occasions.  I’ve noticed my supply of cards has been getting a bit low and committed myself to making a few cards to bolster it up.  New adventures/traveling is the theme of today’s card. I also am sharing a video on how to create a card background using the packaging technique.

go-explore-card-blog
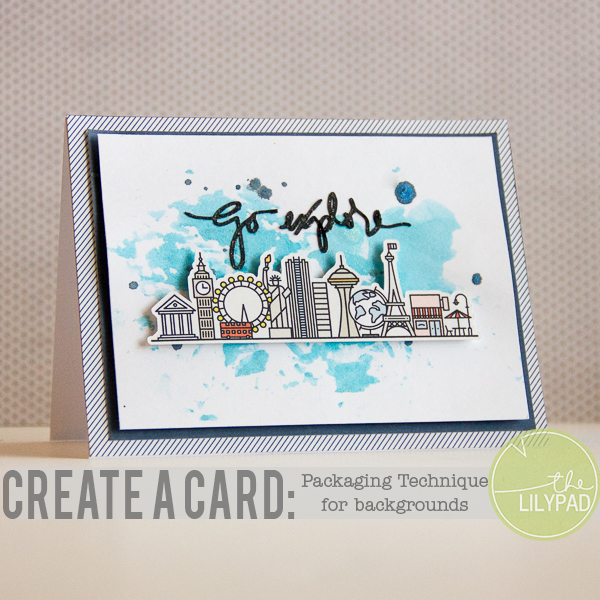
I know quite a few people who are starting new adventures this fall.  While adventures can be exciting they can also be nerve wracking too.  What better way to help calm the nerves of someone than to give them a homemade card with well wishes in it?  A card about exploring the world was begging to be made.

To make this card I used the following supplies:

  • Roam by One Little Bird Designs
  • White Cardstock
  • Paper trimmer
  • Glue or tape runner
  • Foam adhesive
  • Teal Color Shine
  • Navy Color Shine
  • Plastic packaging
  • Clear Wink of Stella
  • Cutting machine
  1. Using papers and embellishments from Roam create your card design in photoshop.capture
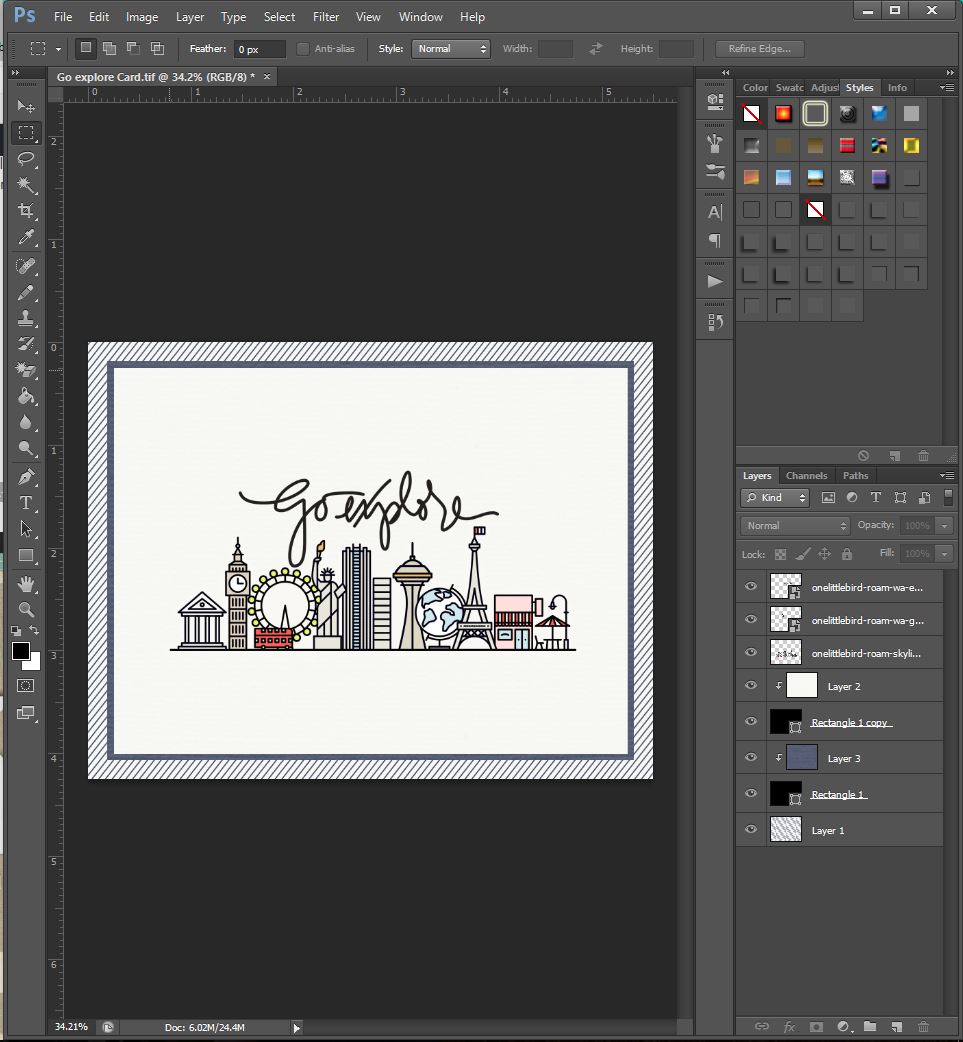
  2. Duplicate the striped base layer and the blue accent layer to an 8.5 x 11 document.
  3. Print and cut the layers out.
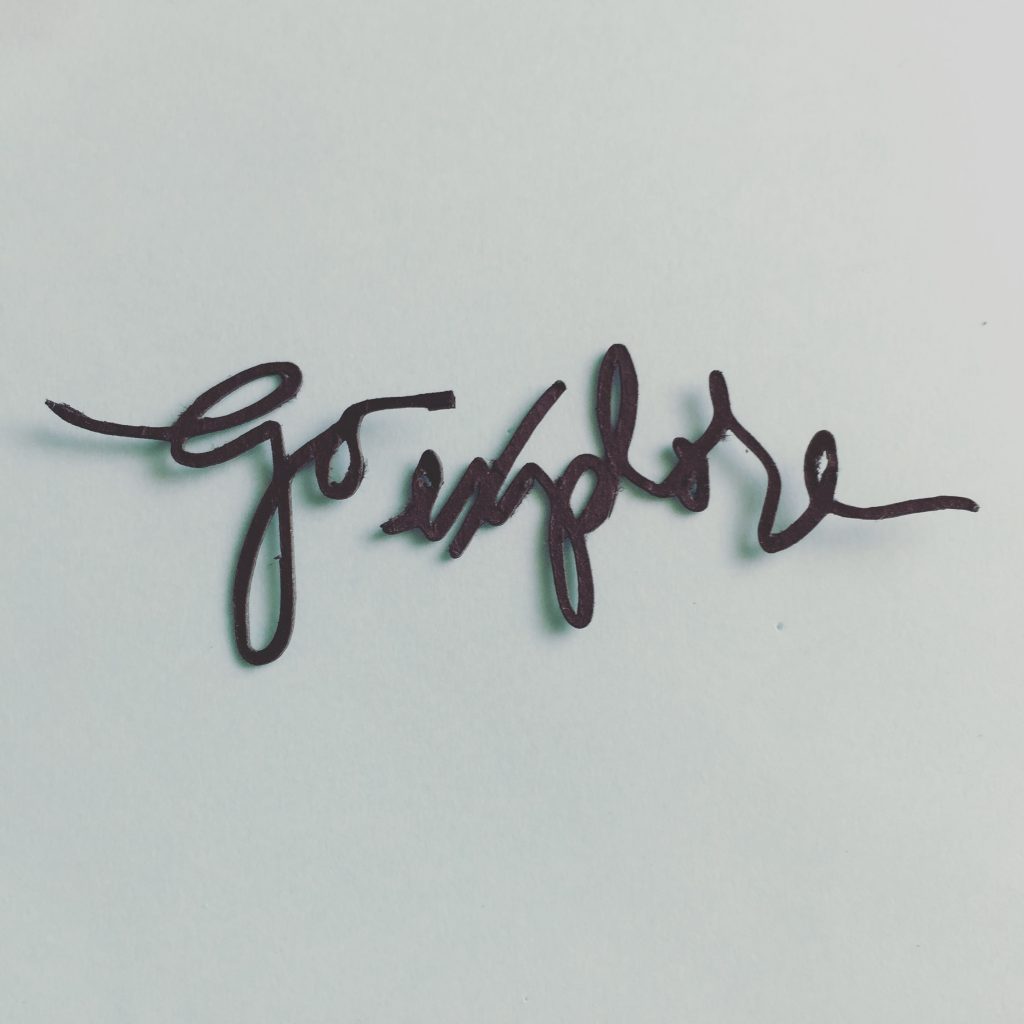
  4. Using your cutting machine software, trace then cut out your element pieces.img_4699
  5. Using the packaging technique (see video below) create your card background.  In the video I used a piece of plastic packaging from a sticker set I own.  It was a little large to work with.  I would suggest a piece of plastic closer to the size of the actual card.  Also the bottles I hold up in the video are teal and navy color shine.

  6. Assemble your card using your original document as a guide.
  7. Add additional embellishments as needed. (ie Wink of Stella)go-explore-card-2

That’s it! A very simple way to add some mixed media to your card background.  I love the pops of shine that I get from the mists.  Anyone who receives this card of encouragement will be ready to head out on their adventure.

go-explore-card-1

I hope you’ve enjoyed this short tutorial!  Stay tuned next month for another Create a Card Tutorial.  Be sure and share any cards you make with us!  We love to see your creations in TLP gallery!
Jewelle

Save

Save

Stay up to date with the latest products, news and site wide events by signing up for our newsletter below!

Hybrid Creating with Paint Effects
Memory Pockets Monthly September Collection AGENDA

Comments

  1. Trista says

    September 16, 2016 at 11:31 AM

    Jewelle, this card is adorable! I enjoyed learning a new paint technique! Thanks for the video!

    Reply
  2. sue Mathews says

    September 30, 2016 at 7:10 PM

    That was very inspirational and easy when you know how. Thank you.

    Reply
  3. Desiree Glaze says

    May 6, 2018 at 1:24 PM

    I LOVE this card! The technique you used looks easy and I cannot wait to try it.

    Reply

Leave a Reply Cancel reply

Your email address will not be published. Required fields are marked *

Search the Blog

Categories

  • Art Journal
  • Behind the Designs
  • Blog
  • Blog Category
  • BYOC
  • Challenges
  • Contest
  • Crafts
  • Create Crate Monthly
  • Dear Polly
  • Document Your December
  • DSD
  • Font Finds
  • Freebies
  • Frontpage Blog
  • Gallery Inspiration
  • General
  • Hybrid
  • iDSD
  • iNSD
  • Interviews. Meet…
  • Journal Pad
  • LilyPad Lovin'
  • Love Yourself
  • Lyrical
  • M3
  • Member Spotlight
  • Memory Pockets Monthly
  • Mixed Media Beginners
  • Mixed Media Monthly
  • Mobile Fun
  • Monday Mash-up
  • Month of Challenges
  • Monthly Muse
  • New Products
  • Organize Your Pad
  • Pad Polls
  • Photography
  • Pocket Pages
  • Polly Picks
  • Printable Projects -Hybrid
  • Project Parade
  • Recipes
  • Scrapping Secrets
  • Snappin' Sundays
  • SOSN
  • SOSN Same but Different
  • SOSN Stash Mash
  • Speed Scrap
  • Template Tuesday
  • The Lighter Side of Life
  • Thoughtful Thursday
  • Tips and Tricks
  • TLPMobileHighlights
  • Trend Watch
  • Tutorial Thursday
  • Tutorials
  • Uncategorized

Resident Designers

  • A Whimsical Adventure
  • Allison Pennington
  • Amy Wolff
  • Anita Designs
  • Becca Bonneville
  • Bella Gypsy Designs
  • CD Muckosky
  • Designed by Soco
  • Elif Sahin Designs
  • Fiddle-Dee-Dee Designs
  • ForeverJoy Designs
  • Gina Miller
  • Grace in Color
  • Heather Joyce
  • Joyce Paul Designs
  • Just Jaimee
  • Kim Jensen
  • Kristin Aagard
  • Lynn Grieveson
  • Lynne-Marie
  • Micheline Lincoln Designs
  • Mommyish
  • NBK Design
  • ninigoesdigi
  • One Little Bird
  • Paislee Press
  • Paula Kesselring
  • Rachel Etrog Designs
  • Rachel Jefferies
  • Rebecca McMeen
  • Sabrina Dupre
  • Sahlin Studio
  • Sara Gleason
  • Scrapping with Liz
  • Valorie Wibbens

Tags

art journalBehind the DesignBYOCcardchallengescraftscrafts for kidsdigital scrapbookingDocument Your DecemberfallHalloweenhighlightshybridhybrid layouthybrid variety showinstagramjournalingkatrina huntlayoutmash-upmember inspirationmemory keepingmemory pockets monthlymixed mediaMixed Media MonthlyOrganizephoneographyPhotographyplannerPocket Pagespocket scrapbookingprintableproject lifeProject Paraderecipesalescrapbookingsilhouettespotlighttemplatetemplate tuesdaytipstips and trickstutorialvideo

Get Around

  • Store
  • Forums
  • Gallery
  • Blog
The Lilypad

Information

  • About Us
  • FAQs + Terms of Use
  • Customer Service
  • Privacy statement

Stay up to date with the latest products, news and site wide events by signing up for our newsletter below!

Copyright © 2007-2015 The Lilypad   


Copyright © 2007-2016 The Lilypad   Credits