Adventures in Hybrid & Cut-files No.2: Concertina Fold Element Chain & Card
Mother’s Day is coming up so you may need to make a card (or show this post to your tech savvy kids if they are up for an adventure, or maybe just supply them with some crayons or scissors instead of your digital cutting machine). Here’s an idea for a concertina fold border for a card or hybrid project. You can use this idea for any repeating shape (more on making your own later). Today I’m using butterflies that work for so many themes.
A bit of context: I feel like sometimes I write informative blog posts and other times more entertainment based ones with some kind of process or journey and reflection. I think this post covers both of those as it goes off the rails during the actual card creation. That really makes for the ‘adventure’ part of this project. Hopefully the Silhouette process and the various ideas are helpful in someway.
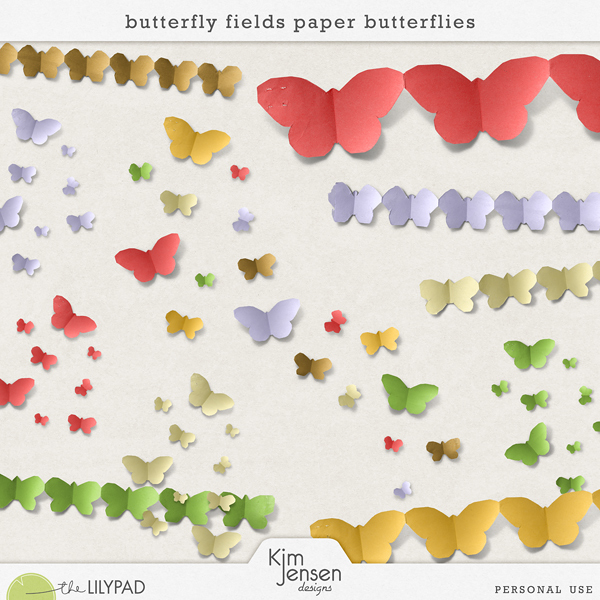
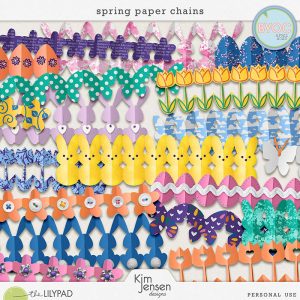
It’s been a while since I pulled out the Silhouette (Cameo 4). (I documented an interview with myself and some hybrid and cut-file FAQs last time and posted that here) And I can’t say I’m a fan of fussy cutting (both the hand cramp and clean up of off-cuts) so I figured it was worth clearing some room and dragging it out of the cupboard. What I have learnt so far about the Silhouette software is that any PNG element that we are used to using on a digital layout can be used for it’s outline (or silhouette in the traditional use of the word) and can become a cut-file. I’m using Kim Jensen’s Butterfly Fields which were not designed as a cut-file. I’ve used them before on a ‘normal’ digital layout but you can see the effect I’m going for in real life already in her PNG files. The shading and the folding gives that concertina folded look. But I’m just using these as cutting files and guides so the shading detail and colour, none of that really matters for this project, I’m not printing them, just cutting out the chain as a whole, but when I fold them, the real world light will give the butterfly chain it’s own shaded detail and the 3D effect I want to give my card some dimension.
The cut-file part:
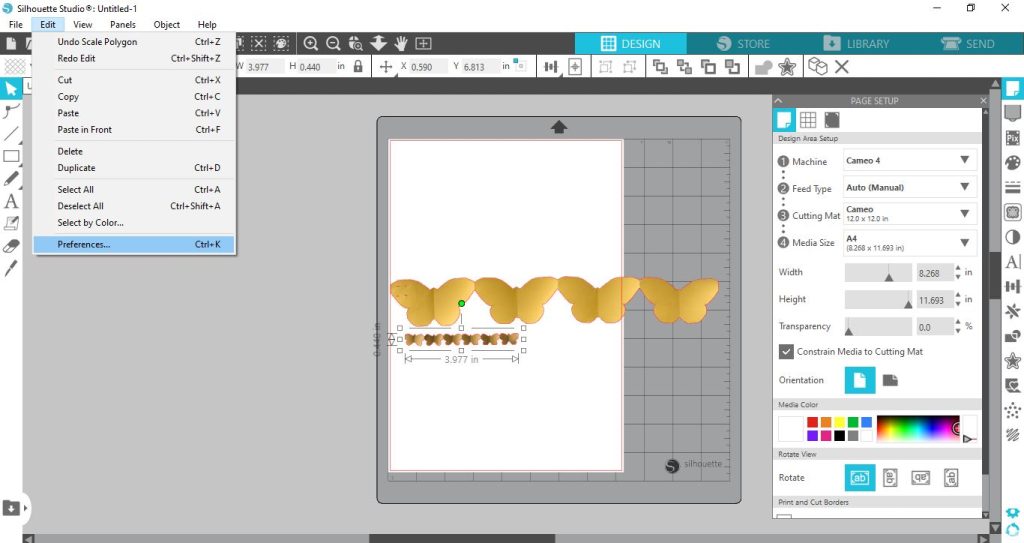
OK so to start I’ve opened the Silhouette Studio software (after updating it because it always seems to need updating) and dragged in 2 of the butterfly chains. A shorter yellow one and a longer, smaller brown one. Here’s what I can see on my laptop screen. It shows my default paper size from my last project as A4 (the white rectangle) sitting on the grey mat (which is the total available cutting area of 12×12 inches) that feeds the paper/cardboard/whatever into the Cameo4 machine.
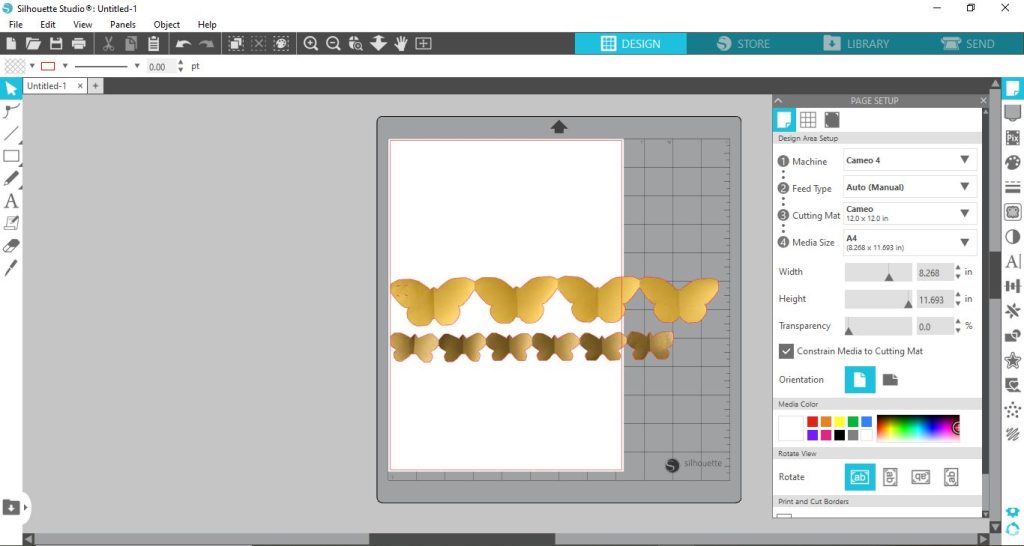 My card base (a premade cardstock base I bought in a pack ages ago) is a bit under 4x 6 inches but I work better in centimetres so I’m just changing the display units so I can make the butterflies work with the scale of the card. I go to Edit > Preferences and change the display unit.
This is the pop-up window and how you change the unit of measurement. Just click the arrow next to the Auto (inches) field.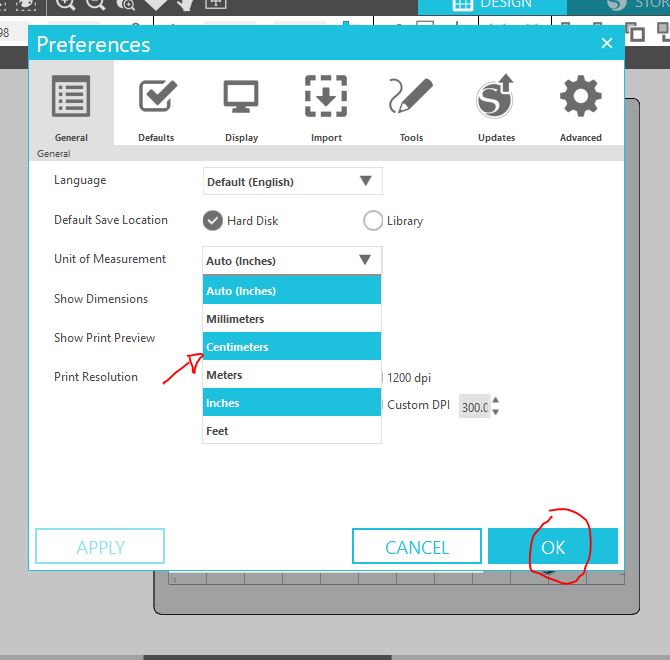
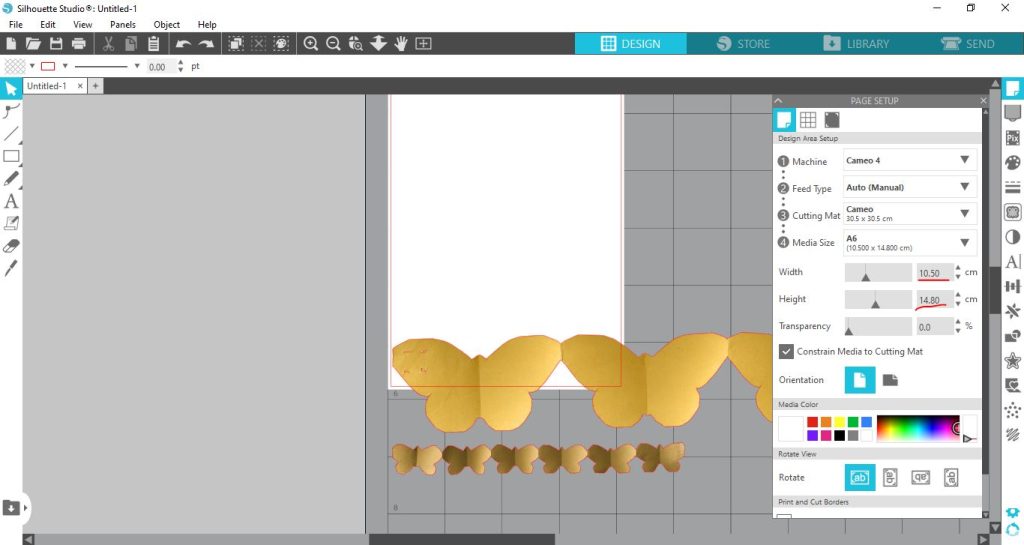
It then zooms in a lot after adjusting for the smaller card size but to zoom out and see the whole matt display, go to View > Zoom and adjust for your screen – mine is shown at 50% on my laptop display.
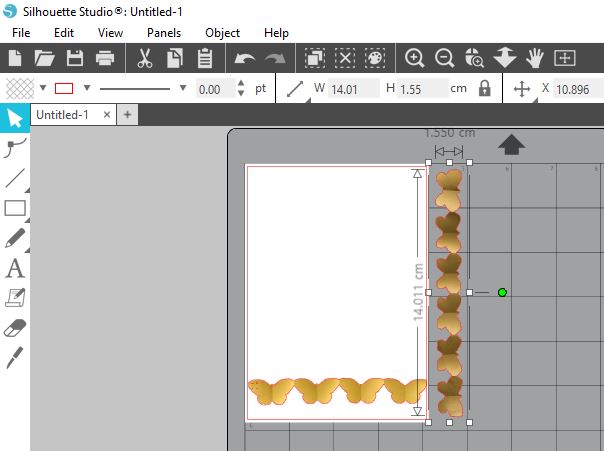
Scale is an important principle in design and ‘measure twice, cut once’ is broadly applicable but good advice. This lets me see how massive the butterflies would be if I just went and cut them without resizing – they would just be way too big for my cards but each PNG file would be different.
Now I just click on each butterfly chain to get the bounding box with the green dot at the top and I can resize them to fit perfectly. To make a landscape orientation card with the butterflies running along the longest side, clicking the brown butterfly chain gives me a bounding box with a green dot and I can rotate the chain so I can easily make it fit (by dragging from the corner in diagonally towards the centre to shrink it, or in the opposite direction if I needed to enlarge it a bit). The padlock closed as shown means it will keep it’s relative size and you won’t stretch or distort it. If the padlock is ‘open’, click it before dragging a corner to resize. (You can also use the menu at the top (i think it was in Object) to rotate by 90 degrees rather than ‘turning’ the green circle and guessing the orientation of your chain).
You can use this idea for any repeating shape with symmetry. Think hearts, semi circles to make a garland as well as paper dolls or gingerbread men holding hands. If making your own is too much, there are some tulips in another set of Kim Jensen’s that would be cool as well as other Spring and Easter themed concertina chain element ideas.
I think it would be easier to make personally in Photoshop or in your normal editing program, you would start with your shape and duplicate your solid shape and just overlap them slightly, then merge the layers and save the whole thing as a flattened PNG file (it can’t be a jpeg because we want the outline to tell the machine where to cut). I *think* you can also create that within the Silhouette program but you would have to click various boxes to make sure it only cuts the outline of the whole document, not the intersections of each where they overlap and I’m still a beginner adventuring with this program so the exact ‘how’ would involve googling and videos and is beyond the scope of the ‘quick card’ I set out to make. *Potential spoiler – from the idea to the pulling out of crafty stuff to the finished tangible card, it’s not so quick.
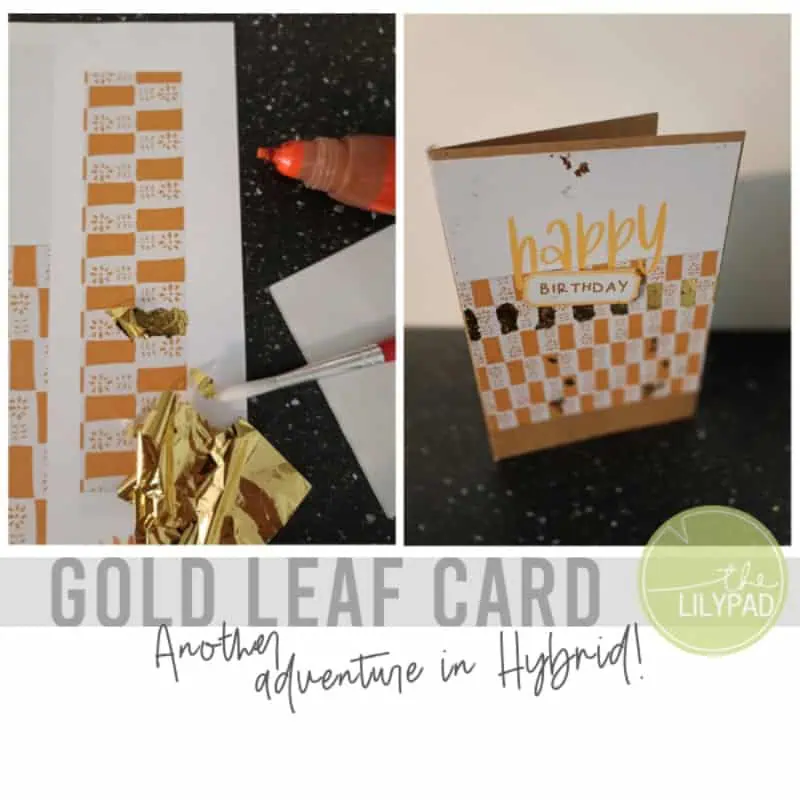
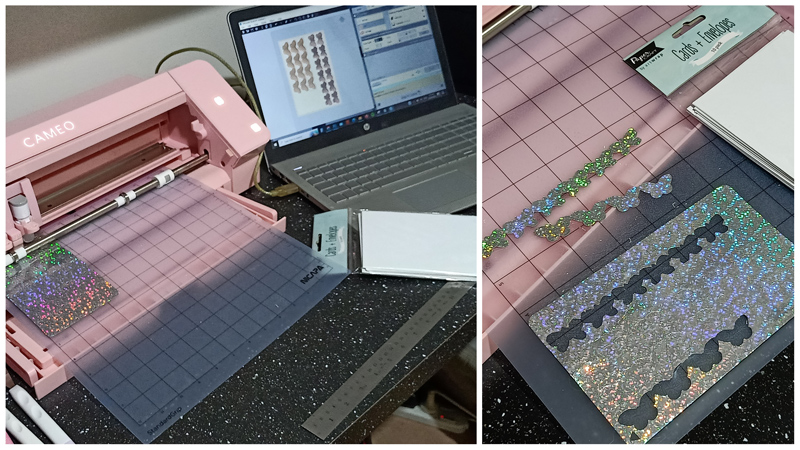
Now the machine is ready to cut, at this point I went through my paper scraps stash to find some kind of paper to load in the Cameo machine. I found some old holographic (thin cardboard) packaging that I’d kept (not sure what it was from but couldn’t bring myself to just throw it out) and thought that might look fancy enough with the butterflies that I wouldn’t have to do too much extra to the card design. So I duplicated the butterfly chain a few times to make use of the paper. Initially I was thinking, in terms of card design, I would stack the 3 rows of 4 chains and just put a sentiment above or below it and that I would keep the longer chains for ‘another day’. (Repetition and simplicity are my jam with cards).
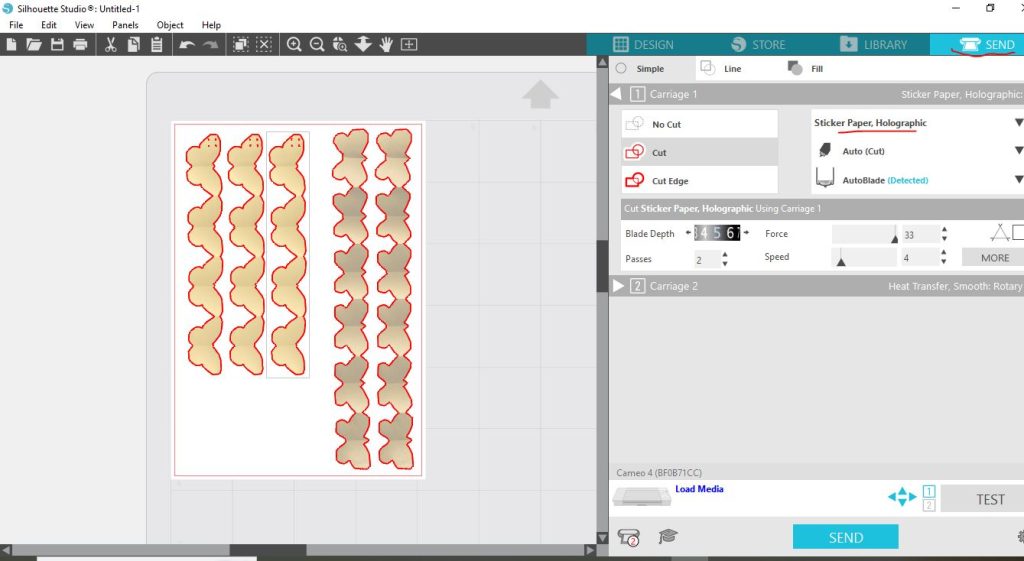
You might have noticed that we’ve been in the Design tab or panel up to now. To send the resized butterflies to the machine to actually cut now, we move from the Design to the Send tab or panel and select (read: guess) what pre-programed cutting settings are required. I picked Holographic Sticker paper from the drop down menu of a million options because I didn’t know if the holographic pattern would add much thickness, in the end I think this cardboard would have been fine (the depth and force settings were similar). I did not want the overcutting of corners ticked/checked because I didn’t want the insides of the butterflies to have little sips through the areas I would be folding, weakening it’s structure. (You can see the dark red cutlines, there are a few on the end of the yellowy butterfly chain, shown as 4 dots, zooming in to the original PNG, there may have been some staples that were removed but they weren’t big enough to worry me and the holographic pattern was distracting enough that i didn’t think they’d even be visible. If I were to use a different, solid coloured paper instead, I may have gone in to Photoshop to ‘hide’ those areas on a duplicate of the PNG before cutting).
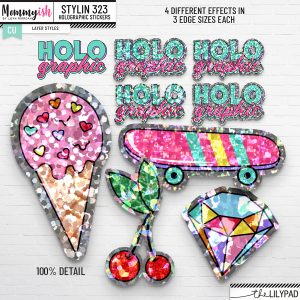
(Digi tip: If you like the holographic style and aren’t a hybrid person, you can get the look digitally in Photoshop or Photoshop Elements with this Layer Style pack that I’ve used before by Mommyish)
Anyway, sometimes you win and sometimes you learn, right? Here’s one thing I realised after I decided to commit and clicked ‘send’ and the Cameo started clicking and cutting. I measured and set the dimensions of my card *base* in the software, I didn’t actually measure the holographic paper piece I put in the machine, I just eyeballed it and thought it was about the same 4×6 size. It was not, so I got 1 and a half long paper butterfly chains only instead of 2.
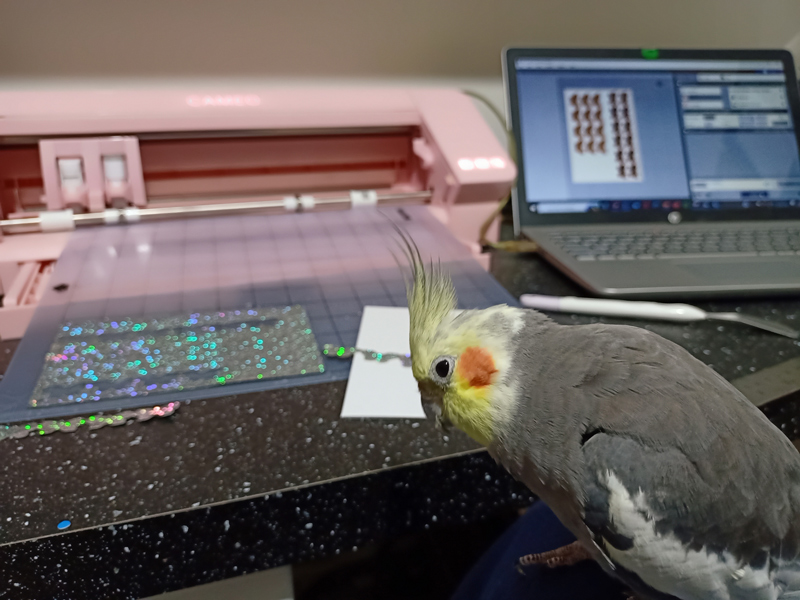
(And here’s a random photo of one of the sticky beaks that came to see what I was doing. They slow down my process somewhat. This one especially loves paper, shiny things and projects but I didn’t want his help with scalloped edges or hole punching with his beak).
The concertina folding part:
As you probably already know, a concertina fold will give you a zig-zag or accordion look. Regular intervals are important and a straight fold is pretty important too. I thought about scoring them with just my fingernail given their rahter small but I decided the cleanest way to fold my concertina butterflies was with the spatula I already had out to help pry the butterflies off the Cameo’s sticky mat.
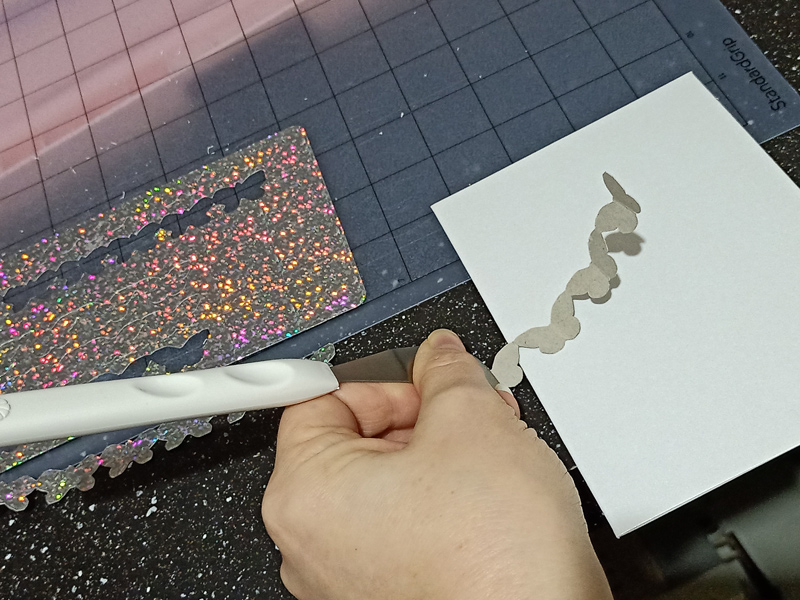
I turned over the chain of 4 and folded down the midline of each butterfly’s body (on the plain brown cardboard side). I then flipped it over to the holographic side and used the spatula to crease where each butterfly attaches to it’s neighbour. I did the opposite on the only 1 long chain I had so the wings folded up, rather than down as you can see below. I used the spatula to add some creases at regular intervals to a scrap strip of silver paper to give it some texture while I figured out how to actually lay out my card design. I pulled out some sentiment stamps and my box of inks while thinking and moving the butterflies around.
The card making part:
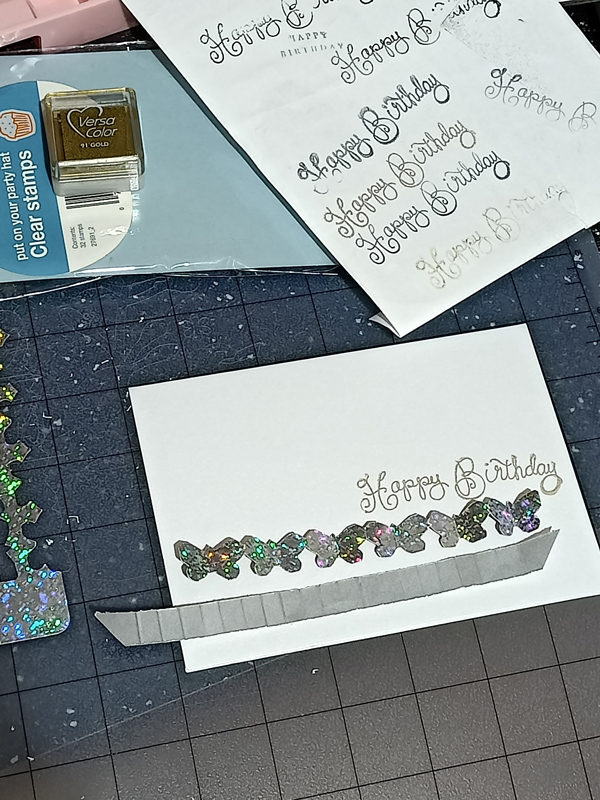
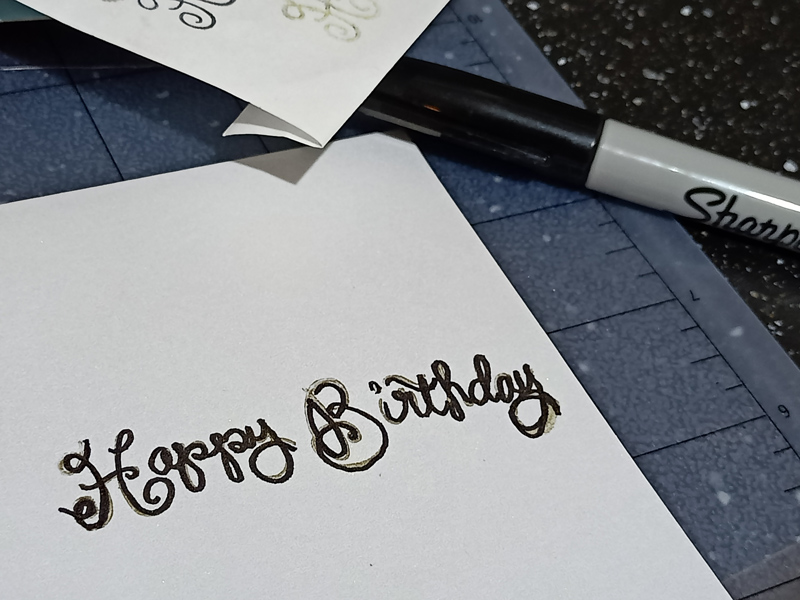
Now for context, what you should know about me is that I may have a collection of stamps and inks, but I don’t use them much or really know the reasons for using each different kind of ink, I just like the colours and usually buy what’s on special at the time. I found that my permanent Kaisercraft ink pads (both black and gold, which were my go-to’s) were dried up so I tried some of the non-specific, no real branding ink pads i had from when the kids liked playing ‘stamping’, but you can see the smudgey imperfection that led to on the scrap piece of paper. It was getting late (we’re about 2hrs in at this point) so I just committed to the gold Versa Color straight on the card base (which has a pearly sheen to it not that it’s obvious in this pic but the big smudgey loop on the ‘y’ probably is…
so I thought i’ll just fix it with a Sharpie, couldn’t find my gold one, so just went with going over the whole sentiment in black … and really stuffed it up. (I should say it was in no way the Sharpies fault, my kids would say this was ‘a 100% user skill issue’).
At this point, I started thinking I should just use the printer and print some wordart because I stuck with digi after buying all these stamps and stuff for a reason, but then I had my stamps out, I really am not good friends with our printer and thought I could still ‘save’ the card and just cover up the sharpie/stamp mess. ( I do know that Stampers swear by the Misty stamp board for re-stamping and keeping things in line and various tricks but I don’t have one but instead of late night shopping for a single project, with the desk already a mess, I pulled out my stash of tags & labels to find something to stick over it.
(Related side note: If you need to or want to cut your own tags on a digital cutting machine, Val Wibbens has a cool mixed set here but much like my stamp stash, my tag stash is kind of extensive and neglected so I thought here’s a chance to use one).
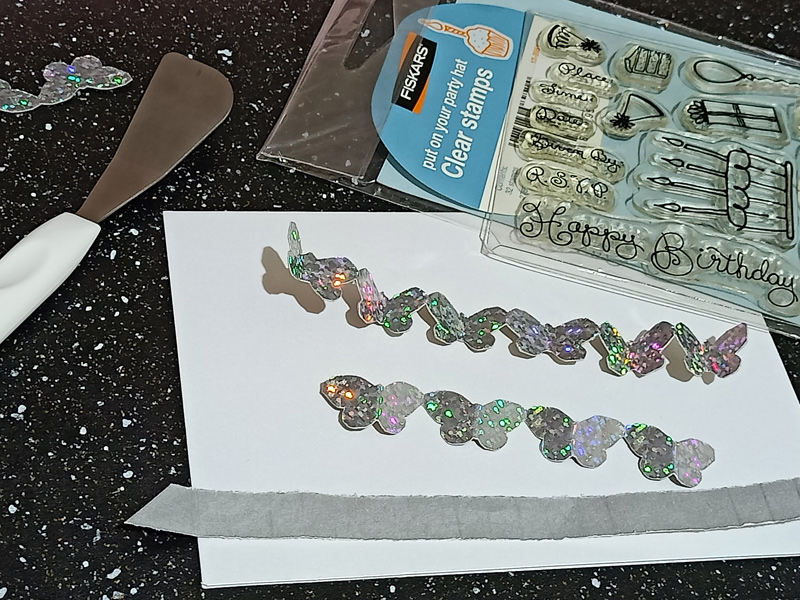
Instead of fighting with my printer to try to align any wordart on the tag I ended up picking, I found a different stamp sentiment set (Kaisercraft Clear Stamps: Birthday Wishes) and imperfectly stamped it on with Versa Color in silver this time and told myself it was good enough (it really isn’t but I was over this whole idea by now). Because I had to cover some holes in the tag where the Sharpie mess showed through, I added some stick-on acrylic pearls as fasteners and because I like repetition and cohesiveness, I added smaller ones to the ‘heads’ of the concertina’d butterflies. And because ‘stick-on’ isn’t always reliable, I added Glossy Accents as a decent wet adhesive to those as well as the tips of the butterfly wings only (so they would still have that pop-up folded look), which, of course, leaked out the sides and onto the silver paper strip so i added more, the whole way along each edge, to make it look purposeful. Because I had some rounded parts and some linear looking edges like on the end of the silver strip, I took a risk and used my (half broken) Crop-a-dile corner rounder and rounded part of the card. I still don’t know if that was a good decision, anyway, it’s done.
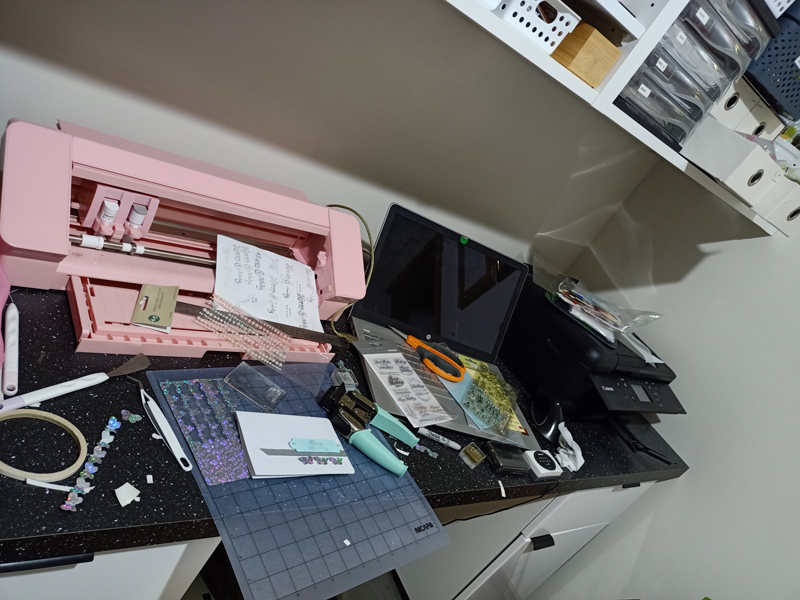
Next time I question why cards are about $AUD6 – 10 each in shops, I need to remember it’s to cover their expertise, materials and time, including clean up. The clean up is a significant part of the ‘hybrid and cut-files adventure’ but I’ll spare you that. Here’s how my desk ended up and some finished shots of the card so you can see the holographic effect, concertina folds and the pearly sheen of the card base.

So, like I said, not sure if this was more an informative or just an entertaining blog post but it was an adventure.
A Recap and Life Lessons from today’s adventures :
- ‘Normal’ digital element PNGS can become chains that you cut out for real world use, and adding concertina folding can give a fun dimensional effect
- You can use a digital cutting machine to save you time and effort (especially for larger or more intricate cutting jobs or if you really hate scissors!)
- Whether you actually save time comes down to how familiar you are with the cutting machine’s software and settings for what you are actually cutting, as well as what other processes (and distractions) are involved during the creation of your project.
- Always measure the piece of paper/vinyl/wood/whatever that you are actually cutting and scale your cut-file according to that, not just the larger project you are using it for.
- The easy way is not always the fastest or most efficient way (eg. finding an ink that is appropriate and quickly stamping a sentiment that then requires fixing and covering up might end up taking you longer than reading the printer manual again for the 30th time and printing suitable wordart or phrase you typed yourself).
- Plans don’t always turn out and that’s okay; the ability to pivot and come up with a Plan B is a good life skill to have
- Sometimes ‘good enough’ is acceptable (this card is not a bridge or anything that could be potentially life-threatening if not perfect)
- Lastly, note to self: Consider just making a digital card with a digital concertina fold as part of it and printing that, (a pocket scrapping journal card would work!), if you like the holographic look you can use a Layer Style like this one by Mommyish, or go a bit more hybrid and print the card base with a wordart sentiment and then stick your fancy concertina cut-out on it if you want the cool dimensional look.
See you next time