Shadow Study: How To Split Shadow
Hi again. Last time we discussed real world shadows based on photos of real scrapbooking elements and some different Blend Modes you could use to create more realistic shadows digitally in Photoshop with some of the limitations of each. All that lead me to the point where I’d decided to start ‘Split Shadowing’ some papers and elements and introduced that concept and today is just about that process. (There’s some assumed knowledge as this is a bit more of an advanced technique but if you can separate your shadow layer already, can use ‘transform’ or warp layers, and you have used clipping masks, I know you’ll be able to follow along and do this. If you need a refresher on those, I’ve detailed them before here ).
___________________________________________
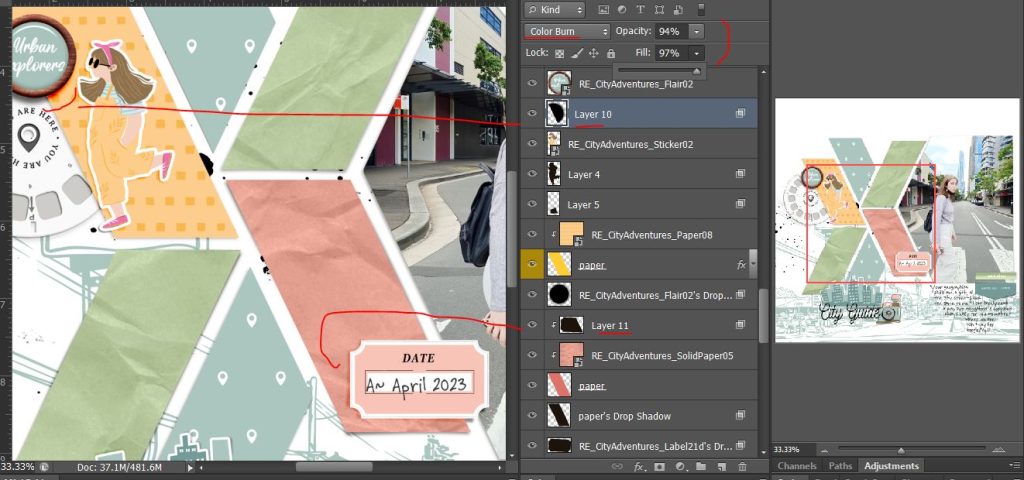
I have a layout in progress and I’m jumping in at the ‘it’s time for shadows’ stage. The base template for the layout comes from Scrapping with Liz’s Geo Cut templates. For this city skyline sticker from Rachel Etrog’s City Adventures kit that is placed over 3 papers (the crumpled green solid, the blue geotag print and the white based sketchy background), I have first used a basic Shadow Style and then separated the shadow (using the right click menu ‘Create Layer’ option) and put it on it’s own layer. I’ve then warped it (with the Transform tool) to give it some dimension so it looks like it’s not sitting perfectly flat (especially on that crumpled paper). The next step is the start of being able to manipulate parts of the shadow independently.
I’ve cut that separate shadow layer into pieces that overlap just those 3 sections. Layer 6 portion of the shadow overlaps just the green paper, Layer 8 covers the geotag paper and Layer 9 is the bottom part of the shadow. You can see the limitations of Colour Burn here on Layers 8 and 9 where the shadow seems to just disappear over the white sections of the geotags and parts of the background in between the blue sketches around the bottom and left side of the sticker. I could have opacity and fill at 100% but it wouldn’t make a difference on those white parts.
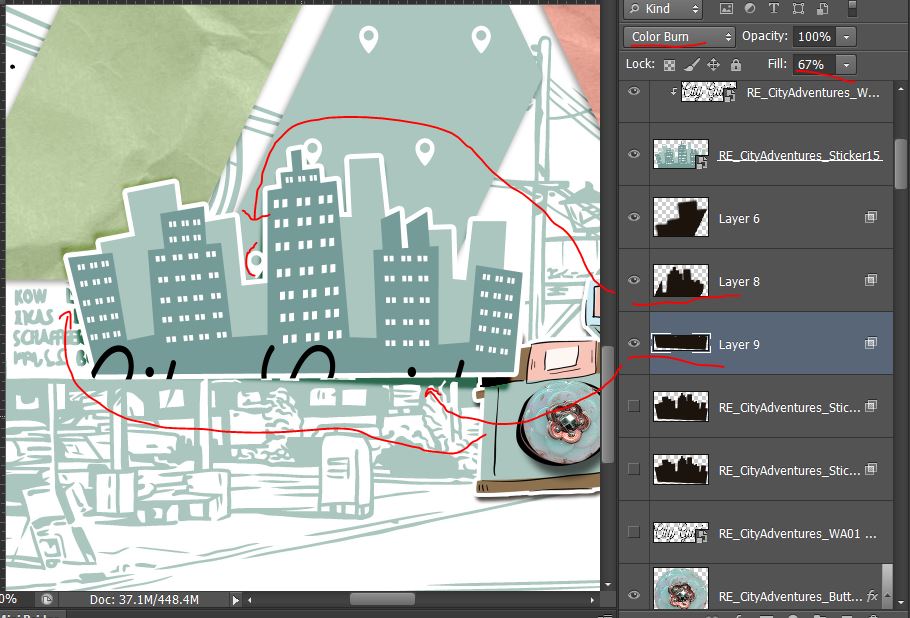
So backing up, how did I get Layers 6,8,9? (And where did 7 go? Honestly, I have no idea on that one at this point but that’s also not important, and I don’t think it had anything to do with revenge from the old kids ‘7 ate nine’ joke).
Let me zoom out a bit. To get Layer 6, I started with just the separated shadow layer (RE_CityAdventures_Sticker15_Drop S) as the active layer and then Ctrl clicked the thumbnail for the green paper shape to get marching ants around it’s perimeter like this
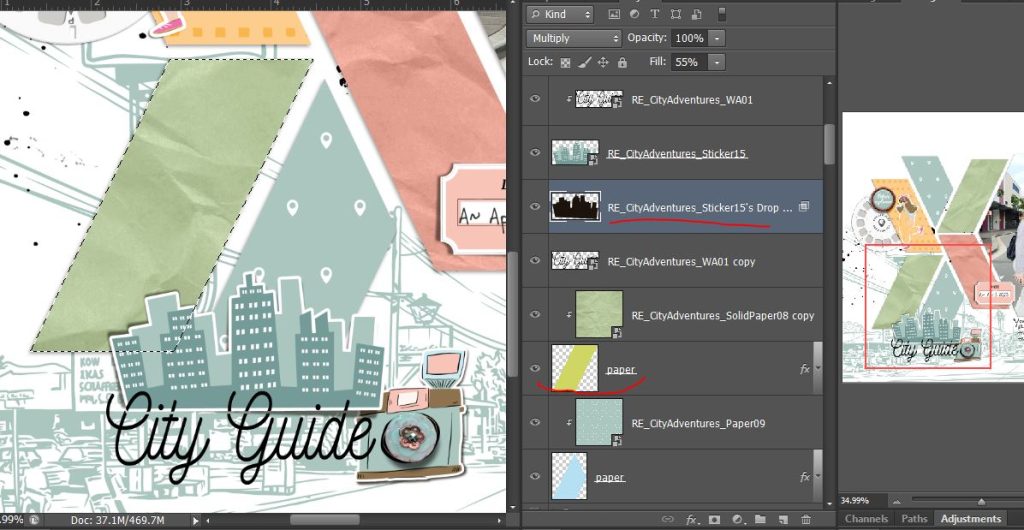
(just a note that you need to Ctrl Click the thumbnail of the paper shape if using a template, not the paper clipped to it or you will select the whole 12×12 inch paper size and effectively not cut your shadow at all, you will just duplicate the entire shadow, as is).
Then with the marching ants going, hit Ctrl J (the duplicate selection shortcut) to put just the part of the shadow that falls in the green parallelogram shape onto it’s own layer. That’s how I got Layer 6 like this.

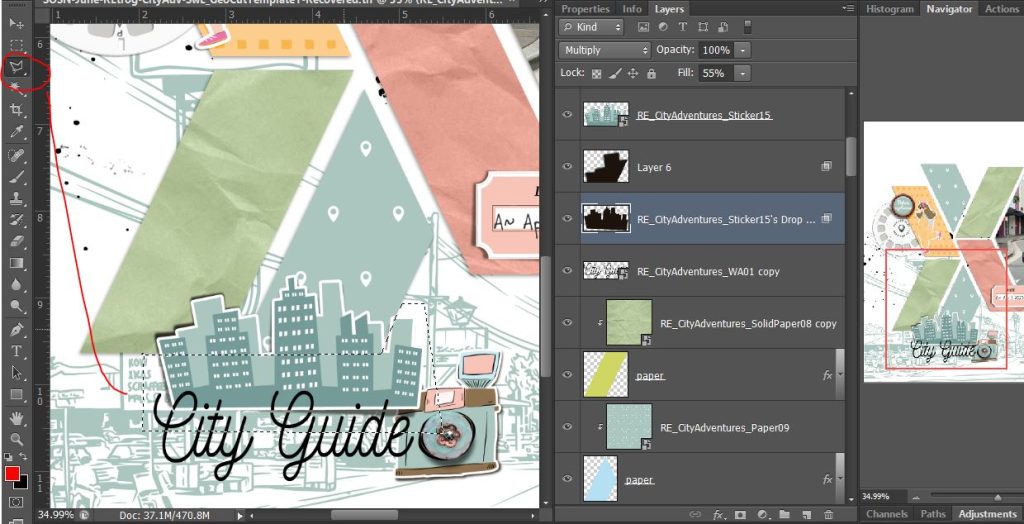
Layer 6 came up as Multiply blend mode by default because that’s what the previous shadow layer was set to and it copies those details, but now turning off the visibility (eye) on the original shadow layer you can see Layer 6 is just the shadow restricted to that green paper spot, and I can then go and change that to ColorBurn because it works on the solid green or whatever I prefer.
I used the same steps to get marching ants on the blue paper shape shadow portion, and then to get the bottom part of the shadow, I again went back to the original shadow and initially, I used the Marquee tool to drag a rectangle that started at the bottom of the green paper shape and covered the whole of the bottom half of the sticker but the Polygonal Lasoo tool for this shape would probably have been better to get more of the right side of the shadow, especially if more was showing.
For a more complex shape that I wouldn’t want to take forever lasooing, I would move Layer 6 down the Layers Palette and clip it above the crumpled paper layer, and do the same to Layer 8, clipping it above the blue geo paper and then just move the original shadow layer to above the white sketchy background (or above the camera sticker layer in this case). Understanding how layers work, this means the parts of the original shadow that are under the green parallelogram and blue geo paper are hidden and wouldn’t influence Layer 6 or 8.
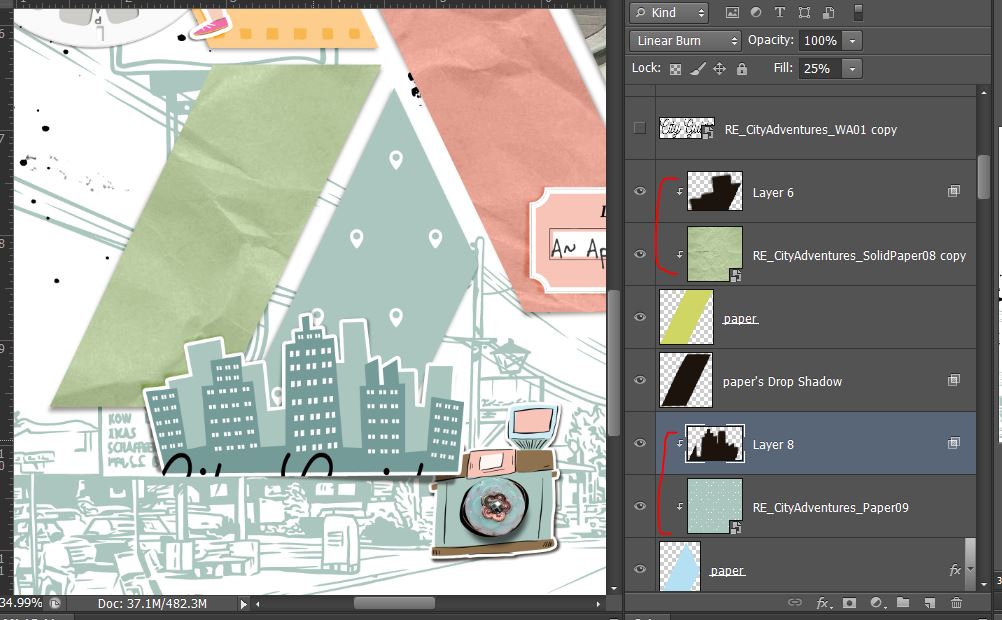
So in the above shot, I have Colour Burn on Layer 6 so some of the green is coming through in the shadow, Linear Burn on Layer 8 and Multiply on the bottom part of the shadow. Because the bottom overlaps the camera sticker where it is brown, Linear Burn was making the shadowing look super dark in that corner and to save me doing more shadow splitting, that’s why I went with multiply there.
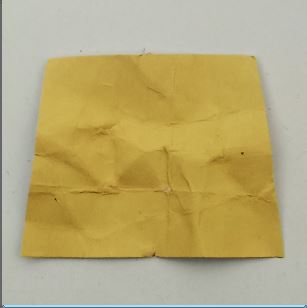
Before finishing up my page, I did warp the crumpled paper area shadows on my page as well. I have studied them before too and this photo gives you an idea of why I tweaked those especially. It’s a trapezium of paper from a diecut machine with normal yellow paper that I just scrunched up before flattening out again, but I figured the creasing would give the digital parallelograms similar shadow issues.
More split shadows: I used the same technique to split the shadows on the date tag and girl sticker shadows on this page to give them some ColorBurn shadows, but not the wood rimmed flair in the end. After playing around with the sliders, all I could get was a neon orange . I think the density maybe required for a shadow on that kind of solid object made it look like it should be darker and less orangey but even at low fill or opacity, it looked like the shadow was wrong. This is why shadowing often takes me longer than actually scrapping these days but I’m always learning. I think the date tag was worth doing, the girl sticker, not as much but I didn’t have any flowers on this page or anything bulky like in my photography experiment. I guess that will be the real test next time I scrap.
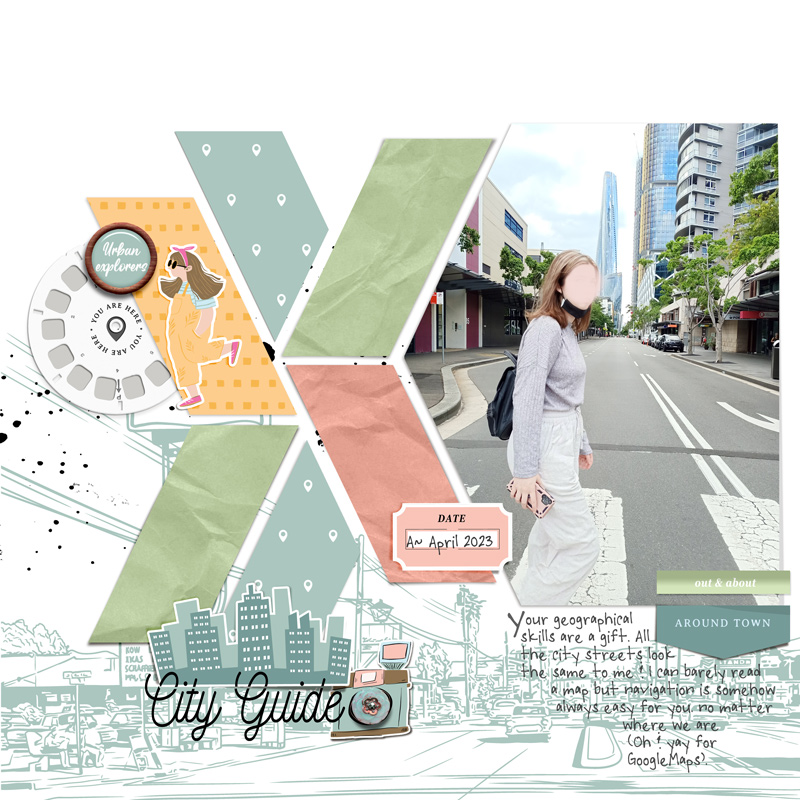
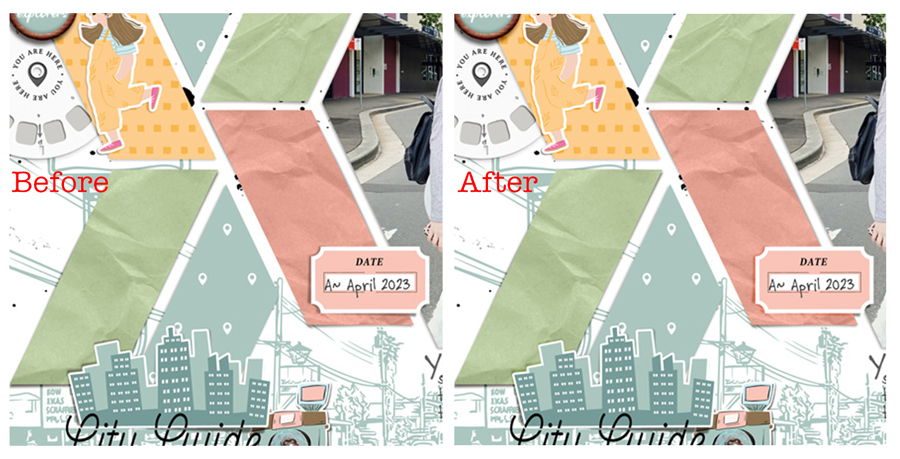
Here’s my final page using SwL’s Geo Cut templates and Rachel Etrog’s City Adventures kit with split shadows, and then a Before and After zoomed in that shows my normal Multiply shadows as the Before versus the Split Shadowing from this process post as the After.
Not sure if this is something I’d do all the time but definitely something for me to think about if my shadows feel a bit ‘off’ sometimes. Hope you followed along okay and tag me if you use this process in the gallery.
And lastly, if this and the previous post has you interested in using colored shadows and you are also a fan of Actions, Mommyish Designs also has this pack available. Check out the video linked in her description for more info and as always check your program can handle actions before purchasing.