Days of the Week Planner Stickers
I have fallen in love with playing with my planner lately and I’m looking forward to sharing some posts with you about that process!
Today, I want to share with you how I make days of the week stickers for my planner using Just Jaimee’s monthly planer kit.
I love the stickers that come with Just Jaimee’s Printable Planner Kit. I used September’s kit for my planner stickers in this post.
This kit comes with two printable PNG pages all ready to be cut out on a cutting machine, like a Silhouette. I love those, but they don’t include enough days of the week stickers to cover the entire month.
So, I decided to put together a sheet of just days of the week stickers that would have enough for one month.
I did this by dragging the individual “hello (day of the week)” stickers (also included in the kit) into a letter sized document in Photoshop. I lined up one week of stickers and made five duplicates. I also brought in the plain day of the week stickers to go in my monthly spread.
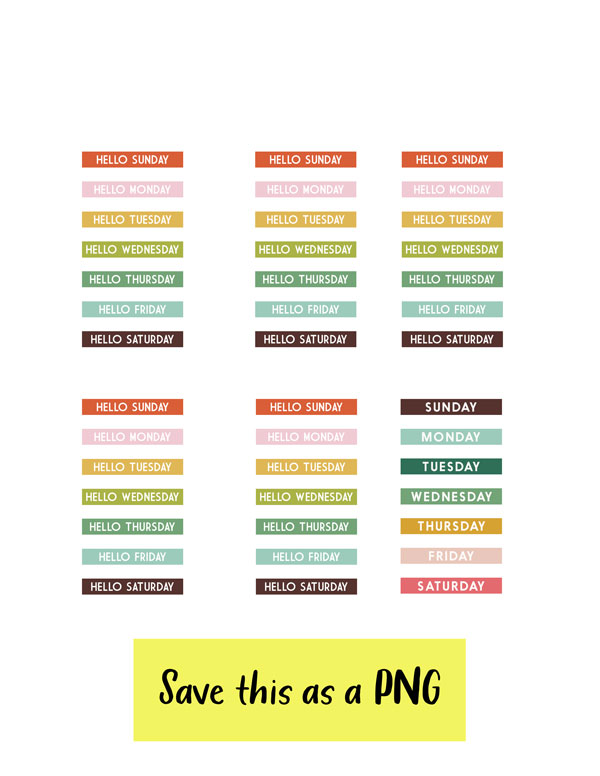
I saved this file as a PNG so that I could easily bring it into my Silhouette software for tracing and then cutting.
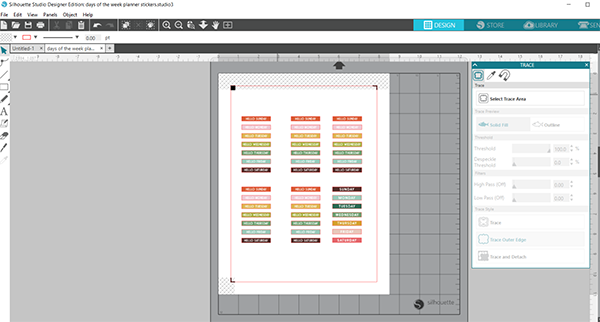
After opening this PNG file in the Silhouette software, I selected the Registration Marks and then I selected the trace area around the boxes with the days of the week labels.
To do this, open the trace window, click on the button that says “select trace area”, draw a box around the stickers, making sure that the high pass filter is off and the threshold is at 100%, and click on “trace outer edge”.
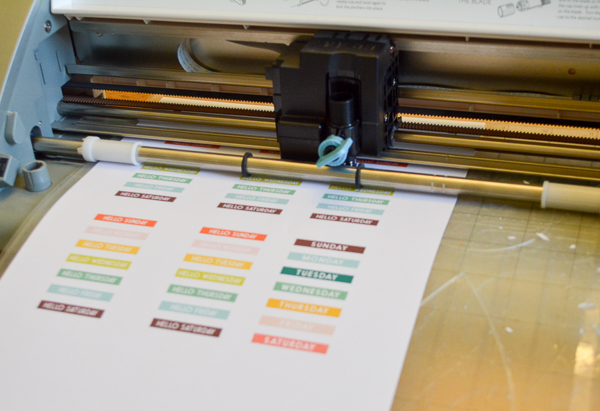
Next, send this to print and position on your cutting mat.
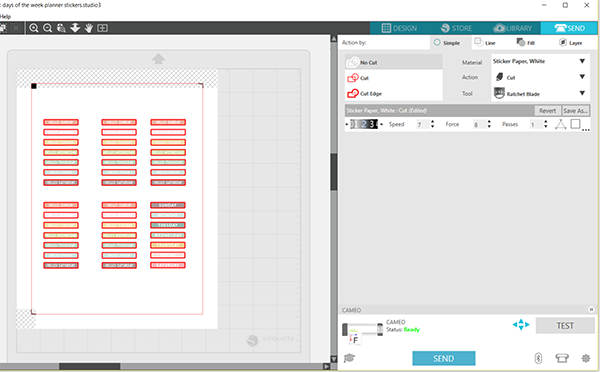
Then you can prepare it to send to your Silhouette for cutting. To do this, select the “send” button at the top of the page and cut settings will appear. For “material”, I selected “Sticker Paper, White” and I changed the speed to 7 and Force to 8 for a cut that doesn’t go all the way through the sticker paper. This is called a “kiss” cut.
Select send for this to be sent to the Silhouette.
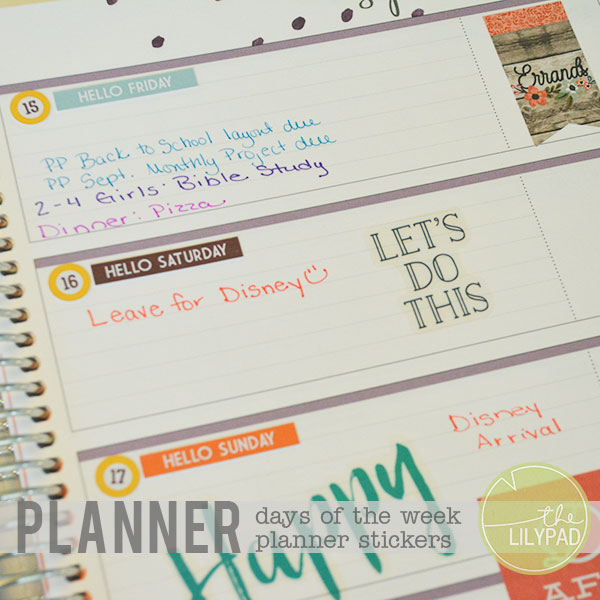
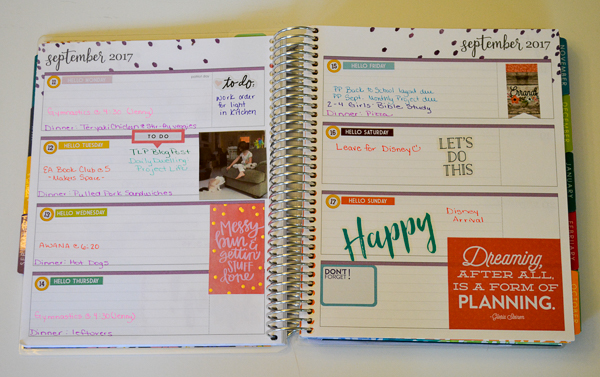
I placed these days of the week stickers over the days that were printed on my planner. These are just so much more colorful and fun!! I also added extra stickers and photos. I’ll continue adding to this spread in my planner as the week goes on.
Here’s a look at this week in my planner before and after adding stickers.
Before adding “days of the week” stickers:

After adding “Days of the Week” stickers, photos and other stickers for fun!!
If you don’t have a cutting machine, you can still print these days of the week stickers out on sticker paper and they’re easy to cut out with a paper trimmer or just plain ol’ scissors since they’re in straight lined boxes. 🙂