Hybrid Tutorial: Shaker Cards
Cards are one of my favorite hybrid projects to create. Those who are not familiar with card making may not know of all the different varieties of hybrid cards you can make. I’ve been trying out so many lately and I wanted to share a type of card that I have fell in love with. Shaker cards. At first glance shaker cards seem very elaborate and hard to make. Not so! Today I’m going to show you with a short tutorial how easy it is to make a shaker card.
 Supplies Needed:
- Pre-folded Card
- Transparent material {plastic bag, sheet protector, transparency, etc}
- Sequins/Confetti
- Adhesive
- Additional embellishments (optional)
- Scissors/exacto knife/Silhouette Cameo
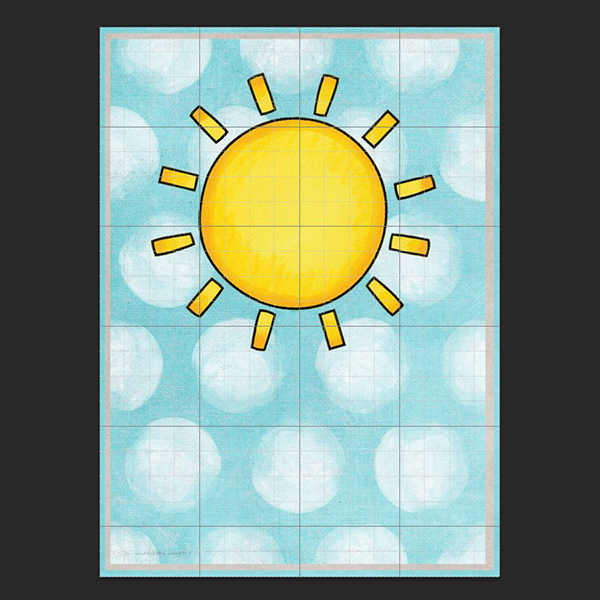
1. Begin by designing the base of your card in Photoshop. I used four papers from the . In the picture below it shows the order of my papers, minus my bottommost layer.. The yellow paper is the paper that will be seen through the “window” of the card. Be sure your papers are in the correct order before proceeding. Layer the sun from Kate’s

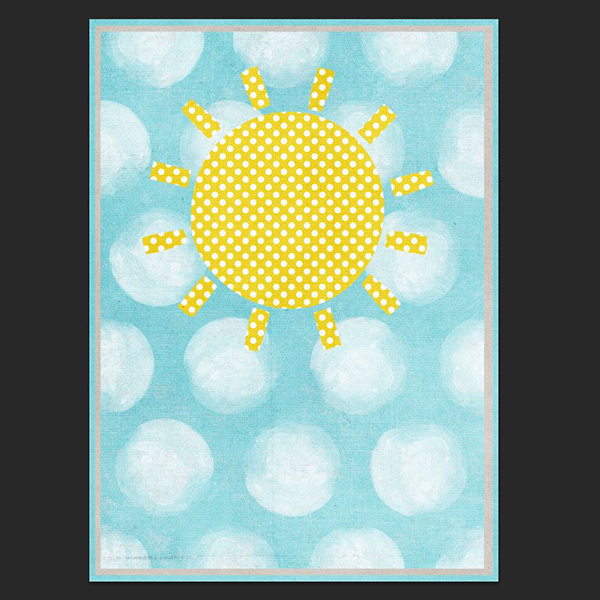
2. Select the sun layer so that it has marching ants around it. To do this press CTRL + left mouse click. With the sun still selected move down to your topmost paper. Hit delete. This should delete the shape of the sun from your paper thus creating a “window”. Then hit CTRL + D to remove the marching ants and use they button to turn off the sun.
Before window:
After window:
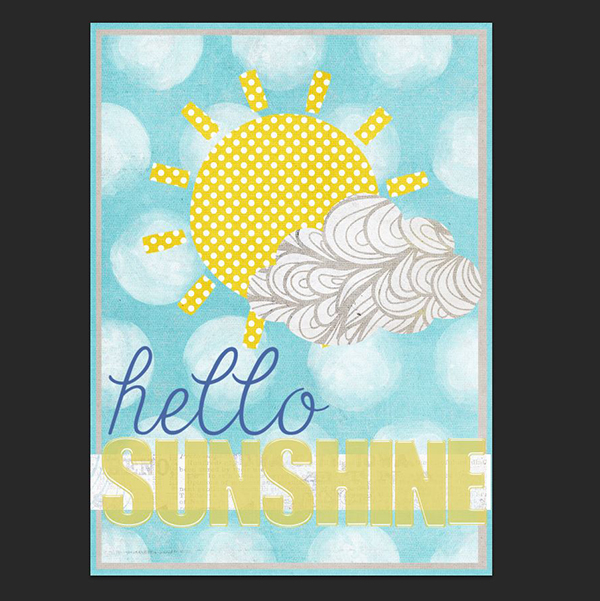
3. Finish designing your card. This how mine looked in photoshop before I separated the pieces to print.
4. Print your card pieces separately. Each layer will need to printed and then cut separately so you can assemble the shaker part of the card. I did use my Silhouette Cameo to cut my pieces out, but it is doable to cut these pieces by hand. In the past I made these type of cards with just scissors. You do NOT have to have a fancy machine to create these fun cards!
5. Lets assemble the shaker part! Take your “window” piece of paper, and adhere your transparent material to the card, being sure to leave one end open. To make things easier for myself I used a transparent bag that used to hold confetti. I did this so I would have a premade pocket. If you do not have a bag available to you that is okay, it just means you have to make one! Create the bag by placing two pieces of your transparent material together and adhere them with adhesive. Or if you are handy with a sewing machine sew the sides up. Just remember how ever you make your bag leave one side open!

6. Fill you bag with sequins/confetti.
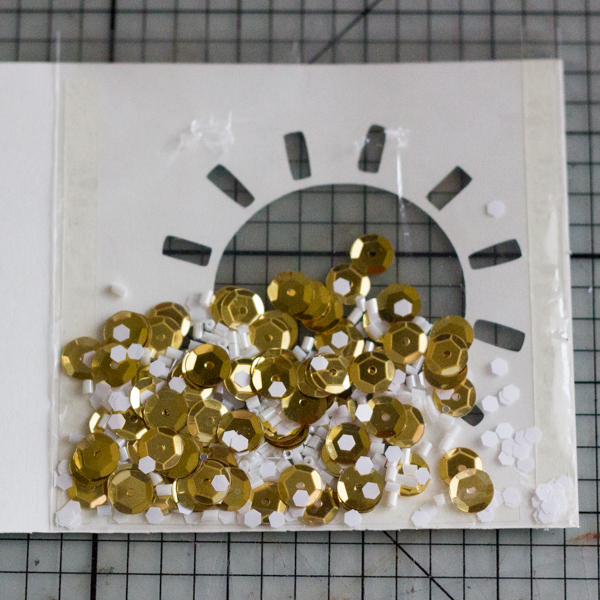
7. Trim any access plastic you have and then seal your bag with adhesive.
8. Adhere your “window” to your paper that you want to peek through. You can always refer back to your Photoshop rendition if you’ve forgotten the order they go in. I do that often!
9. Continue to assemble your card layers as you normally would. Add any extra embellishments to jazz up your card. I added a few enamel dots and some Stickles glitter to mine.
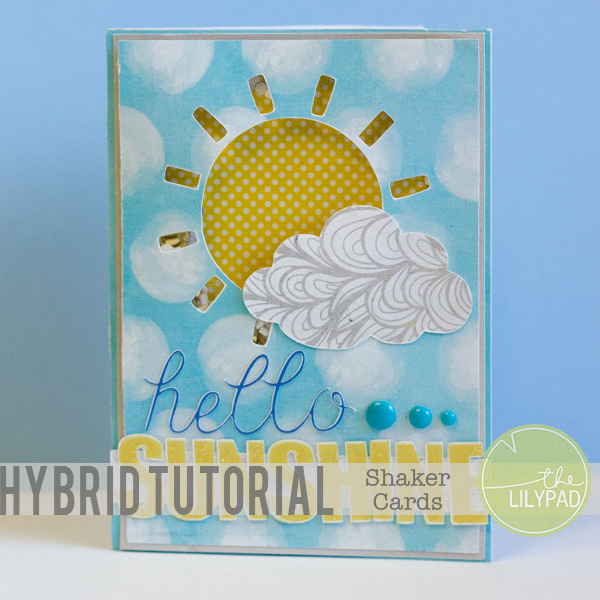
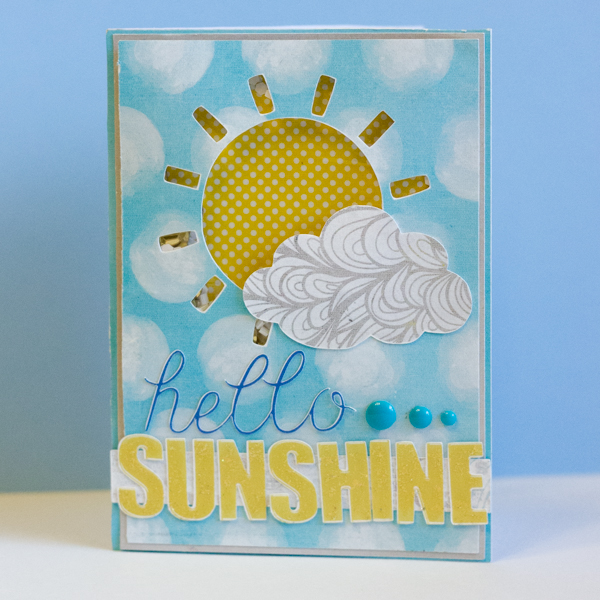
Your finished! Shake that card of yours and see the confetti float around! It really is fun to see the confetti through the window. Here are two pictures of my finished card. One standing up, and then one lying down to see the “shaker” effect better.

I hope you have enjoyed this tutorial and it inspires you to create some shaker cards. Please share any of your creations with us in TLP Gallery. We love to see what you make!


