Gradient Tool Blending in Photoshop
Hello everyone! I’m dropping in today with a tip for blending two designs together with the Gradient Tool in Photoshop. I love using journal cards on my digital scrapbooking pages – but sometimes instead of one perfect card, I find that I want to combine parts of two different cards. I did just that on this page (click on layout for gallery credits):

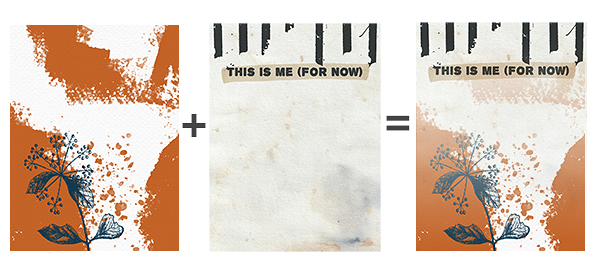
Notice the focal card in the middle of the page? That is actually two journal cards that I combined with the Gradient Tool. Here is the Before and After:
This technique is easy to accomplish in Photoshop.
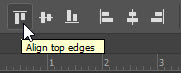
Step 1. Place the two journal cards directly on top of each other. Activate both journal cards in the layers palette by clicking one then, while holding down the Shift or Ctrl key, click on the other. Now use the alignment tools at the top of the workspace. I generally use the top and a side alignment to make sure the cards are directly on top of each other.
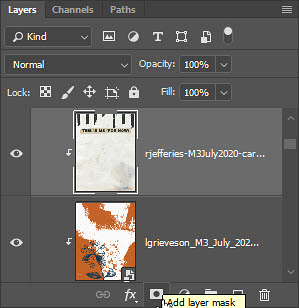
Step 2. Add a layer mask to the top card. (Make sure the mask is all white, or you will hide the card entirely.)
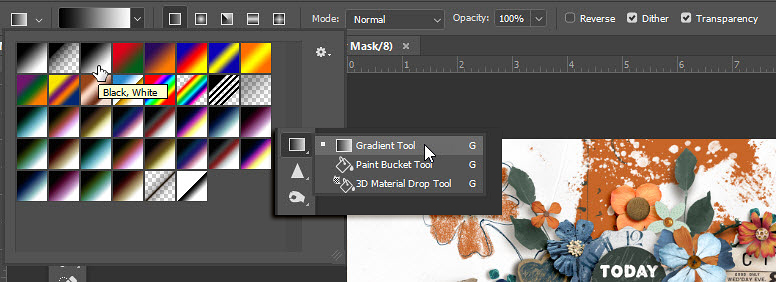
Step 3. Activate the layer mask and apply a black and white gradient to it. The black area will be hidden and the white area will show (hiding that part of the bottom journal card). Select the Gradient Tool and choose Black/White from the Gradient Picker. The gradient should be set to Linear, Normal, 100% opacity.
Now activate the layer mask next to the top journal card. Depending on which part of the top card you want to show either drag from the bottom toward the top or the top toward the bottom. I wanted the top part of the card to show so I clicked on the bottom and dragged the gradient tool upwards to hide the bottom of the card. This is what my layers looked like after I applied the gradient to the layer mask:

Here is another look at the blended card on my page:
I hope you have fun with this technique! I can’t wait to see your blended creations in the Gallery. 🙂
Until next time ~
Judie (HeyJude)


