Digital Sketch Blending
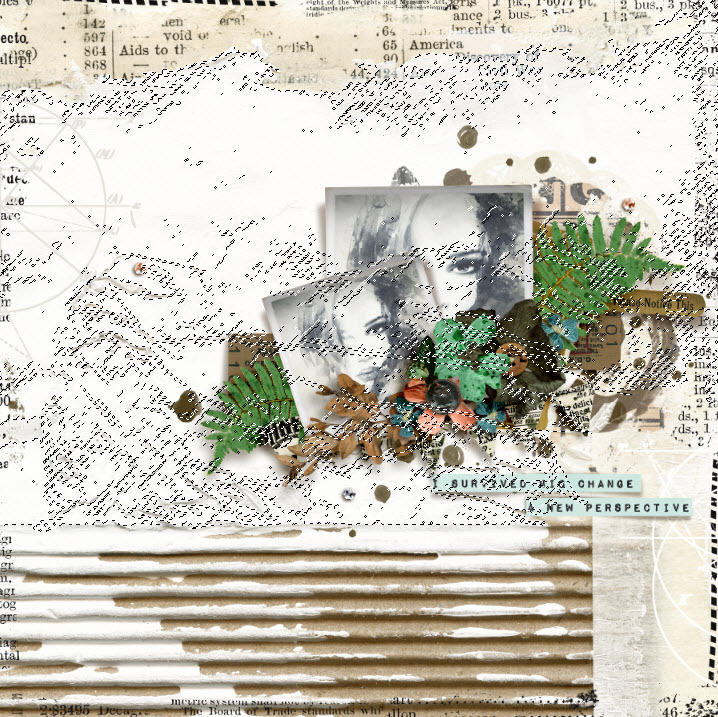
Hello all my artsy friends! I am back with a tip for quickly masking an area on digital paper. Have you ever wanted to constrict a photo, sketch or digital paper to a particular area on your page? I was working with these amazing mixed media pages by Rachel Jefferies (available in today’s SOSN sale) and wanted to add a back ground sketch in the gessoed area. The sketch was larger than that area so I needed a quick way to create a mask that would match the edges.

I initially added the sketch to the page and then tried to create the mask by hand by painting over the areas of the sketch that went beyond the gessoed part of the background. This method works, but takes quite a bit of time to complete. Instead I decided to try the Magic Wand tool to create a quick selection of the gessoed area. This method was much faster and I was able to create a mask for the sketch in just a minute or two.
These are the steps I followed:
1. Select the Magic Wand Tool and adjust the settings to Tolerance: 10; Anti-alias; Contiguous

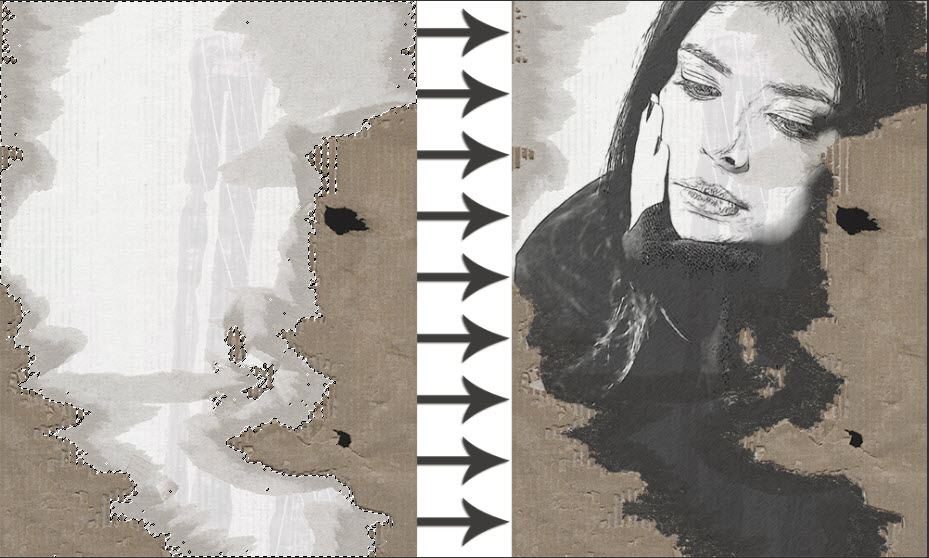
2. Now take the tool and click on the area of the page that you want to select. Depending on how uniform the coloring is, you might need to click a couple of times to get the selection you want. The lower the Tolerance setting, the more selective the tool will be. If the area you are selecting is significantly different in color than the surrounding areas, you can boost the Tolerance setting and get a larger selection. This is what my selection looked like:
3. Once your selection is complete, you need to copy the selected are onto a new layer so that you can use it as a clipping mask. The shortcut for this is Ctrl-J in Photoshop. You should now see a new layer above the background paper with just the selected area included. Now add your sketch (or photo or paper) in the layer above the selection layer and clip it to the selection (Ctrl-G is the shortcut in Photoshop).

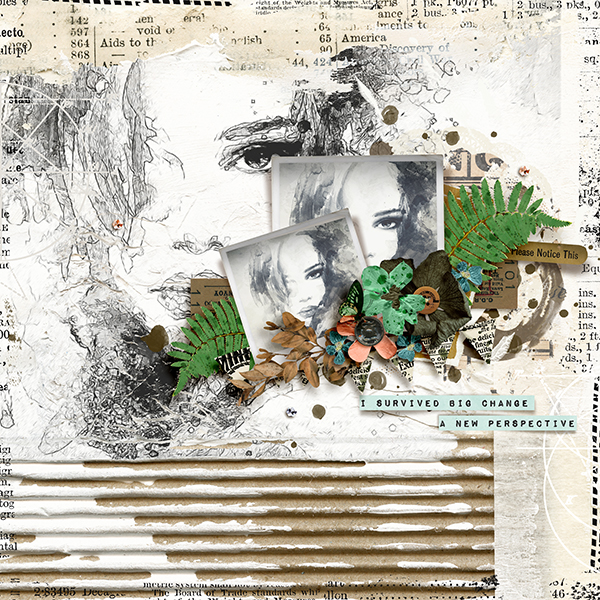
Here is my finished page with the background sketch clipped to the selection layer:
Here is another example of the technique:
I will be back with a blog post next Wednesday with another quick tip related to this example. Be sure to join me and see what I do with it!
And there you go! A super-quick way to create a selection mask. I hope you find this tip useful in your digital creative process. Be sure to link us up to your pages so we can see how you used it. 🙂
Until next time ~
Judie (HeyJude)


