Creating Snow in Photoshop & PSE
Hello everyone! I don’t know about you, but we got some awesome snow this weekend in the Southern part of the United States. Growing up in the north, I have really missed the sight of snow in December – so the winter storm was an unexpected pleasure. I took several photos of the snowfall, and I thought it would also be so cool to create this effect in Photoshop. It turns out that there is a very simple way of creating digital snow that works in both Photoshop and PSE.
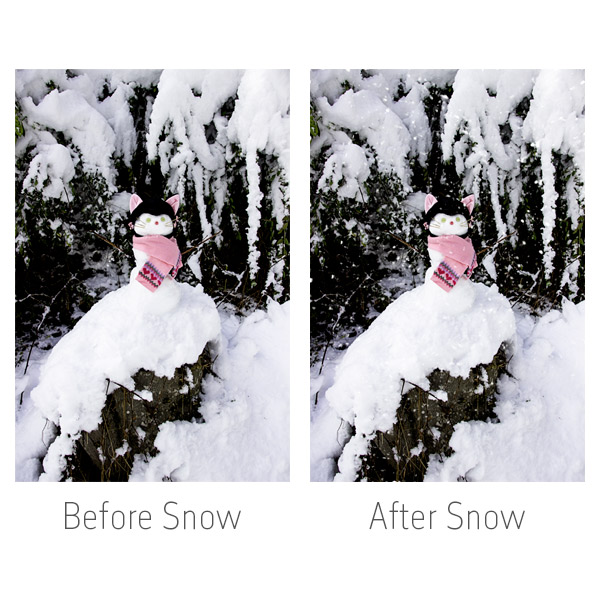
Here is a peek at the technique in practice:
How did I create this effect? There are actually several ways to create create digital snow. You can use round brushes (playing with the jitter and opacity settings), create your own scattered snow brushes or create some random snow flakes with a couple of filters. This last method is probably the quickest of all of them, and is the one I am going to share with you today.
Step 1:
Open your photo and size it appropriately. My photo was sized at 72 dpi | 4 inches by 6 inches. Add a new layer just above the photo (click on the New Layer button at the bottom of the layers palette in Photoshop CC). Now fill this layer with black. You can do this several ways, but the easiest is to hit “D” to set the foreground/background to black and white. Then click on Alt > Backspace to fill the layer with black.
Step 2:
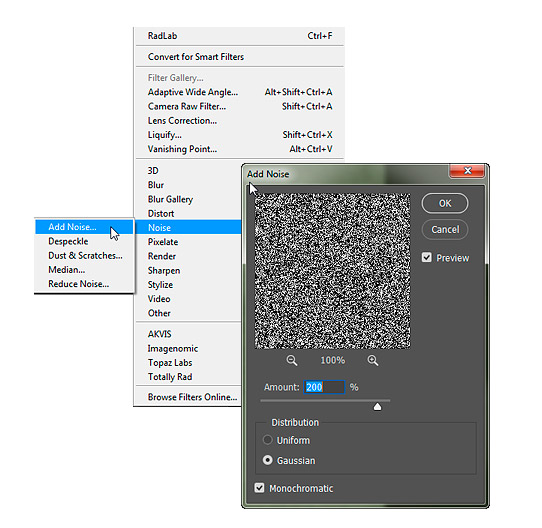
Now apply a noise filter to the new black layer. Click on Filter in the menu at the top of the work space and choose Noise > Add Noise from the drop down menu. Set the amount anywhere between 200 and 240 and make sure Gaussian and Monochromatic are both checked.
Step 3:
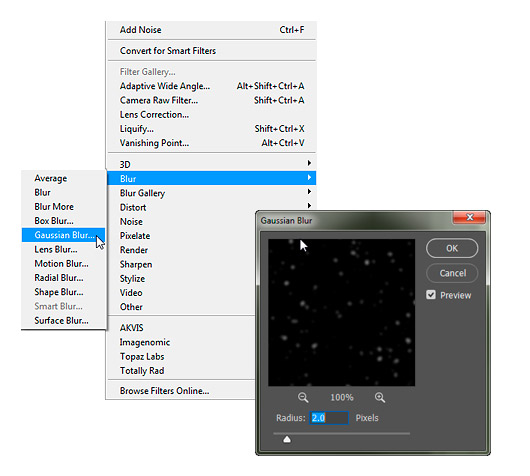
Apply a Gaussian Blur to the noise layer by choosing Blur > Gaussian Blur from the Filter drop down menu. Set the radius to 2 pixels.
Step 4:
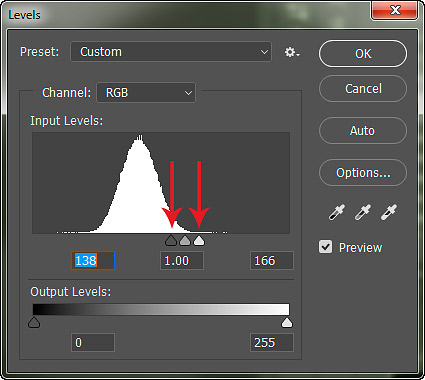
Now add a levels adjustment to the noise layer to make your digital snow appear. Ctrl > L will bring up the Levels dialogue box. In that box, adjust the black and white sliders until you have the amount of snow you desire. You can see the settings I used for my photo below.
Step 5:
The last step is to set the blend mode for the noise layer to Screen. This will make the black background disappear and leave just the snowflakes on your photo.
Step 6 (optional):
You can leave the photo as it appears after Step 5. If you want the snow to be more visible, or want more of it – just make copies of the snow layer (Ctrl > J) and move them around the photo. I used three snow layers on my photo. I made the first copy a little smaller (Ctrl > T, then hold down the Shift key while dragging the corners of the layer), and the second copy a little larger to made the snowflakes a little more random. If snowflakes fall where you don’t want them, just add a layer mask and use a black brush to erase the unwanted snowflakes.
And through the magic of Photoshop (or PSE) we have digital snow! I hope you have fun with this technique and create some snow kissed photos of your own. 🙂
Here is another look at the before and after photos:
Until next time ~
Judie


