Color Swaps on Papers: Not just the Hue/Sat Slider!
Having blogged the Mixed Media Beginners series a few years back, I still feel artsy scrapping is not exactly my comfort zone and so everything just takes me longer. I really appreciate when the bones of an artistic background have been created for me but sometimes the flat jpeg in a mixed media paper pack means that I have to accept their artsy goodness in colours that don’t necessarily suit me…or at least I used to think that. Now I look past the colours to the ‘bones’ of the page design, knowing I can tweak or replace colours to make it fit my page better. Yes, there’s the Hue/Saturation slider but when you have something that contains multiple colours and you just want to tweak one or two, that can create more issues for me than it solves.
Today I’m using 2 different methods to replace single colours on an artsy paper from this Life Oh Life paper pack by LiLi Wee – and also the Hue / Sat slider that most digiscrappers would already know about and use (if not, there’s an older post about it here)
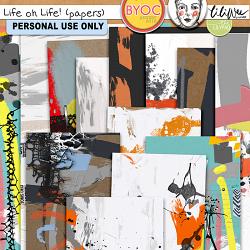
I’ve chosen a paper. You can see the original paper in thumbnail in the Layers Palette but it’s got red and yellowy paint and is shown larger with the next method. Ideally I think I want a more blue and green paint look, but the placement of these strokes suits my plan and it’s got an extra cut paper and grey-ish scratchy paint and charcoal splatter that I want to keep. If I just add a Hue/Sat Slider adjustment layer like we would often use to change the colour of a solid paper or element, it will change both those colours in the same way (which might work for you or me some other time but today I want different colours) and this is the result of pushing the Hue slider to the light-ish blue I want.
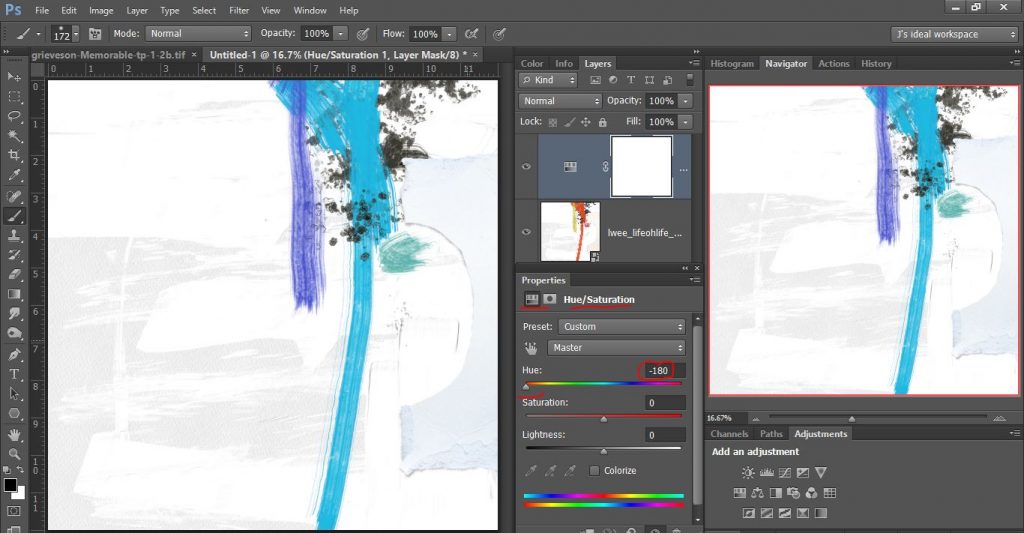
I can then activate and use the mask layer and paint back the original colour using a black brush, so I can restore other colours that I didn’t want in this hue, but I’m not exactly delicate or finessed with my brushwork, so there’s now red visible in my yellowy section again where I started painting from the top of the mask.
To reduce that issue, I could use the Refine: Color Range option within the Hue/Sat Mask Properties box. This opens another pop-up, where I can select using the dropper right on the paper the colour I want to mask and replace. But it’s pretty specific. Clicking where my red arrow is only selects so many pixels and doesn’t change the whole brushstroke with the default settings. 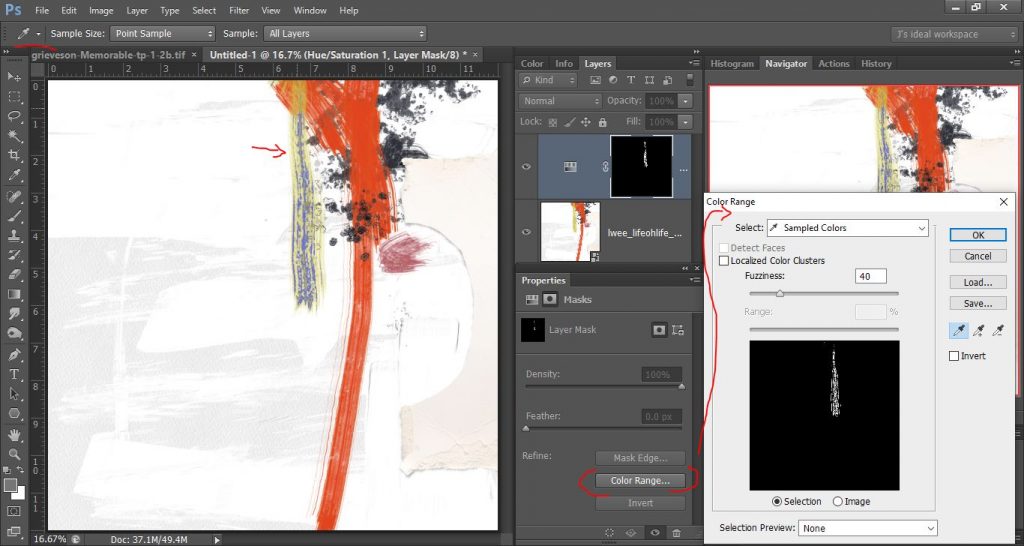
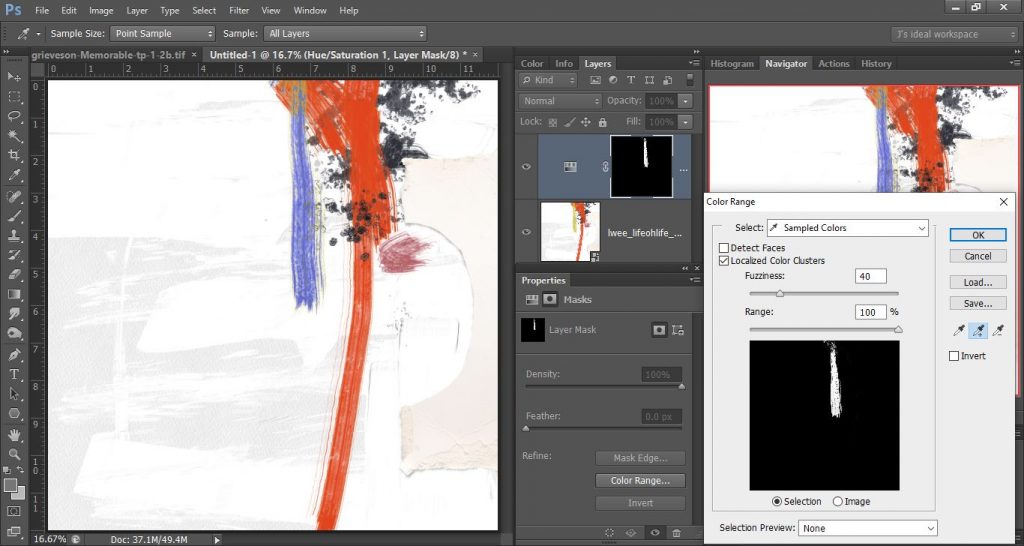
Using the plus dropper (activated under the save button) to click on a few extra points around to my original one above broadens the reach and gets me this, still not perfect up the top but better (and then I realised I wanted this part green and the red part to be blue so I just ditched this and used another method).
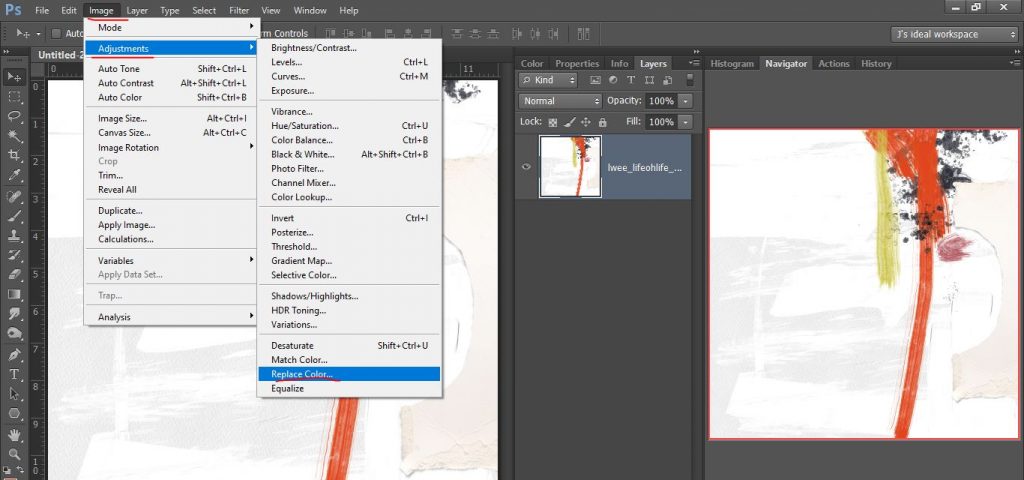
I’m going to start with the original paper again and that dominant red stroke and use the Replace Color Adjustment tool. Here’s where it is in the menu.
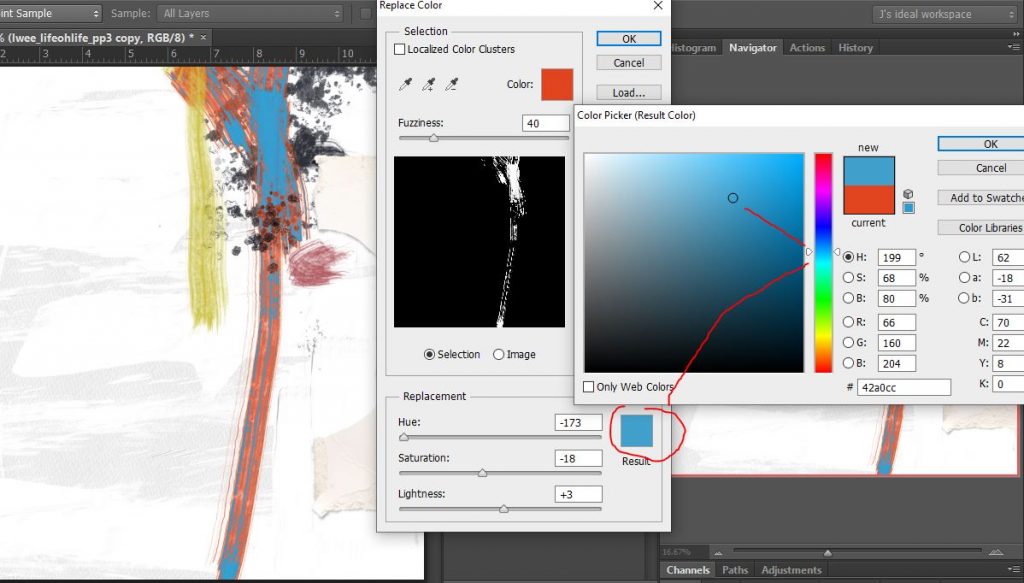
This is the pop up I get and I start with the selection color box using the eye dropper, I click on that colour square and to get the exact colour, I click the eyedropper straight on that red paint stroke where I’ve drawn the arrow and the selection box shows me a mask with the white area indicating where the selected colour is.
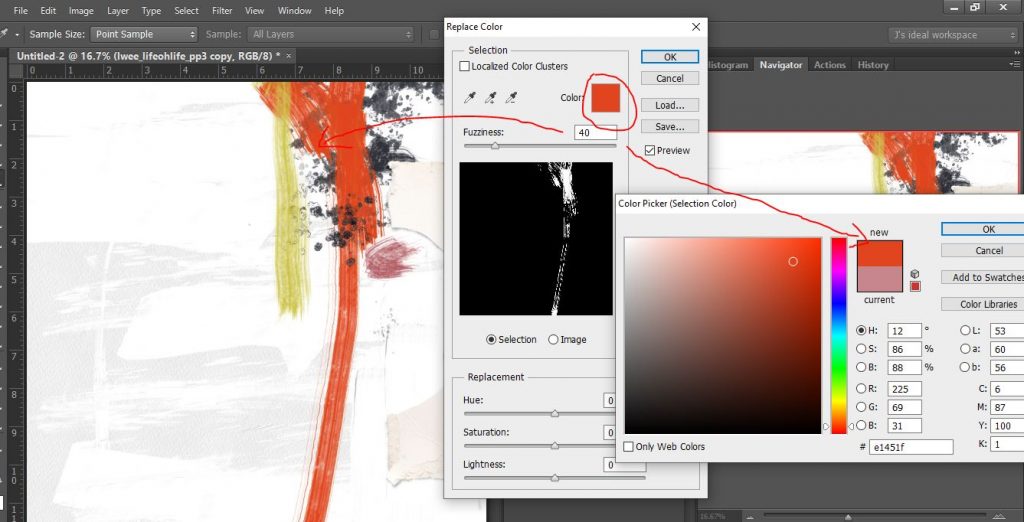
Now I choose the colour I want it to be using the Replacement section at the bottom of the pop-up. (You can alter your choice if it’s not quite right, the preview is very helpful in that respect but as you can see it’s not perfectly covering the red. The initial Hue/Sat click was perfect in that respect at least…
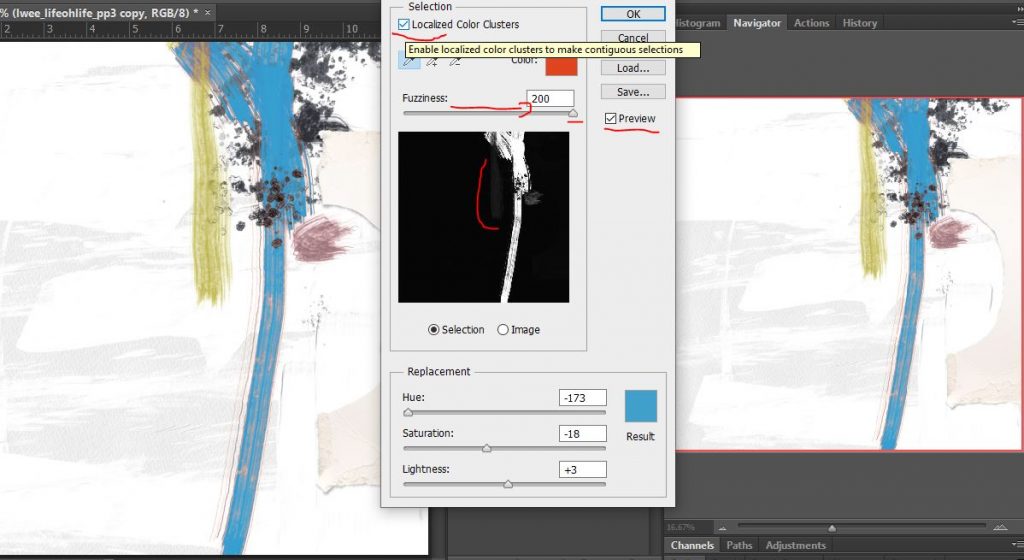
To get it to be more accurate, I tick ‘localised colour clusters’ and I increase the fuzziness slider so now you can see the blue has better coverage. Maybe if I had done this with the Hue/Sat Color Range, it would have worked better. Anyway you can see the result is better but it has also found some red in that yellowy paint stroke (shown in the dark grey vertical part of the selection mask preview)
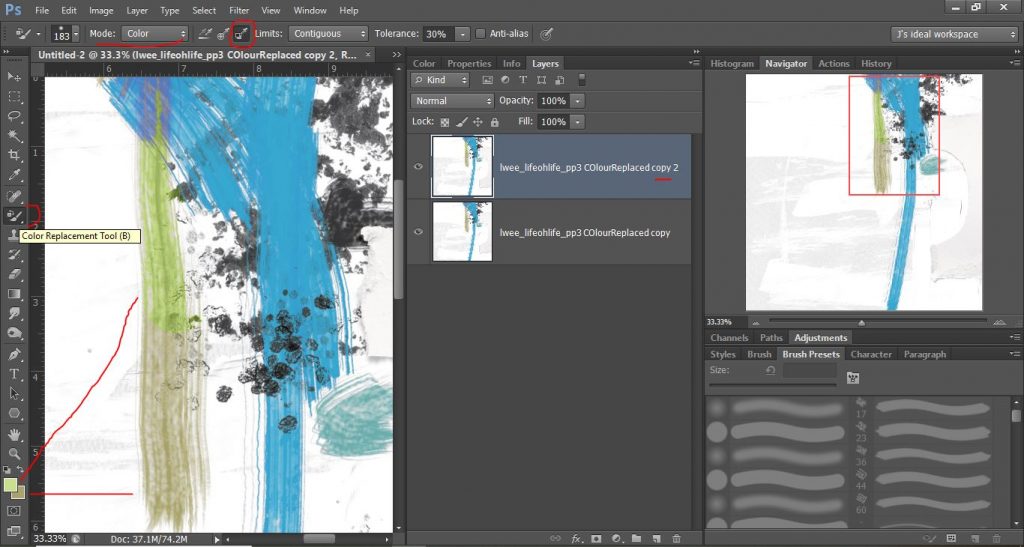
Now because the yellow has become a murky green, I think I want to make it a more light or grassy green like my son’s backpack straps in the photo I’m going to use. This time for more controlled colour replacement, I’m using the Color Replacement Brush tool method. (It might be hidden in your Brush Menu but you want to set the mode to Color and we will be selecting with the dropper tool the colour we want to ‘paint on’ and the colour we want to ‘paint over’. So we activate the ‘Sampling Background’ square and now we can set our foreground colour to whatever we want (I grabbed the hex code from my son’s backpack in the photo in another tab) and using the colour picker, I set the background colour by clicking on that murky green paint stroke. So in this screenshot you can see I have painted the top half of the page and was still rather inelegant with my brushing but it won’t change the blue paint- it searches for that background sampled colour (provided the Sampling Background button I’ve circled in red up the top is active). Having Contiguous selected in the Limits box at the top means Photoshop is actively looking for pixels attached or touching the ones that are in that murky green (or whatever your background sampled colour is) so you may have to toggle that off if your paint is more widespread and diffuse or remember to paint in various sections but this method can be really effective.
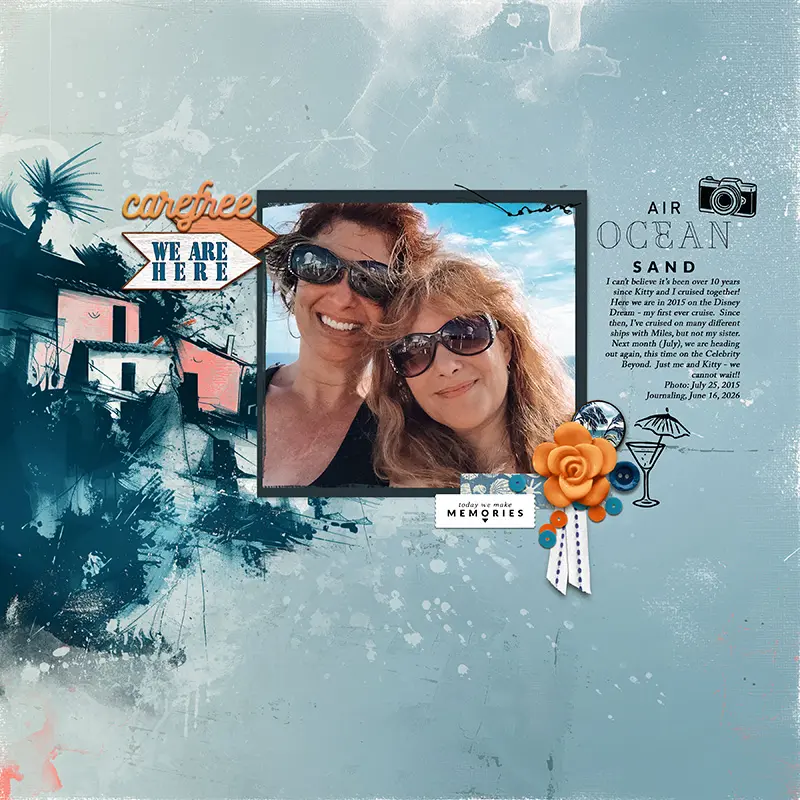
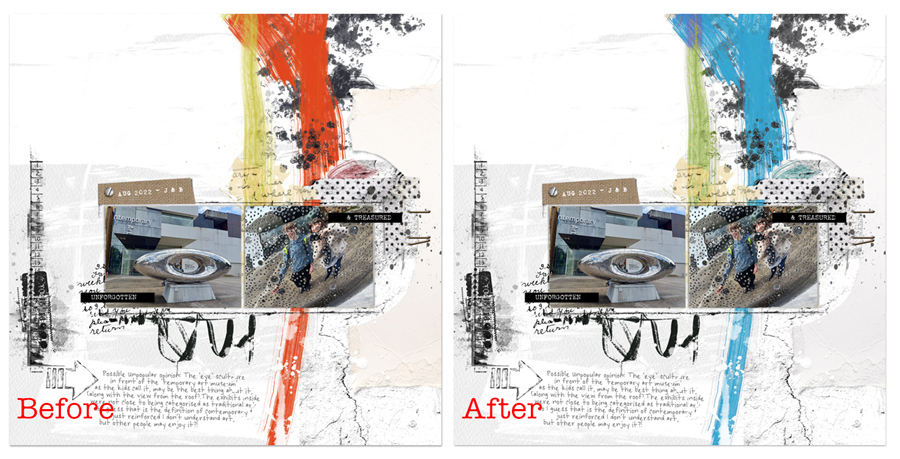
Now here’s my finished page with the two paper options side by side. These methods definitely extend the possibilities with your paper stash, as well as elements and can allow your colour swaps to be more precise than the hue/saturation slider method without having to mask areas if you don’t want to change the whole paper.
full page credits in the gallery
Do you already use these methods or does your program do something different?
Have you mastered the Hue/Sat slider?
Let me know if you have tips and tricks, and also pop over and check out Li Li’s Love Our Designers feature and store sale today if there’s something on your wish list knowing now how much extra potential they have!