Travel Ephemera
Hello all my artsy friends! I’m just popping in with a fun tip about creating and using travel ephemera on your digital scrapbooking pages. When I travel to new places (especially abroad) I always find the time to send a postcard to myself from the new location. It is so much fun to receive the “happy mail” after I get home and it always brings back fond memories of the trip. On our recent trip to Paris, I made sure to keep up with this tradition and air mailed a postcard back to the States. It took a couple weeks to get there, but it was a sweet treat to receive the post card along with the canceled stamp in the snail mail!
Ideas for starting (or continuing) your own post card mailing tradition
1. Take a picture of yourself mailing the post card from the travel location.
2. Take a picture of the post card in your home mailbox when you receive it.
3. Include your favorite memory of the trip on the post card, then use it as journaling.
4. Scan in the front and back of the post card and use it as an ephemera element on a digital page.
5. Extract the canceled stamp and use it on a digital page.
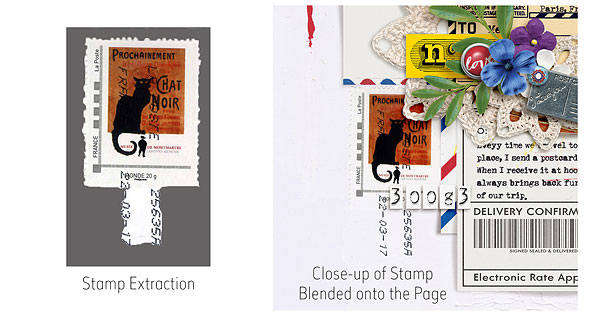
Here is a look at how I incorporated the post card (and stamp) onto a digital page (BTW – everything I used is in Today’s SOSN sale. Image is linked to the Gallery for full credits):

The postcard is framed in the middle of the page, and the canceled (Chat Noir) stamp is located in the bottom left corner of the page.
Extracting the stamp was an easy process for use on this page because I was extracting it from a white background for use on another white background.
Steps for Extracting and Blending the Canceled Stamp
1. Scan in the back of the post card where the stamp is located. You should scan it into a jpeg output at 300px or higher.
2. Use the quick selection tool (or extraction tool of your choice) to separate the stamp and cancellation onto a separate layer. If you are using the stamp on a similar colored background, your extraction does not need to be perfect. My extraction included parts of the post card in addition to the stamp/cancellation.
3. Move the extraction layer to your layout and place it on the page. Once you have it situated, change the blend mode to Darken or Multiply. This change in blend mode may do the trick, but if you want to brighten the colors up a bit, go on to Step 4.
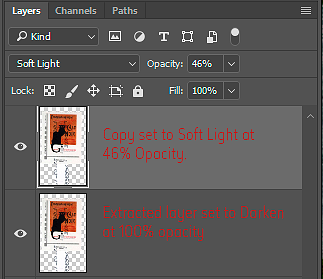
4. (Optional) Make a copy of the stamp layer (Ctrl J) and change its blend mode to Overlay or Soft Light. The reduce the opacity of the layer until you are happy with the effect. As always, feel free to play with the different blend modes. Depending on the colors of the stamp and your background, a different blend mode (or blend mode combination) might work better.
There you have it – a super fun and quick way to create your own travel ephemera and use it on your digital travel creations!
Until next time ~
Judie


