Tracing PNGS For Use In Hybrid Scrapbooking
Hey Lilypad peeps! It’s Katrina aka @kathunt13 (or hybrid girl LOL) sharing how to trace PNGS specifically in the Silhouette Studio software and also how I speed up my hybrid process by doing this. Now, be prepared, I have about 15 screenshots, but I am showing step by step on how to do this and how to make it quicker. Part of the hybrid process for me is the time it takes getting things ready to do a hybrid project.
This process is something that I do when I don’t feel particularly creative or just plain don’t want to scrap. It’s an alternative to making a page and a stress reliever for me! It’s also great when we go out of town and are just sitting around doing nothing in particular!
Some designers ( I won’t say all, because I don’t know!) include the element PNG and then element sticker PNGS. Honestly, unless I have trouble with the regular PNG for some reason, I usually use that and don’t bother with the sticker. You just have to play and figure out what works and want doesn’t. You will learn pretty quickly.
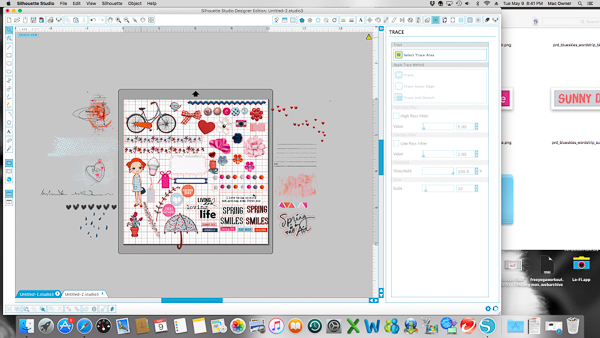
Open Silhouette Studio and your folder where your elements are that you want to trace. Drag the element over onto your Silhouette mat. Now…you cannot drag more than one at a time, I don’t think. If someone knows how, let me know PLEASE!!! Here I have moved to my mat, the two bike elements from Pink Reptile Designs Blue Skies Elements, which are a part of the BYOC for May, I am also in the trace menu. If you look at the top of the screen it’s the 8th button from the right. It’s highlighted blue here.

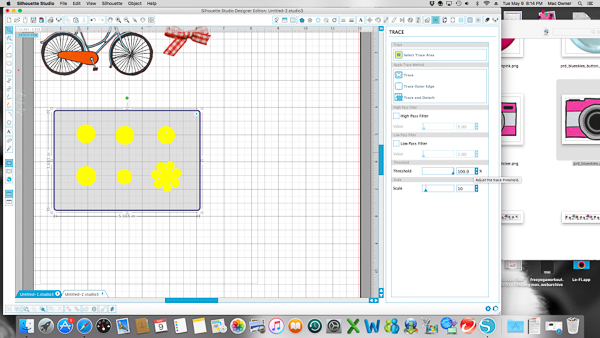
Click on the “Select Trace Area” button at the top of the trace menu. This will allow you to draw a box around the element you want to trace. When you do that, parts (or all if you are lucky!) of your element will turn yellow. This tells you that there will be a line that is traced around the area that is yellow. You will also notice the there are three choices “trace”, “trace outside edge only”, “trace and detach”. What you choose will depend on how you are wanting your element cut out.
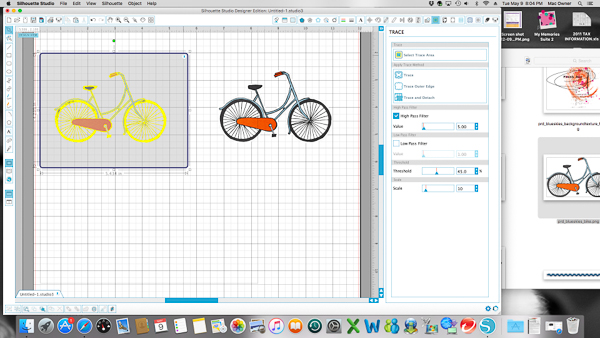
We know we want to trace around the bike, but the bike isn’t completely yellow. To solve that problem, you will uncheck the High Pass Filter, then move the slider on Threshold until your element is yellow.
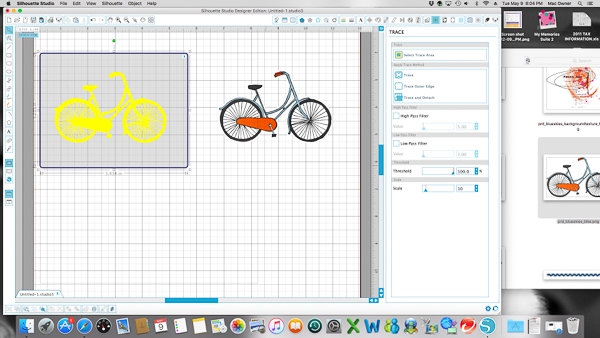
Now it’s time for the magic. If you select the first trace button, you will end up with the bike traced inside all open areas, like the spokes bars, etc. Which would be amazing on a page, but that would be pushing it and it would probably rip when you tried to take it off the mat. Or in my case, when I tried to apply to the layout with my clumsy fingers! If you select the second choice, trace outer edge, then you will end up with a cut line around just the outside of the bike shape, which is a much better element to cut and work with on your page. You can see the difference in the two tracings below. We are going to continue with just the outline of the bike.

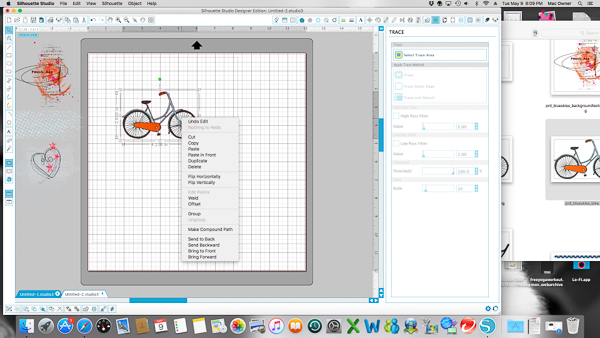
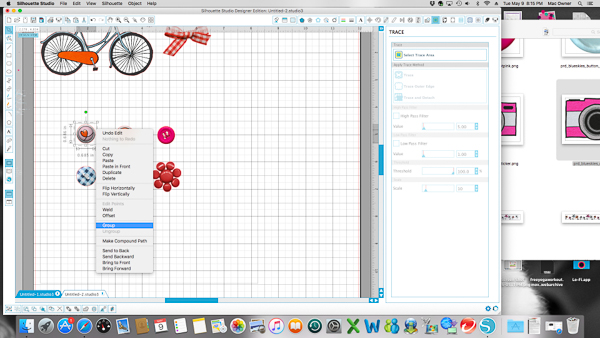
Now, here is the most important part of having success at tracing PNGs and cutting them out. DON’T MOVE ANYTHING at this point!! Draw a bigger box around the element and right click to bring up the sub menu. You want to group at this point. This groups the PNG with the cut lines you just made. Once they are grouped, you can move, resize and play to your hearts content!
So, now you know how to trace a single PNG and you are thinking, lady you are CRAZY! I don’t have time for this!! Well, you can do this with multiple elements, with just a few changes. I usually try to select elements that are similar in how I want to trace them. Outside edge only elements together, trace (both inside and outside lines) elements together. It just makes it a little quicker. So here I have placed several of the circle shaped elements together on the mat.
Select the trace area and draw a box around all the elements you just placed on your mat. For this example, I traced outside edge, because, well circles! This will create cut lines around each element individually. Remember, chances are you will have to uncheck the High Pass Filter and up your Threshold amount.
Once you have traced, then you will draw a box around all of them again (just like you did with the bike above, but making sure you have all the “buttons” in your box instead) and right click to bring up the same menu as before. The different is you are going to want to select Release Compound Path. What this does is releases the grouping of the cut lines you just created and lets you group them with the individual elements. 
Now, just draw a box, selecting each element individually, which will also grab the cut line for that element. Once you have the box drawn around, right click and select group. Then continue to do this with all the element you brought in at this point.
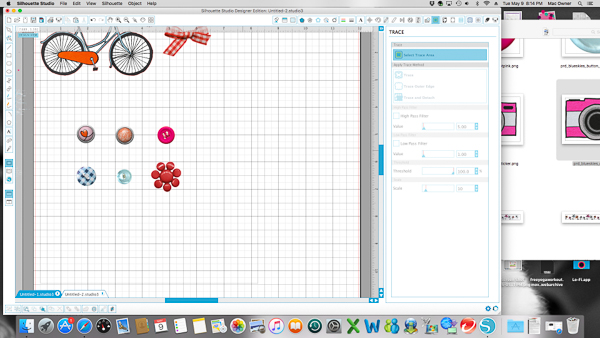
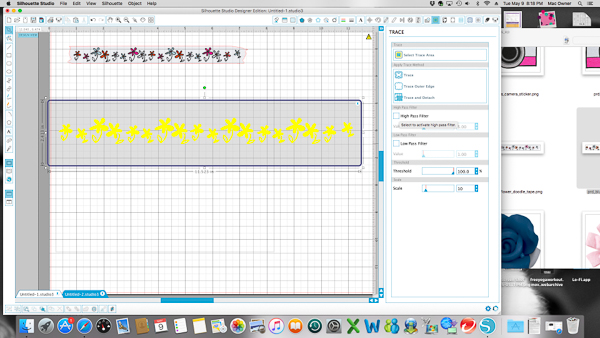
I even trace the washi tape strips and sometimes even the doodles, just to see if they might work. The example below worked perfectly for both the tape and doodles. I will have to increase the size of the doodle, but the flower would be cute to be sprinkled on a page. Tape is at the top, the doodles are below.
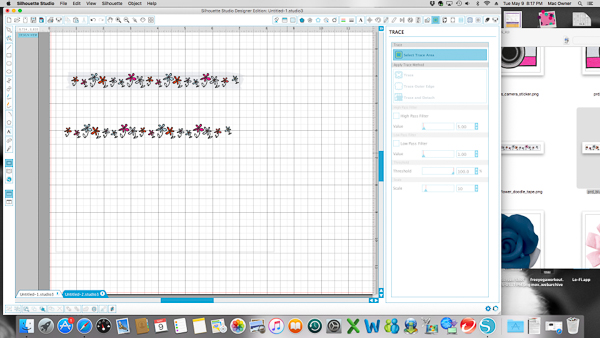

See, aren’t those flowers cute increase in size?!! I cannot wait to use them.
Now the rest of the process is to trace the all the elements in the kit. I KNOW, RIGHT?! Honestly, if you get a groove going, it doesn’t take long. And then they are ready and waiting for you when you want to do that hybrid project. Once I have them all traced, here is how my mat/screen looks. Things that do not trace well, are the things that I move to the outside of my mat….like the doodles, paint masks, tiny elements, etc. This way, they are there to remind me when I pull up the studio file that I may want to use those on my page.
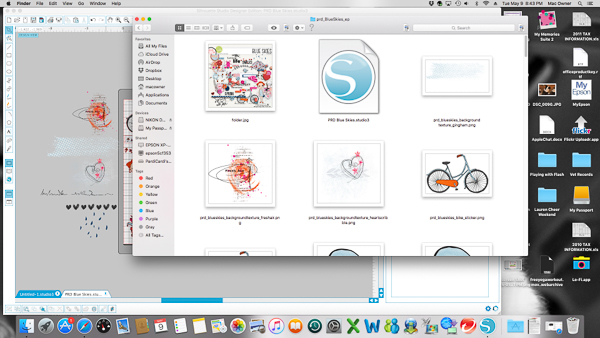
Once everything is traced and I have them arranged how I like them on the mat and the other elements out to the side that I may have not traced (or if I run out of room on my mat!), I save as a .studio file in the folder that the PNGs are in. I usually use the designer’s name and name of kit. Here you can see the file saved in the folder with the elements.
Whew!!! That was quite a tutorial!! Now, go try it!! And if you have any questions at all, leave them here or feel free to send me a private message thru the forum and I will help you anyway I can. Thanks if you made it this far!!!


