Photographing Pets
There’s nothing more fun than photographing pets but it can be a bit tricky to capture a good shot. Let me share a few tips with you that have helped me when photographing pets.
The two most important tips, in my opinion, are to be prepared and to be patient. Let me explain what I mean.
Being Prepared:
Look at your surroundings. Do you know what direction you would like your pet to face? Have you figured out where you will be in relation to your pet? Have you thought about the angle or distance between you and your pet? Do you have to adjust any camera settings and if so, take a few test shots beforehand so that when you place your pet into the position you’d like, you’ll be ready to take the photo. Have you checked to see if there is any clutter around the area you don’t wish to be in the shot? If there is, can you move the clutter out of the framing of your shot?
Check your lighting and where the light is coming from, is it enough to light your subject and, if not, can you adjust your camera settings and/or use an external light source such as a video light, speedlite, etc to provide ample lighting?
By checking these first, you can be prepared for bringing your pet into the room for photographing.
Of course, you sometimes are “in the moment” and just want to snap a photo and that’s perfectly ok. The most important thing is to capture that moment that you want to remember. Any photo is better than no photo, right? But….if you have some time beforehand, being prepared can help assure that you capture the best photo possible.
I know that in my home my kitchen gets a lot of warm light (compared to my dark living room), which is very flattering, and allows me to use more ambient light than my living room does.
BTW….ambient light is….light that is already present in a scene, before any additional lighting is added. It usually refers to natural light, either outdoors or coming through windows or indoor lighting from lamps, candles, etc.
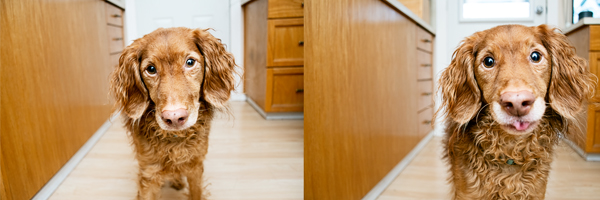
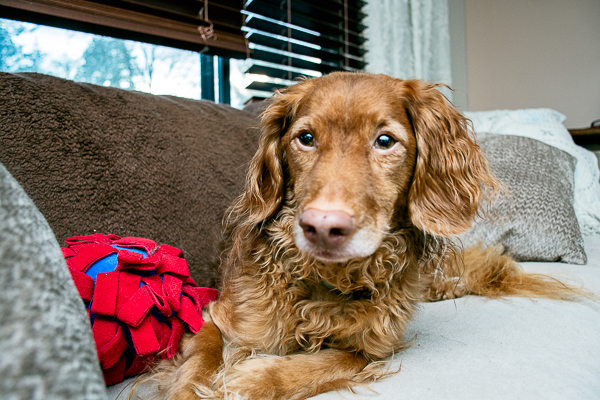
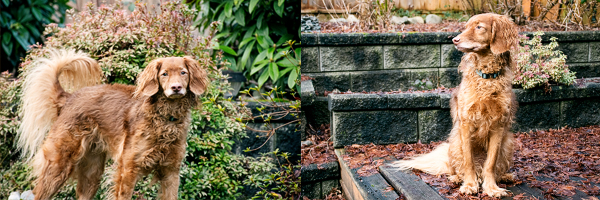
All of my sample photos were taken this morning, which show the three different lighting conditions:
- indoor warm kitchen lighting with ceiling lights on and ambient lighting coming through windows with a speedlite set to 1/8 power and bounced off the ceiling behind me.
- 3rd photo was shot in my living room with less light coming through the window and Taz is shadowed by the couch, no warm bright light shining down as there was in the kitchen, through the door and windows. I had to set my speedlite to provide more light, so set it at 1/4 power and bounced off the ceiling behind me.
- The next set of photos was taken in the backyard a few minutes later and no additional lighting was required, the diffused early morning sunshine was enough to provide ample lighting.
Being Patient:
Once you have done what you can to ensure getting a good shot, it’s time to bring in your pet. Be calm, don’t make fast, sudden movements to distract or startle your pet (unless you purposely need to get their attention). I recommend having a few noisy squeaky toys and small treats handy. You can stuff them into your pocket or behind you so that they won’t be distracting until you wish to use them or hold a small toy or treat in your hand to draw attention to you when needed. If your pet will remain still, you might be able to place the toy/treat within the line of vision of where you would like them to look i.e. on a table beside you or on the floor in front of you. I like to place a very small treat on the floor so that my dog will look in that direction but he knows not to touch it until I say so. By doing this, I can snap a few photos of him looking at the treat and then later I can clone the treat out of the shot in my editing program. All of this helps to direct your pet’s vision in the direction you would like but there is no telling when you are going to get the photo you desire. You may be lucky and get a great shot within a few minutes of setting up or you could be there awhile, often having to move your pet back into position and trying a few times. I never want to stress my dog out so won’t try too long to get the shot I want. At some point, he gets fed up and doesn’t even want the treat anymore. So then you might have to take a break, then go back and try again, in that location or try somewhere else.
So the key is to be prepared, get things set up as much as you can before bringing your pet into the area and then be patient and ready to snap that photo.
If you want to take more candid photos, it is still helpful to check the lighting and the surroundings and lastly, to ensure that your camera is ready to take the photos. Then watch your pet to see what photos you can capture. I do this when I take Taz out into the yard. I check my camera settings first, take a test shot and then call him out into the yard. I am then ready to take photos with usually just a minimum of camera adjustments as we move around the yard. I bring a few treats in my pocket to keep him interested in walking around with me.
It might sound like a lot of work but it’s really not and it can be a fun interaction between you and your pet. Your reward, of course, is getting a great photo of your pet!