Outdoor Summer Photography
Summertime means more sunlight, more outdoor activity and more memories to preserve. Let me share a few tips to help you take the best outdoor summer photos you can, regardless of whichever camera you use.
I love the summer sun, the longer days, and getting outdoors to enjoy it. It can sometimes be tricky to get outdoor photos when the sun is high in the sky, casting harsh shadows. I have a few tricks to help you capture some wonderful shots.
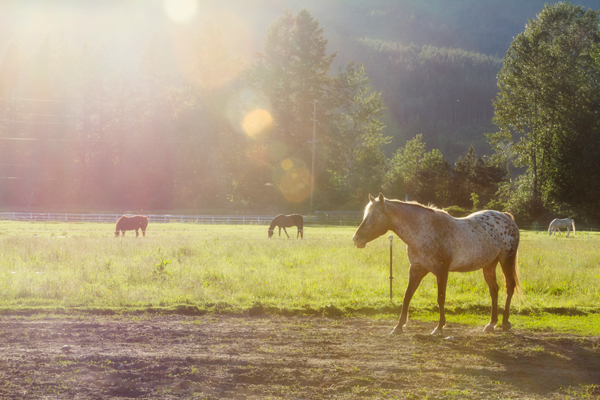
Lens Flare, as described by cambridgeincolour.com website:
Lens flare is created when non-image forming light enters the lens and subsequently hits the camera’s film or digital sensor. This often appears as a characteristic polygonal shape, with sides which depend on the shape of the lens diaphragm. It can lower the overall contrast of a photograph significantly and is often an undesired artifact, however some types of flare may actually enhance the artistic meaning of a photo.
For the above image, I decided to work with the lens flare and hazy sun. I took a few photos and choose the one with the best flare. I edited by keeping the contrast low and just darkened the right side of the photo slightly to enhance the tree/horse, drawing your eye there. Had I not wanted flare and didn’t have a lens hood, just holding your hand above the end of the lens and creating a shield between the light and lens can help to lessen or prevent lens flare.
If you’re lucky, you might have some clouds to diffuse the sun, minimizing the harsh shadows, but if not, here are some tips for photographing outdoors in the sunshine.
- under-exposing the image slightly can help to minimize blown highlights (the lightest areas of your image) and can be recovered to some extent in photo editing but since I often take photos with my iPhone or small mirrorless camera, editing is limited, so I try to get the best shot I can in-camera.
- look at the shadows, where they are falling. I look to see if a shadow is falling across anyone’s face or body in an undesirable way. If possible, I will move one or more subjects, watching to see if the shadows fall in a more pleasing way. You don’t always have much time to stage a photo but, if possible, just asking for a turn of the head or taking a step or two can help immensely.
- when the sun is behind you and your subject(s) are looking in your direction (thereby getting the sun shining uncomfortably into their faces), ask them to look down or blink a few times and then look right at you, at the moment you take the shot. This minimizes the time they are looking uncomfortably into the sun.
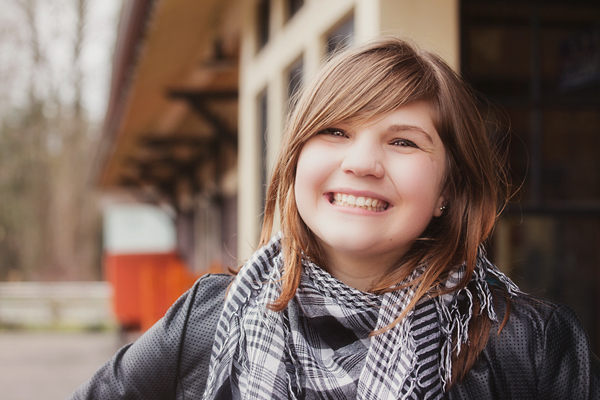
In image above, I placed Bailey under the building overhang (as seen above, behind her). This blocked the sun from shining directly onto her and diffused the light, creating a softer, more even distribution of wrap-around light, with softer shadows.
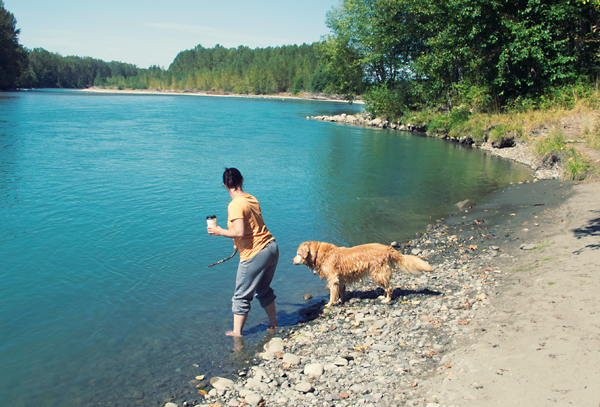
Photographing water movement in the sunlight is like a double whammy! You not only want to capture the water movement (usually creating a smooth flow or freezing the movement, depending on your intent) but you also want to minimize harsh shadows and blown highlights. So, as I mentioned above, under-exposing a bit can help to prevent blown highlights which are bright areas of your image where detail has been lost (looks like white texture-less areas). You may not be able to adjust the shutter speed on your camera but, if so, a slower exposure (i.e. 1/6 sec) will produce more of a flowing, dreamy water effect while increasing the shutter speed i.e. 1/100 sec, will freeze the water, creating less blur. If using a camera that doesn’t allow you to manually adjust the settings, take a burst of photos while standing as quietly and still as you can, elbows tucked in close to the body can help to steady yourself or lean against something to brace yourself. With a burst of photos you can then choose the best one to keep.

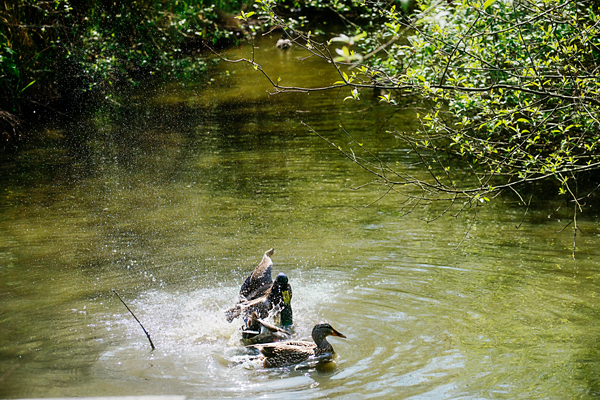
Coming down low to the ground to frame a subject can help to minimize an undesirable background, whether it’s bright sun, haze, unwanted objects in the background, coming down to the ground and coming in closer to your subject can help to eliminate or minimize the undesired background, as I did with this shot I took of the dogs. I knelt down, shooting downwards, at a 20-30° angle. You’d never know that the air was filled with a smoky, hazy fog that afternoon, by looking at this image.
So, when photographing outdoors, look at your environment, assess the lighting conditions and shadows, then determine how to achieve the best photo possible within the parameters of your camera capabilities. Remember, taking the photo is the important step, to preserve that moment, that memory, and that can be achieved no matter which camera you have. Get outdoors, enjoy the summer….take some photos!