Mixed Media Stamping
One thing you can always count on in the mixed media kits and add-ons that come out every month, you will find a plethora of stamping goodies to play with. Each of them by themselves are wonderful products to incorporate into your page design but when you combine them together, that’s when the magic happens! You can create some very interesting and intricate designs.
Every time you start to group together products, you will get a different result, depending on the placement within the layers, the position on your layout, the size and color and to add even more variety, the blend mode you choose.
You may choose to save the stamp layers, enabling you to use them in future projects, without having to recreate all the layers again. I like to save my layers in a group. By saving as a group layer, you can then turn off any layers not desired in any particular project you use them in. Let me show you how to do this.
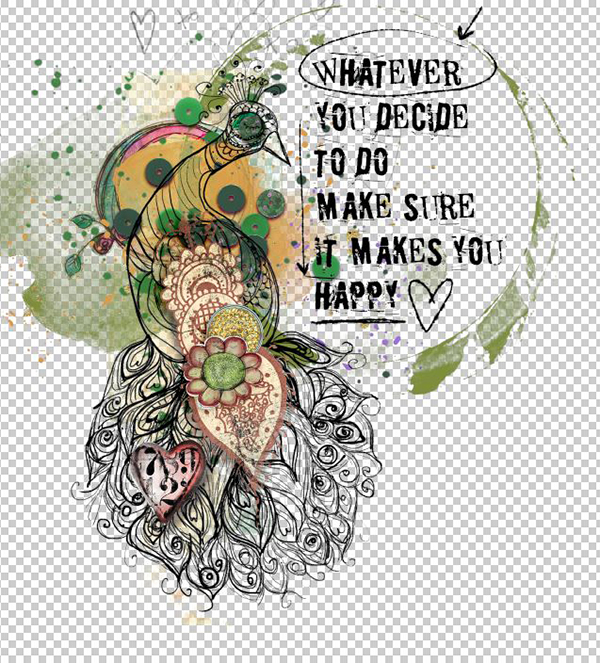
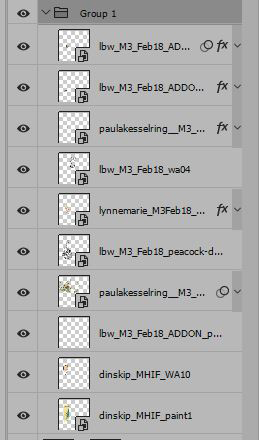
I created this multi-layered grouping of mixed products from the February 2018 Monthly Mixed Media kit and a few add-ons. Here are the layers I created, which I highlighted and saved as a group, in the layers panel. This can be achieved by pressing Control key + G key after highlighting. This nicely umbrellas the layers inside a group layer that can be opened and closed, which helps to keep your layers panel from becoming overwhelmed with open layers. It’s not a necessary step but a nice way to clean up your layers and more easily see the layers. You may rename the group layer which can be helpful if you have more than one group layer in your panel.
Once I have finished creating my layers and umbrelling them under a group layer, I then open the group layer so all the layers are visible and I ensure that I have all the layers inside the group layer (it can be easy to miss highlighting a layer so I turn off the other layers in my design, just viewing the group layers, to ensure that I have not missed getting any of the layers inside the group layer). If any layers have been missed in the initial highlighting and grouping, you can select that layer and then drag it into the grouped layer, so its a good idea to double check this before saving the group for future use. What I then do is open a new document page (12 xs 12), select WINDOW > ARRANGE > TWO UP VERTICAL (from the menu panel at the top in Photoshop). Now the two documents are visible side by side. I select and drag the group layer over to the new empty document. I then save it as a PSD file onto my computer so that it can be used in future projects.
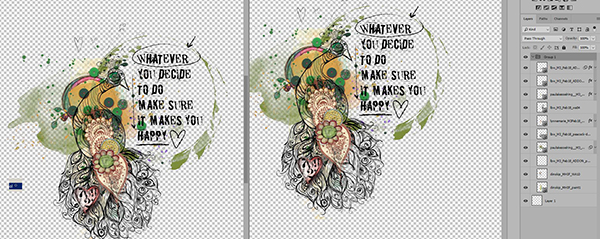
In the sample above, I turned off the paper layers to ensure that I was only moving over the group layers. Then I closed down the new PSD document, renamed it and stored it on my computer. Here is the finished page.
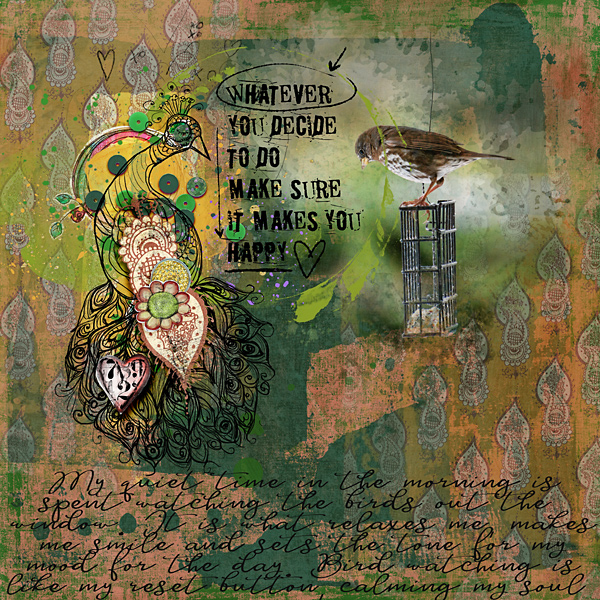
I had added shadows to the layered opague elements overtop the paint and black stamped bird but because I have saved this grouping as a PSD file, I can not only pick and choose which layers to turn on and off when re-using in future projects, I can turn off or change the drop shadow styles too. These can be recolored, resized, etc as desired.
It can be so much fun to create your own personalized stamped groups and I hope you give it a try.