Make It Monday: personalized phone cover
Scrapbooking products are very versatile and can be really useful when it comes to creating personalized items. Hybrid projects are good examples, but today I am going to show you a digitally made project. It is a personalized phone cover. I’m sure you all know the standard phone cases and covers, some are nice, some are fun, but hardly ever exactly what you’re looking for. Shops offer personalized cases, but that usually means you can have a photo printed on it. But you can do so much more with the custom options offered by phone cover shops.
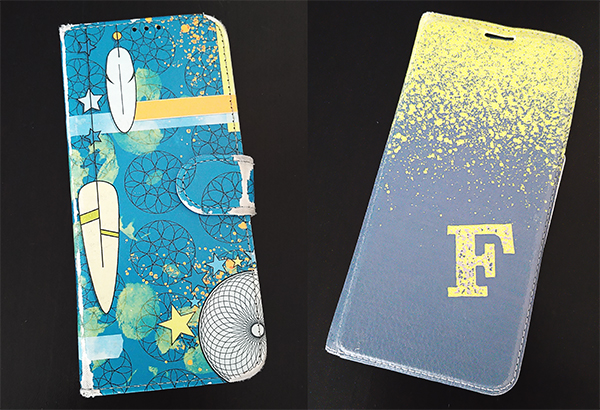
Let me show you a couple of covers I have made before. Top left is my own phone. It was the first cover I made, so I used some of my own designs to try if it would work. That was three years ago and as you can see by all the wear and tear I’ve been using it since. Up until then I had only created custom photo cases. I was pleasantly surprised with how well this phone cover looked. The one top right is my sons new phone cover. I created this one for his 13th birthday so I kept it simple and cool. I’ve also created personalized covers with a combination of photo and design elements as gifts for family members.
So how to create such a fun and personal gift? Important before you start designing anything is to know what phone you want to create a case or cover for. Seems obvious? Well, I’ve found that some companies only provide tha custom option for a few popular phone models. So make sure you find a shop that offers custom covers for the brand and model phone you have.

First go to the case designer on the shops website. It will show you the template for the cover of your choice. Make a screenprint and copy it to a new document in your design software. I’m using Photoshop CC (in Dutch btw, if you have any questions about menu options etc, just drop them in the comments).

Now extract the template and change document size to 3600 pixels wide, making sure the Constrain Proportions is enabled. Using the magic wand select the blue and red lines and copy them to an new layer. These lines are the guides for your design. The space between the red and blue line is the overflow area for the edges of your cover. The background should go up to the red line. Main elements and details should be kept within the blue lines. Make sure you keep the layer with those lines as your top layer, so you can see where you are placing things.
Now you are all set up to start designing you’re cover. I am using Keep Growing | Kit by Ninigoesdigi to create my personalized phone cover. I am creating this as a private design, so it will comply with the terms of use of this kit. Please check the TOU of the products you want to use.
Choose the background and create a composition you like. Think about the front and back of your cover. Maybe you want a photo on it? Or a name? Keep adding papers, elements and brushes until you’re satisfied with the look. You can add text, styles and shadows.

As you can see, my cover has a clip to close it. It’s not necessary, but I want my design to be continuous. So the clip needs to have the same design as the front of the cover. I do this by creating a rectangle that fits the clip and set it to 60% opacity. Then I copy the top layer with lines to a new layer and clip it to the rectangle. I move both layers to the right side of the template. The dotted line needs to line up with the blue line of the front. Then I select the layers that are covered by the rectangle of the clip, copy them. Keeping the copied layers selected I create a smart object, so I now have only one layer to work with for the clip. I clip that layer to the rectangle which is still at 60% opacity. Now the three layers: rectangle, design layer, outlines, are moved back to it’s original place on the left. Once there you can change the opacity of the rectangle to 100% and delete the copied outlines layer.

As said, it is not necessary to design the clip like that. The clip could be just the background color or have an element on it to make it look like a lock. Or choose a cover that does not have a clip, like the one I made for my son’s birthday.
All done? Save the design with all the layers, so you can come back and make changes if needed. Once you’ve done that, make the template layer and the outline layer (so the bottom and top layers) invisible before merging all the other layers. Make the template layer visible again and use the magic wand to select the white parts on the outside of the cover. Now you can use that layer as a clipping mask for the merged design layer. And there is your phone cover design. Save it as a .jpg file so you can upload it to the case designer.
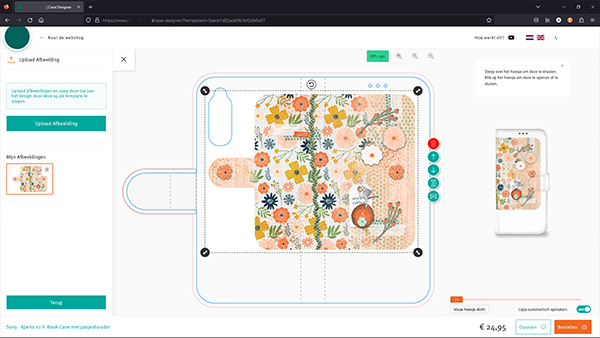
Once uploaded to the webpage you may need to resize your image to fit the template depending on which shop you’re going with. Enlarge the file to make it fit the red outline. The designer I’m using shows a mock up, so I can immediately see what my design will look like. The slider even lets me have a 360-view. I like it!
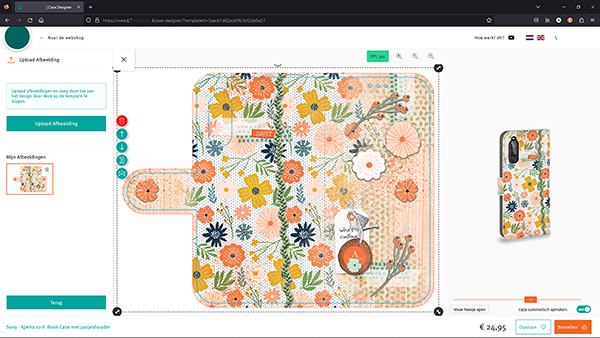
Be sure to check if everything is exactly the way you want it, before you order it. You can always go back to your design to change things. Or create a couple of different covers and try which one you like best. Then place your order and wait for the personalized cover to arrive. So why not try it? Say goodbey to the standard phone cases and covers and order your own design. Or create one as a gift for someone special. Surprise them with their very own personalized phone cover.