Meibritt
Well-Known Member
- Joined
- Mar 7, 2010
- Messages
- 2,578
I had so much fun, thanks for the challenge.
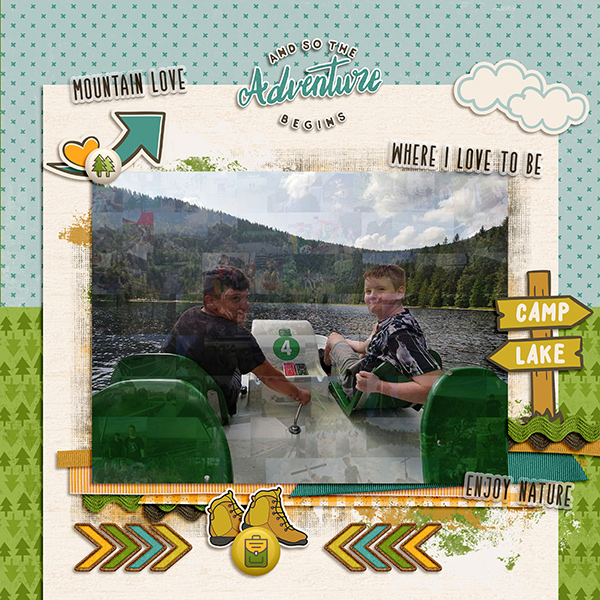
I took 88 holiday photos of the 2 boys.
I took 88 holiday photos of the 2 boys.
Follow along with the video below to see how to install our site as a web app on your home screen.
Note: This feature may not be available in some browsers.
Users of PSE 11 - PSE 2022 will need to be in EXPERT MODE and use the Create Function (upper right of screen) to create a photo collage. It only lets you use 8 photos though.
First you need to open 8 photos and then select Create > Photo Collage.
It does it's magic and then let's you select (double click) the layout style you want to use. I picked facebook cover because that one made the photos the smallest and had portrait and landscape orientations for more variety in the pattern later.
Next you will need to click on the advanced mode (top left of screen) so you can adjust the photos to get rid of the white borders. Once in advanced mode select window > layers. This will open the layers panel and you can make adjustments there. The photo collage function put each photo in it's own group with a photo and a mask. Click on the group name and use the arrow keys to move each group next to each other so it looks like one photo with no white between them. I did a row at a time and then moved a whole row next to the other row.
Then get the marquee selection tool and select the whole photo collage, leaving out any white border that was left when you moved the photos together.
Select Edit > Define pattern from selection and continue on in your instructions.
You may have to simplify the pattern overlay layer before being able to adjust the lighting and shadows/highlights, but that should get you to a point where they can get the mosaic. HTH
THANK YOU!!! I could not have done this without your helpful instructions!!!

")