Doodled Elements & Patterns
I hope everyone is having a good week and staying cool – or warm, depending on your location! I’m just popping with a couple of quick tips on using patterns with doodled elements. There are some fabulous larger doodled elements in the shop that make great focal points (especially on art journal pages), but they can sometimes get lost if you place them on top of a patterned background. Doodles and patterns can play well together using the mask and brush tools in Photoshop and PSE.
Take a look at this page with an awesome sketched face by LiLi Wee (click on layout for full credits):
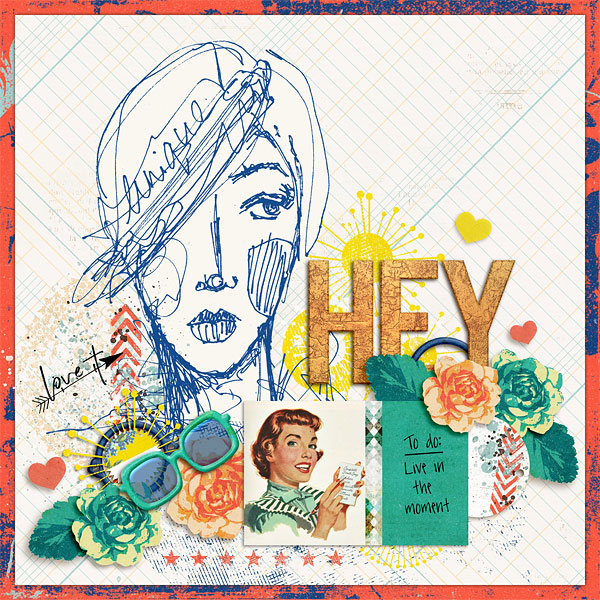
Notice how the background includes a grid design, but the background behind the face is solid and a perfect match to the off-white grid background? There is a super-simple way to accomplish this effect with your brush tool in either Photoshop or PSE.
Step 1: Set the Foreground Color
Click on the foreground square in the tool bar and the color picker menu will pop up. Your cursor should look like a mini eyedropper now. Use it to select a neutral color from the background by hovering over the area you want to select and clicking. When you click, you should see the color appear in the color picker box. Click on OK and you will set the foreground color.

Step 2: Use the Brush Tool to Paint the Doodle Background
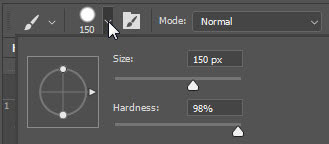
Now grab your brush tool (shortcut Ctrl>B) and set it to a fairly hard round brush. The size you use will depend on the size of the doodle area. My brush was set at 150 pixels | 98% hardness.
Create a new layer just above the background page in your layers palette and start painting over the area under the doodled element. I suggest that you zoom in when you are painting around the edges (and maybe adjust your brush size smaller) to make sure you stay within the lines of the element.
And it is that easy!
You can also add patterns to a doodled element using the layer mask tool. Take a look at the hair on this alternate version of my layout:

I used the brush technique to paint over the grid pattern under the face, and added a pattern to her hair with the masking tool.
Step 1: Add Pattern Paper and Create Mask
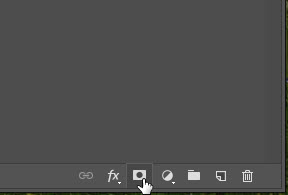
Add the patterned paper just below the doodled element in the layers palette. Add a mask by clicking on the mask icon (it looks like a rectangle with a circle in the middle).
For this technique it is easier to paint in the pattern where you want it, as opposed to painting away the areas that you don’t want, so it is best to start with a black mask (which will hide the patterned paper entirely). Click on the Layer Mask Thumbnail in the layers palette and set your foreground color to black. Now click on Alt>Backspace and the mask will fill with black (hiding the pattern paper entirely).
You can also start with a black mask right off the bat by holding down the Alt key when you click on the mask button. This will automatically fill the mask with black instead of the default of white.
Step 2: Paint in the Pattern
Once you have the black mask added, grab your brush tool (Ctrl>B) and set the foreground color to white. Now paint in the areas where you want the patterned paper to show.
It is as easy as that!
I hope you have fun dressing up your doodled elements with these techniques!
Until next time ~
Judie (HeyJude)


