Creating a Custom Stamp Using Digi Supplies

One thing I have been working on lately is actually DOING the things I want to do and making real goals to learn the skills I want to learn. Too often I put this process off until a later date (that really never comes) because I’m intimidated by my own supplies and tools.
My husband gave me a Silhouette Mint stamp making tool last year. I was so excited to use it, but also very intimidated by it. I immediately took it out of the box and placed it on my desk. And there it sat looking pretty but not really doing me any good at all until yesterday.

This tool holds so many possibilities for hybrid scrapbooking and card making (both new skills I am dipping my toes into). What I really love about it and the reason I’m sharing it here today is that I can use my plethora of digital scrapbooking supplies to create custom stamps for these endeavors!
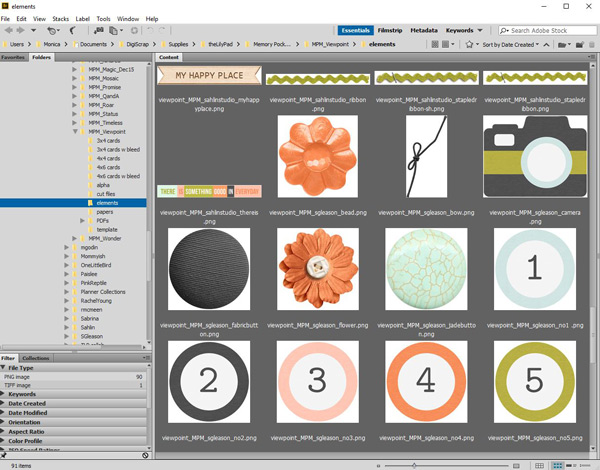
I used the camera element from MPM Viewpoint to create a stamp for a hybrid card for this project and I absolutely love how it turned out!! AND as an added bonus, it was really easy to do.
Here’s how to use the Mint tool to make custom stamps using your digital scrapbooking supplies…
First, install the Mint software, plug it in and connect to your computer using the provided USB cord. Also, select the file you want to use for your stamp. I would suggest using something with clean lines, especially for your first try.
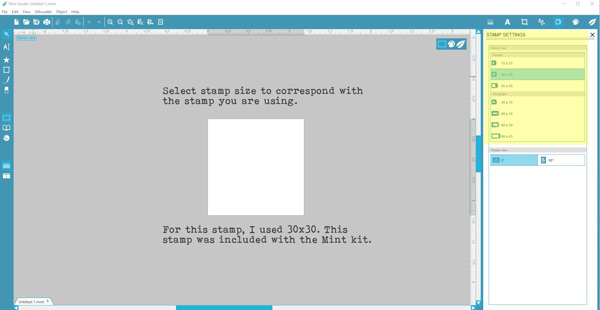
After opening the Mint software in the “design” settings, select the stamp size to correspond with the stamp you are making. For this stamp, I used a 30×30 mm stamp that came with the Mint.
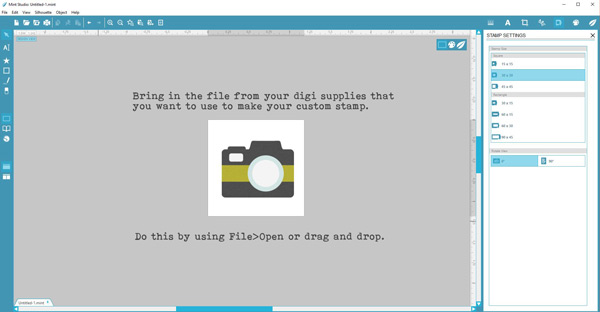
Next, bring in the file you want to use for making your stamp from you digital supplies. You can do this by using File>Open or just drag and drop. I just dragged and dropped my file in from Bridge (you should be able to do the same from Windows File Explorer, ACDSee or whatever you use to view your files).
You’ll want to size this file to fit the stamp size.

To get the exact look I wanted for my camera stamp, I opened the “Stamp Filters” box and played around with these filters. The middle art palette button brings up these filters.
I ended up using the Comic (Outline) filter with brightness around 46%.
At this point, you’re all ready to sent your design to the Mint to be printed!
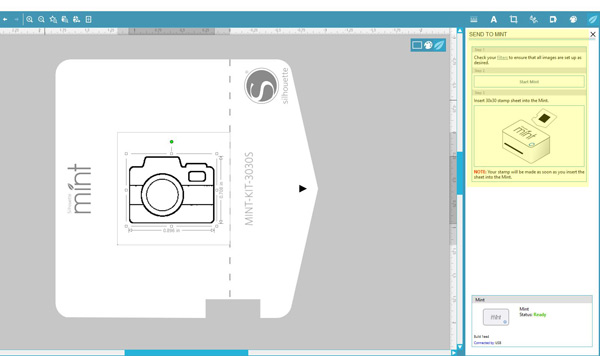
Click on the mint leaf shaped button to send your custom design to the mint to be printed. You’ll see a dialogue box with instructions like the one highlighted above.
Click on “Start Mint” and be sure that you are using the exact size stamp sheet as the one you selected in the first step or it won’t print correctly.
Take your rubber stamp sheet – still on the cardboard and still with the plastic overlay – and place it in the slot in the back of the machine with the arrow side going in first. It will go in at a slight angle. The Mint stamp machine will automatically begin feeding the stamp through the machine and will spit it out the front of the machine in less than 30 seconds. Remove the stamp sheet from the Mint.
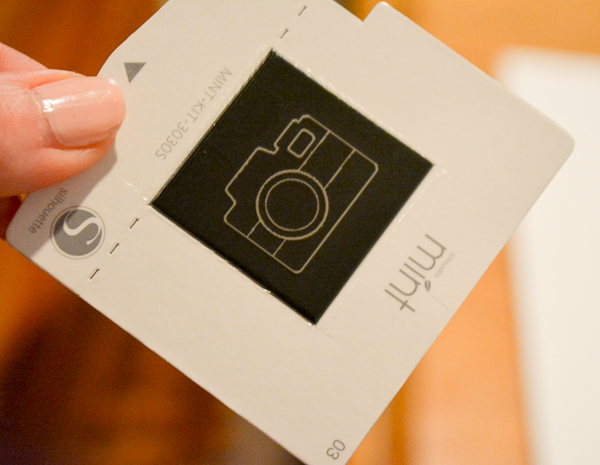
Remove the rubber stamp from the cardboard base and plastic liner and place onto the stamp base.
Now you can use the provided Mink inks to color your stamp. Squeeze a generous amount of ink onto the stamp on the raised areas and let it sit for about 10-15 minutes.

You’ll want to stamp off the excess ink on a piece of paper before actually using the stamp on a hybrid layout or card. It can now be used over and over without re-inking. I think the ink is supposed to last for around 50 stamps before it needs to be inked again!
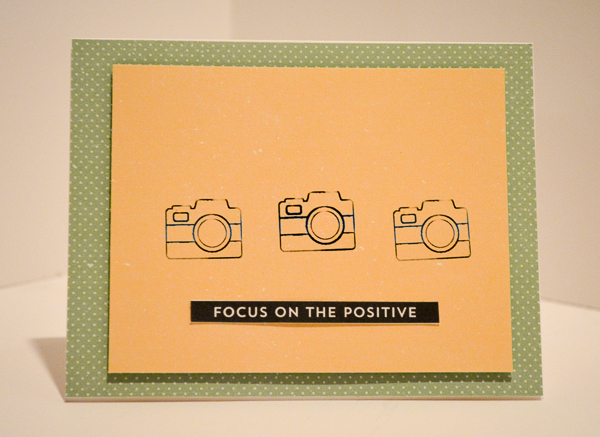
I also used patterned papers from Valorie Wibbens MPM Add-on, From Where I Stand, and a word strip from the MPM Viewpoint Kit to complete my card.
I loved the way this came out and now I want to make more custom stamps so that I can stamp all the things!