Adding Dimension to Templates
Happy Saturday everyone! I’m just popping in today with a quick tip on adding dimension to templates with definitive shape components. Don’t you just love those templates with pieced shapes – not the paper layer shapes, but special shapes such as purses, frames or even specific word art? They work great with clipped papers, but you can also add a dimensional pop to the elements one quick and simple trick involving bevels.
Here are some examples of the technique in action:
Notice the dimension I added to the super cute purse elements on this page (I also added dimension to the word art with a beveled style by Mommyish Designs):

Here is another example of the word art (by Scrapping with Liz) with some paper clipped to it and a bevel added:

This is another fabulous template by Fiddle-Dee-Dee Designs. I added a bevel to the large frame element to give it some dimension:

Ready to learn how to achieve this look? Then let’s get started. 🙂
1. Select the shaped element layer in the layers palette and clip your paper of choice to it. (Ctrl/Alt/G in Photoshop)
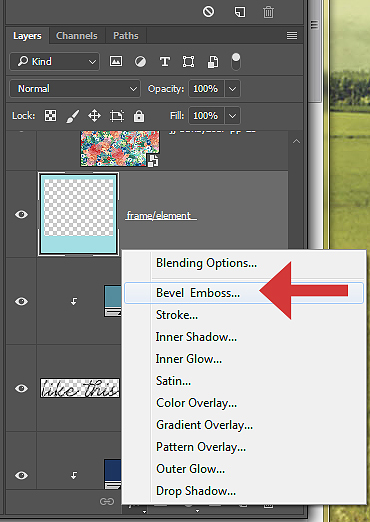
2. With the shape layer still selected, apply a bevel to the shape by clicking on the Layer Styles button at the bottom of the layers palette (it looks like an “fx”) and choosing the “Bevel Emboss” option.
3. The options box will then pop up. Focus on the Style, Technique, Depth and Size options. The default settings are usually good for everything else (although feel free to play with them to see how they change the overall look of the effect).
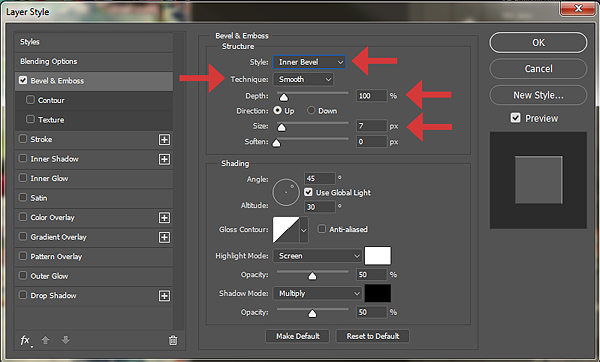
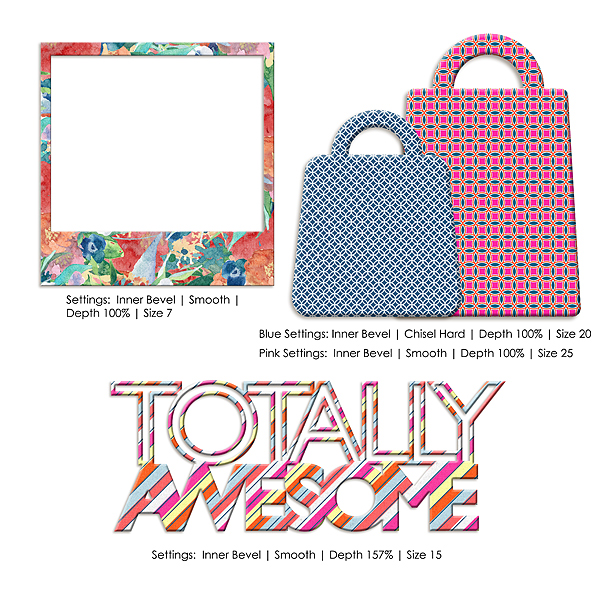
Here are the specific settings I used on the shaped elements above:
And that is it! A quick and easy technique to add some dimension to those fun shaped elements in templates.
Until next time ~
Judie (HeyJude)


