Painted Portrait Technique in Photoshop
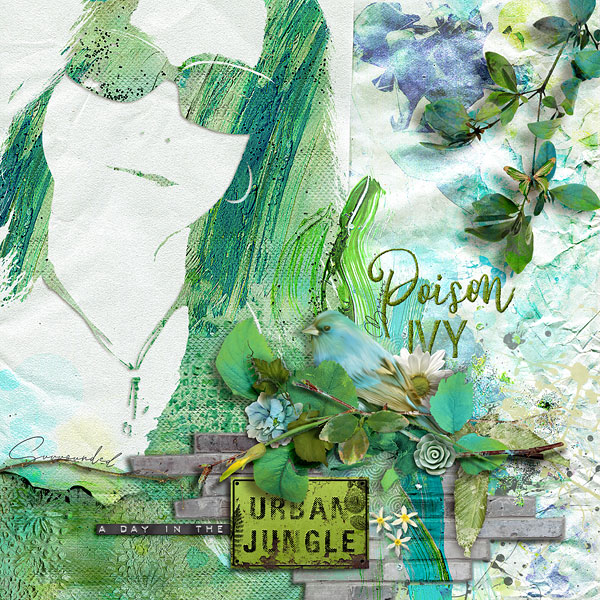
Hello all my artsy friends! I have a fun painted portrait technique for you today that is easy to accomplish in either Photoshop or PSE. Here is a look at the technique in action with some of the amazing kits available in today’s SOSN sale (click on layout for full credits):
Ready to dive in with your own portrait? Let’s get this portrait party started!
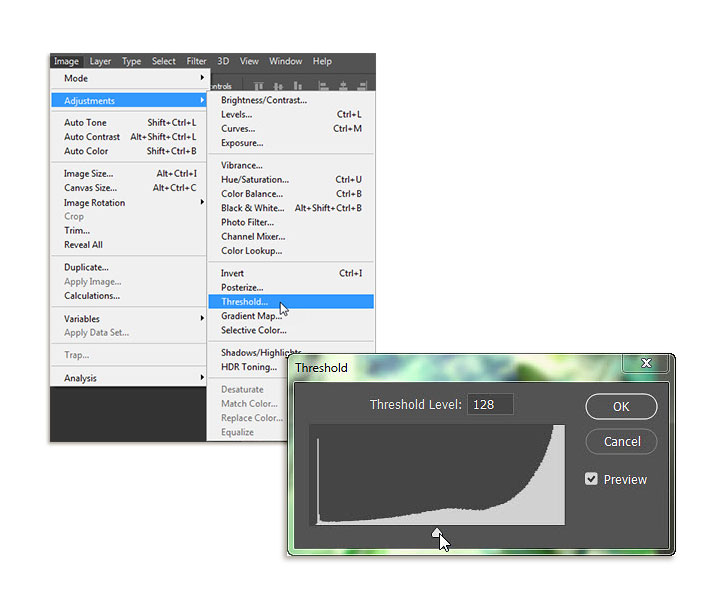
Step 1. The first step is to convert your photo to a solid silhouette to which you can apply a digital style or clip papers, paint or other dimensional elements. I applied a Threshold adjustment to my photo. You can find Threshold in Photoshop under Image > Adjustments > Threshold. When the setting box appears, just play with the slider until you get the look you want.
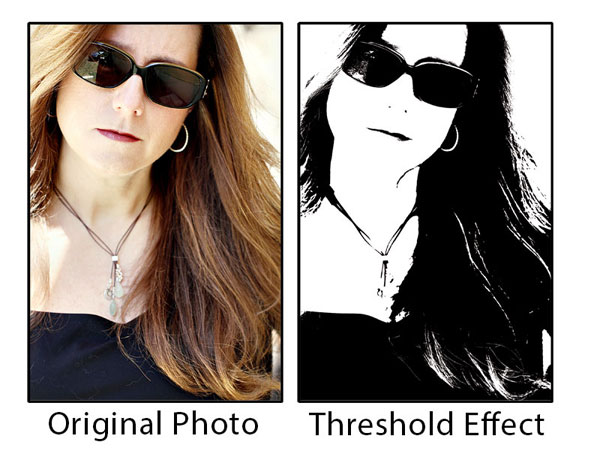
Here is the comparison of my original photo and the Threshold version I used on my page:
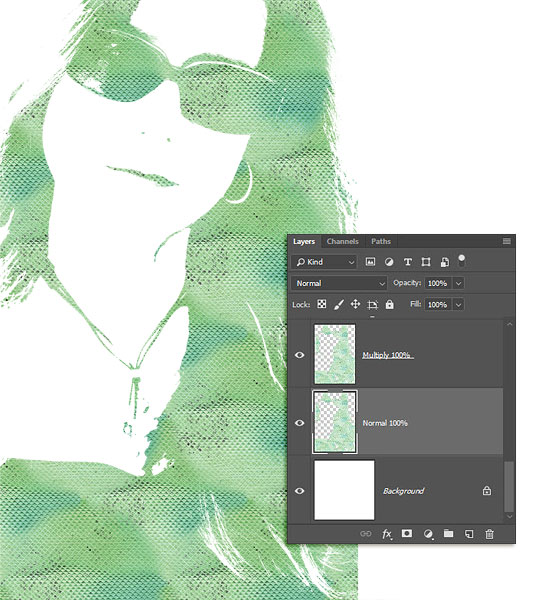
Step 2. Now that you have your portrait silhouette, it is time to “paint” it with different digital elements. I started by applying the “paint+tulle” style from NBK Design’s Urban Garden Collection to the silhouette. To make the style effect more pronounced, I copied the silhouette, placed it above the original and set the blend mode to “Multiply.” This is what it looked like:
Step 3. Next, I added several dimensional paint elements from the Urban Garden Collection. I layered and clipped them on top of the styled layers. I kept the blend modes at Normal, but you could certainly play with these and see what effects you get. As you can see in the layers panel below, I added a layer mask to a couple of the paint elements to hide their appearance in certain places.

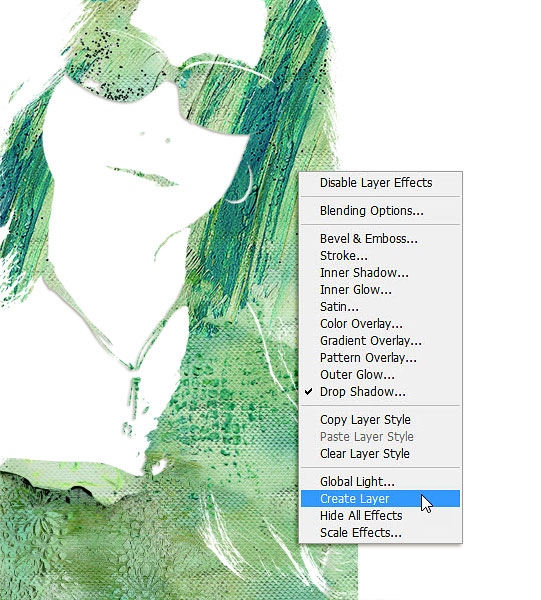
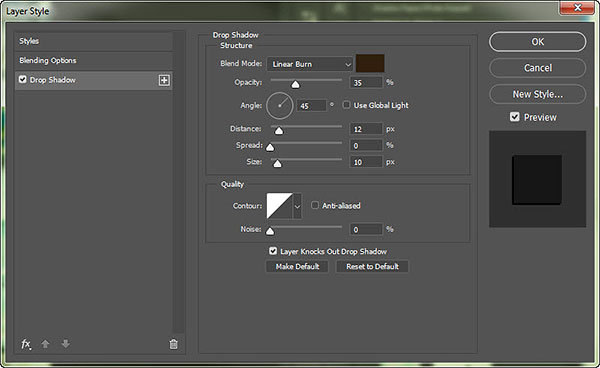
Step 4. The last effect I used is a drop shadow to add dimension to the sunglasses and necklace. I added the drop shadow to the bottom styled layer and then separated it out on its own layer so that I could delete it from other areas of the silhouette with a layer mask. To separate a drop shadow in Photoshop, right click on the drop shadow icon and choose “Create Layer” from the pop up menu. Once the drop shadow is on its own layer, you can add a layer mask and erase it from the areas where you don’t want it to appear. As you can see below, I only kept the drop shadow around the sunglasses, necklace and earring.
And that is all there is to it! I hope you have fun with this technique – be sure to share your painted portraits with us in the TLP Gallery!
Until next time ~
Judie (HeyJude)


