Mixed Media Beginners: Dolls and Art Dolls
Hi there! Even if you lived under a rock, I would bet you’d know Barbie has been trending. Well not really bet, I’m not much of a gambler but I’m also probably one of few people with no interest in seeing the movie. It did influence the selection of the photo I’m scrapping today though and a Mixed Media product to feature this month – namely Art Dolls.
___________________________
What is an art doll? Good question, kind of hard for me to answer. Looks like they’re also known as collage dolls. These are unique and whimsical paper-pieced art portraits that are often flat but can incorporate dimensional and found objects or traditional scrapbooking elements. They can vary from lifelike illustrated people with a wardrobe of pre-made costumes, much like press-out paper dolls you may remember from childhood, to equally strange and wonderful creations, limited only by imaginations.
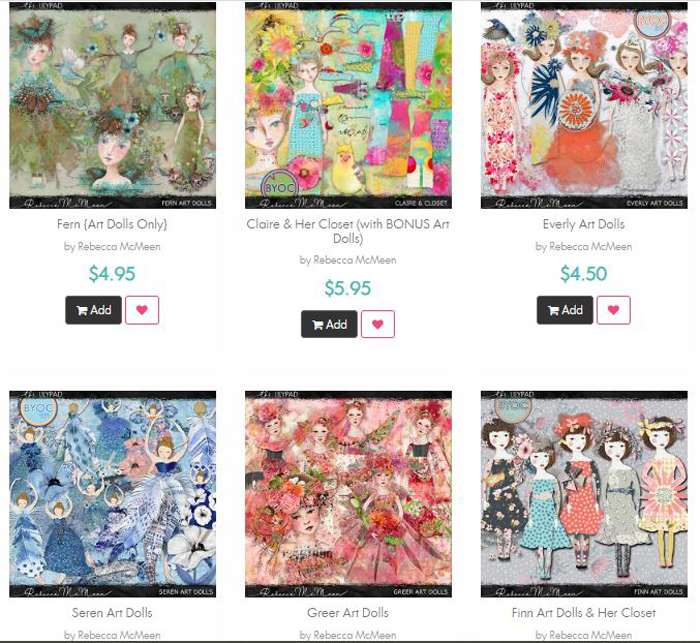
In the store, Rebecca McMeen and Tangie Baxter, among others, have filled the Art Doll section with an amazing assortment, covering everything from fairy styled to steampunk themes and with a wardrobe and menagerie of pets and accessories to make Barbie herself jealous. Let me show you a few, they’re so different but equally creative and inspiring and there’s so much more.
Choosing one today meant deciding whether to use a pre-made and pre-dressed doll or a more sketchy face illustration or something beyond description that I dreamt up and layered up myself with various pieces and options within a pack. I was very much overwhelmed and paralysed with indecision for the hour (yes, hour) that I window shopped the Art Dolls category. I’m way out of my comfort zone with art dolls and the Barbie in my photo is a more refined one so I let those 2 factors guide my choice.
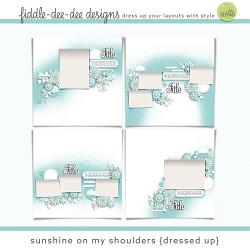
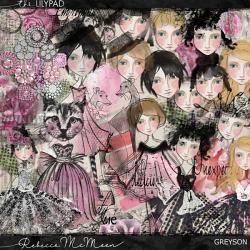
Jumping in. Here’s the products I’m using today. The new Sunshine on my Shoulders template by FiddleDeeDee Designs which has some great artsy mist and a nice big photo spot, and I’m also going to mash up the Greyson art doll kit by RebeccaMcMeen with a more traditional kit, Little You by Kristin Aagard. By now in this Mixed Media Beginners series, I’m self-aware enough to know if I’m really stepping out of my comfort zone with one thing, like art dolls today, then mixing them with more familiar styles and products always makes me feel less trepidation (yep, seriously, even with the safety net of the ‘undo’ button!)
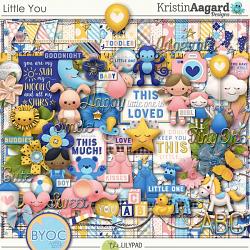
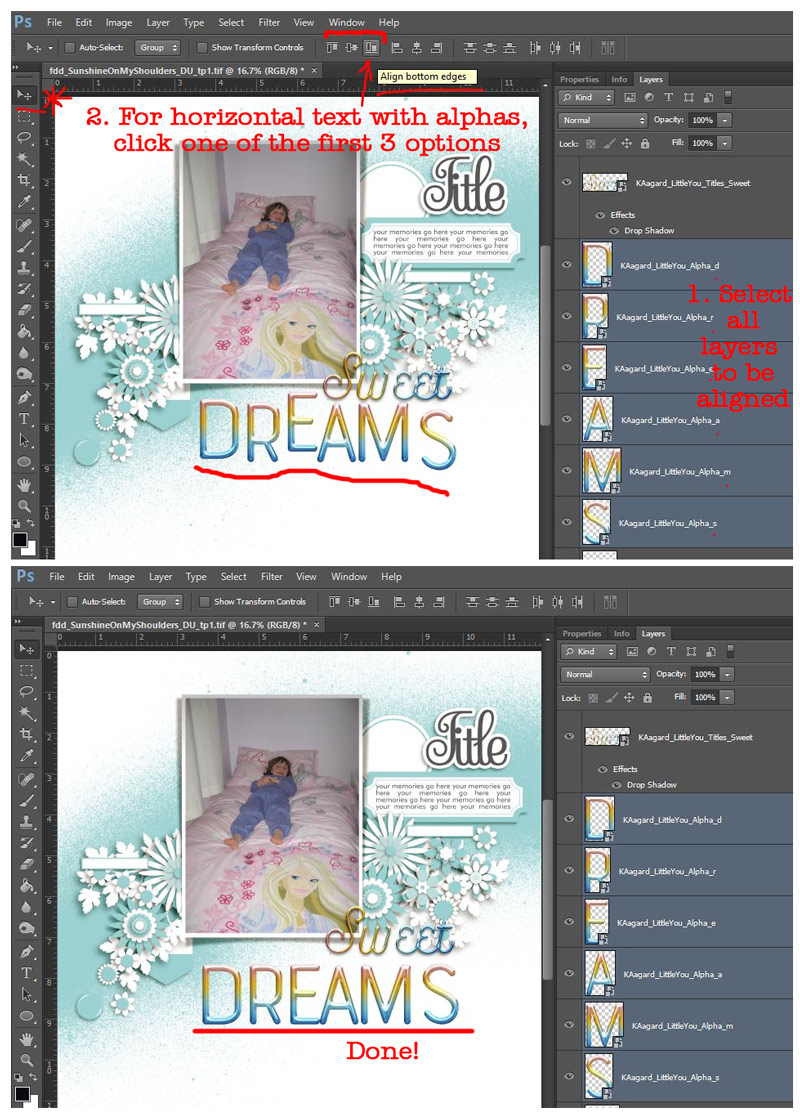
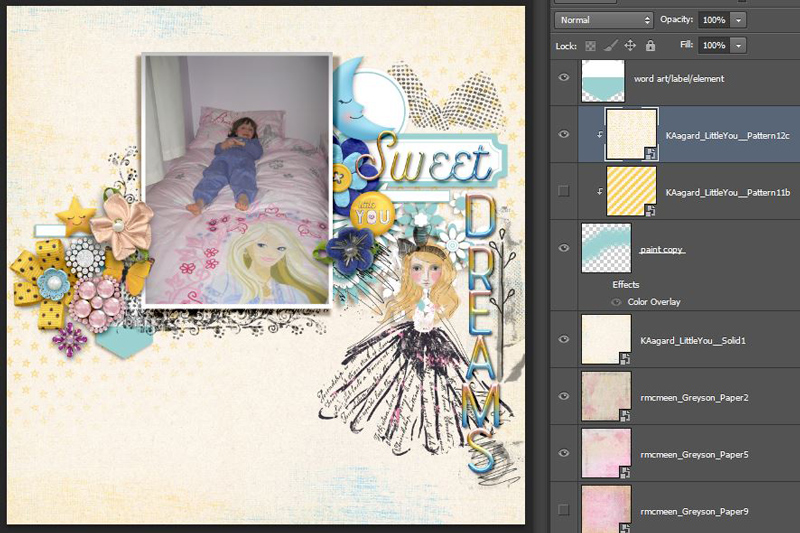
Here’s my start point. Placed the photo, enlarging the photo spot about 10% and knowing after having thought about this for a while that I wanted to include wordart or a title that said ‘sweet dreams’so I’ve used a rainbow ‘Sweet’ word art and dragged in these fun rainbow-gradient alphas, both from Kristin’s kit.

Let’s talk about alphas. Do you use alphas often? Does having to move or scroll past a dozen individual alphas in the Layers Palette put you off?
I think I probably only use alphas on less than half of my layout titles, and I’m not always fussed on perfect alignment (because imperfect looks more real to me) but when I’ve dragged letters in haphazardly, the alignment tools and grouping them to move and quickly shadow all at once can come in handy. After selecting all the layers/alphas you want to align in the alpha palette by ‘ctrl clicking’ them all; you can go to the Layers menu > Align and pick an option or use the top tool bar icons while the Move Tool (ctrl V) is active like I have below.
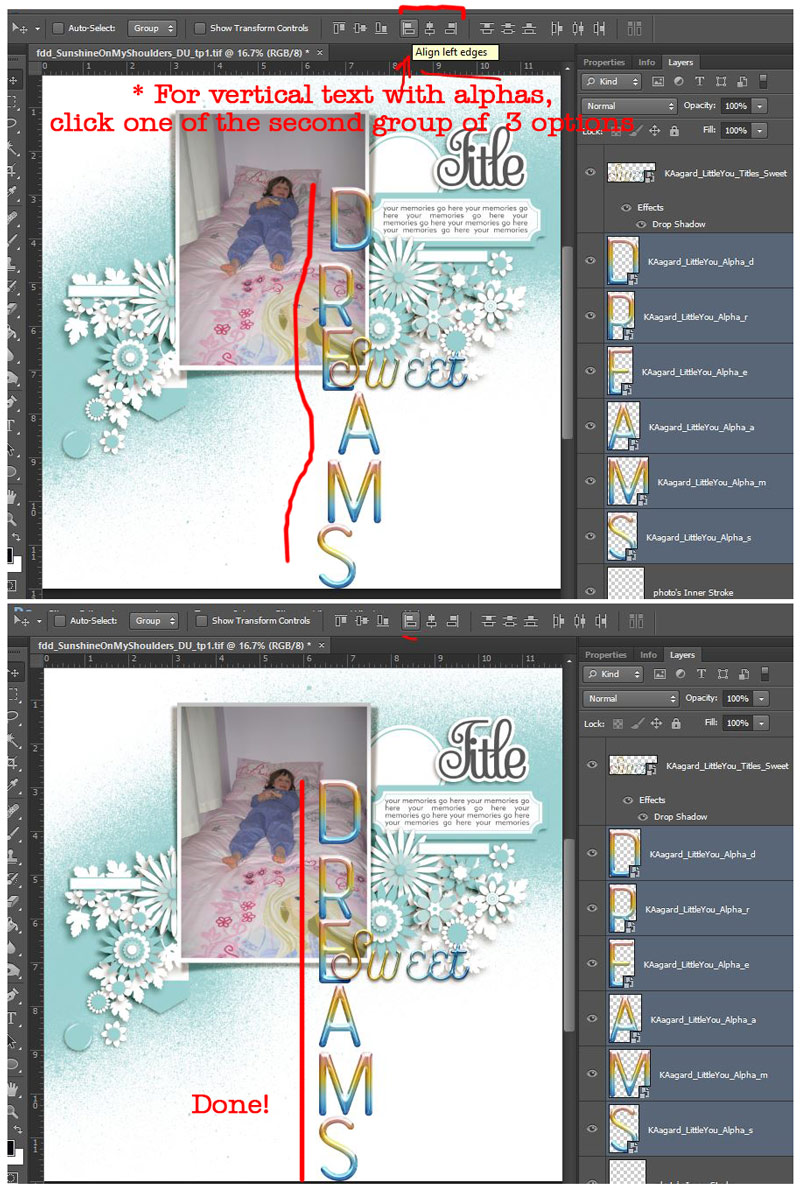
It works for vertical titles too.
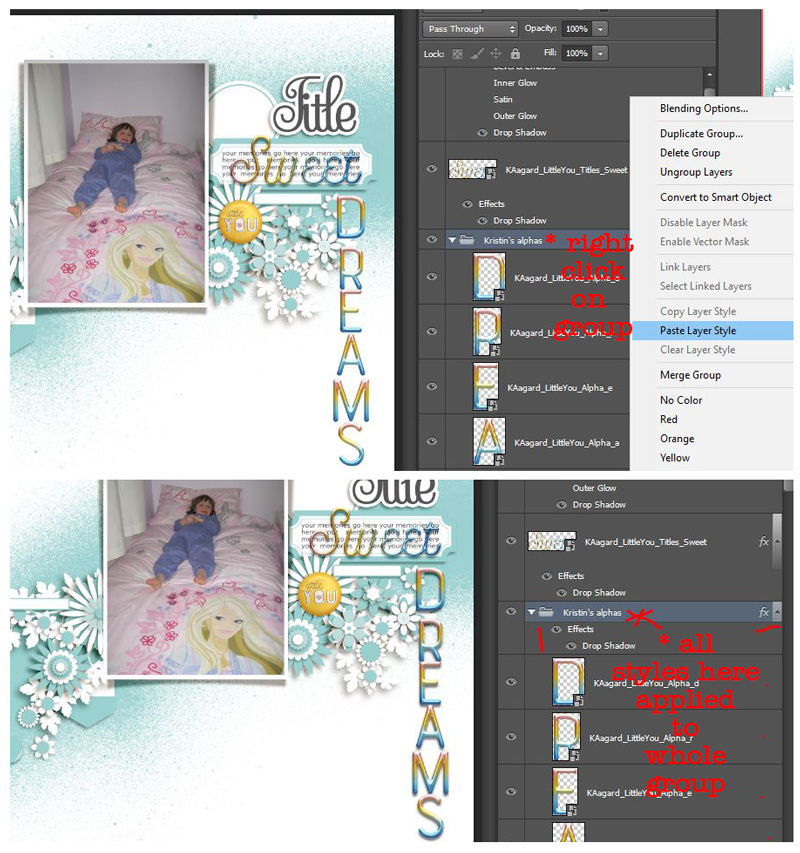
Especially for longer titles, I also group alpha layers. Why should you use groups? With a title I’ve already gone to the trouble of spacing ‘perfectly’, or if I have a cluster of elements I want to keep together, groups make moving them easier, while I can still move individual pieces if I want (without having to ‘lock and unlock’ layers.
To make the layer group, I select all the individual alpha layers by ctrl clicking agin and hit ‘ctrl G’ to create a group of them (or right-click and select ‘Group Layers’). (I may have commitment issues and avoid just merging the alphas all into one layer). I rename the group to ‘alphas’ or something similar, so I can hide all the individual layers because scrolling through a hundred layers is not my favourite thing, but it means I can find them easier later while scrolling through (or just right-clicking on that area of the layout). It also means I can shadow every alpha (or apply any ‘Layer Style’) with just one click by shadowing the group.
Ok, back to our normal Mixed Media Beginners digiscrapping process programme.
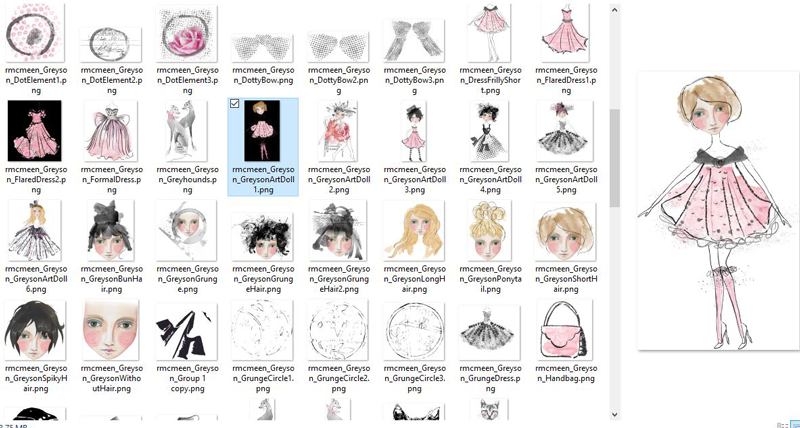
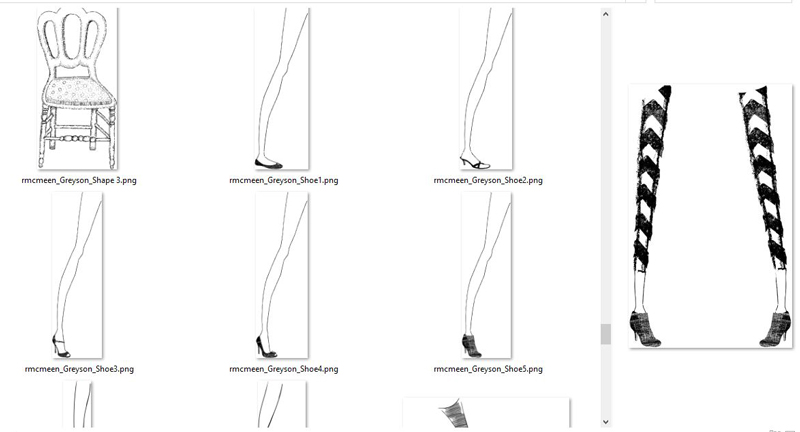
The Greyson art doll pack I grabbed has a ton of potential, with individual limbs and heads and all manner of accessories, as well as general mixed media doodles and stamp PNGs. There’s also several pre-made dolls with different looks as well. Here’s a little peek in the unzipped folder, which is seriously huge.
I went with a pre-made doll and shrunk her to about 50%. Importing her, she could easily fill a 12x12inch page at 100% and I’ve seen large art dolls used on photoless and art journal pages with great impact. The detail in the skirt is pretty amazing but I’m using her as a supporting element in my page and channeling Barbie’s long blonde hair and fancy wardrobe which works when she is scaled down and not the star of the page as well.
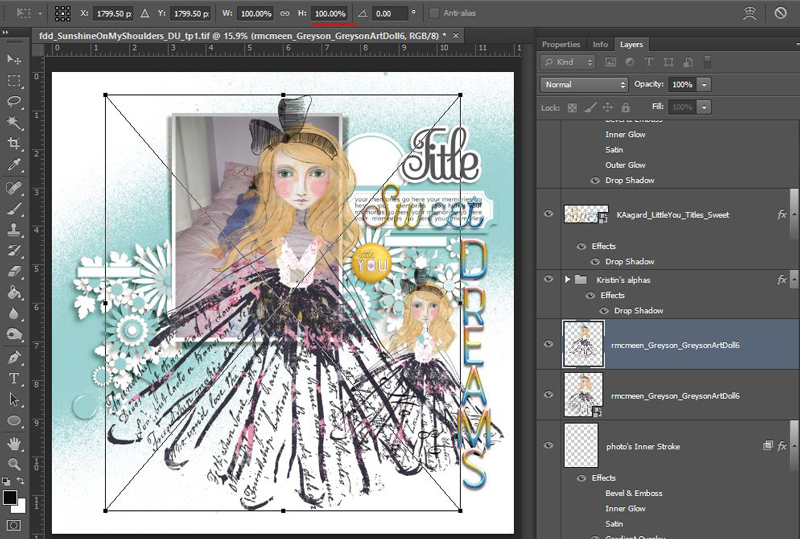
At this point I throw some more embellishments on and there’s a great assortment of bling in the Greyson kit so I start with that. And because there’s so much great mixed media stuff included I add some squiggles and stamps too. I grouped the bling and shadowed it as a group too. I may tweak the shadows later but for now this works.
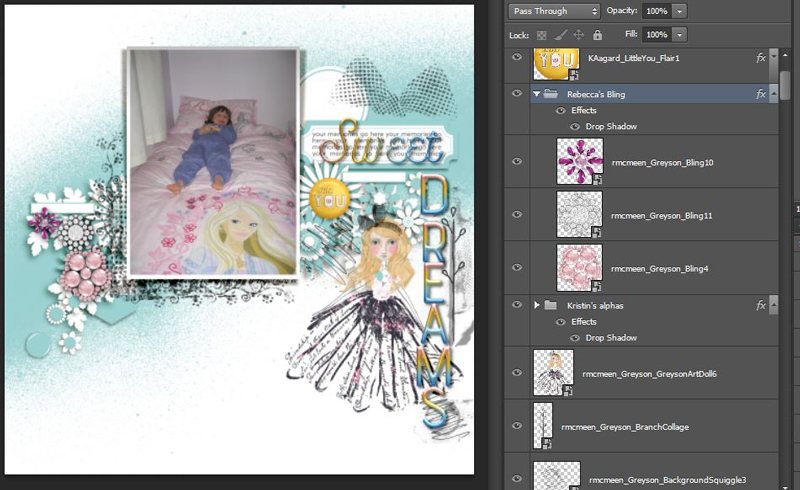
Then I added some more from Kristin’s kit and here is one of the sad facts about scrapbooking. See that big pink flower near the moon?
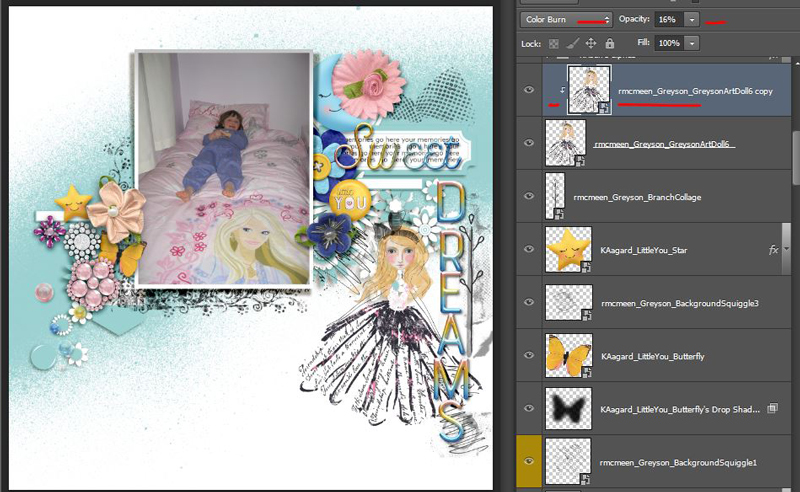
I moved it all over the page and just couldn’t make it work in the spots I wanted it; there were just too many flowery things in this kit I wanted to use with Rebecca’s bling, so I ditched it, which I was so sad about because it was one of the first things I saw when I unzipped the element pack that made me say ‘Ooh I have to use that!’ The ribbon rosette attached to it made me think back to paper scrapping and oh well, that’s scrapping life, right? Too much good stuff, and we just can’t use it all on every page. (This happens to everyone, right?!)
I did also duplicate and ‘Color Burn’ the art doll a little to give it some more oomph against the more saturated colours filling the page. Ok, what’s next? Yeah I know I need a paper at least, so I audition some for the role of main background. It ends up feeling a bit like trying a single shoe on every woman in the land, trying to find a princess – ones a bit too stripey, ones a bit too weathered or distressed, one’s a bit too spotty… I settled on a ‘solid’ from Kristin’s kit and one of her starry patterns clipped to the misty paint layer of the FDD template to blend a subtle pattern in.
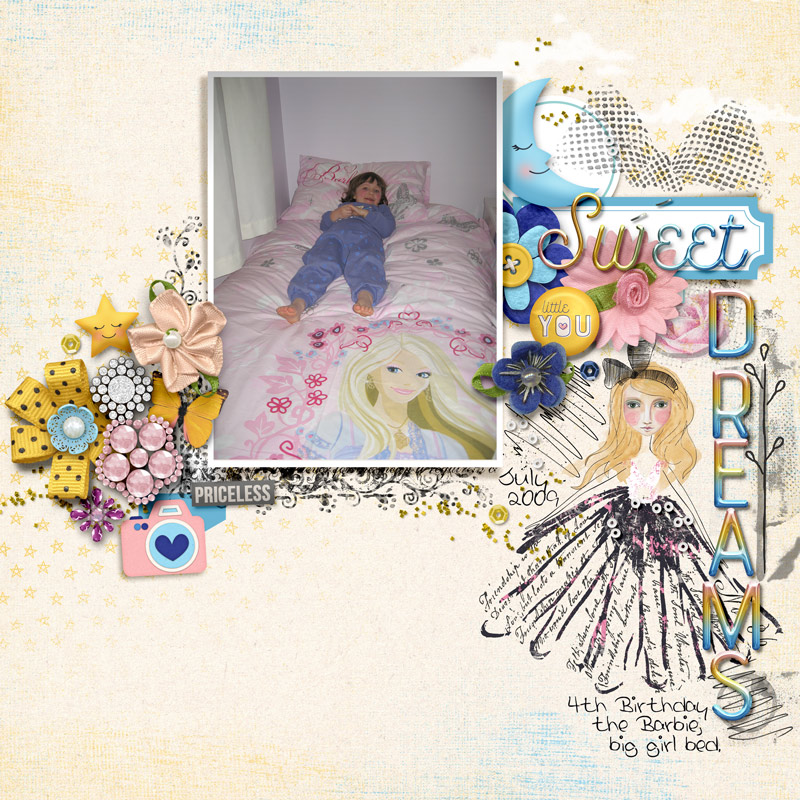
And here’s the finished product.
In a surprise twist, after I turned all the flower/element template guide layers off, I was able to squeeze that pink flower in after all! And because I was having one of those ‘I don’t know when to stop’ days, I felt like I needed some glitter as a finishing touch (it’s the story of my life and why my family have banned me from IRL crafting) and after looking through my stash of Valorie Wibben’s Sprinkles, I added digi glitter and a few extra details from Sprinkles V.23 – I was making a pretty blingy layout anyway so sequins felt reasonable and the seed beads gave some extra texture and detail to the art dolls skirt.
Thanks for following this page through to the end and I’d love to know if you’re an art doll fan or newbie in the comments. If you have made one of your own or featured one on a TLP page, link me up please. Or are you an alpha fan or new to ‘groups’. See you next month 🙂


