I made a star shape from the custom shape tool, shrunk it, rotated it, enlarged it, and warped it and then put them together as a frame. I then warped the frame.
I think I shrunk my frame a little bit too much, but going with it. I like how the frame turned out.
I started with a circle, enlarged and smooshed it, rotated the smooshed version, flipped the smooshed version and then strung them together touching and overlapping. I used a stroke on the shapes with no fill. Once I got the frame built, I merged them all and added a hammered metal style from Mommyish.
I used a heart shape and made a large outline image that I lowered to opacity on and placed on top of the background page. I then used smaller versions of this heart in both the outlline and filled version as well as an altered image of the heart to make it longer and thinner which I also filled and used outline versions in various sizes. I placed these hearts along the border of the largest heart in the background to create a heart frame for two of my focal photos. This was a really fun challenge. Thank you for the inspiration.
Here is my take #2. I made three different wonky stars (which was a new thing for me in GIMP!) and resized them and flipped them to make this frame. @bellbird please let me know if I did ok!
I began with a simple 5-point star shape from Photoshop's custom shapes. I duplicated (many times), and changed the sizes and angles of some of the stars. I added patterned papers and solid colours to many of the stars. I applied Elif Sahin's amazing painted wood style to all of the stars.
This was very challengeing as I felt overwhelmed to use so many shapes to make a frame... Bt what would be MOC if there weren't some challenges te he he.
I hope I got this correctly.
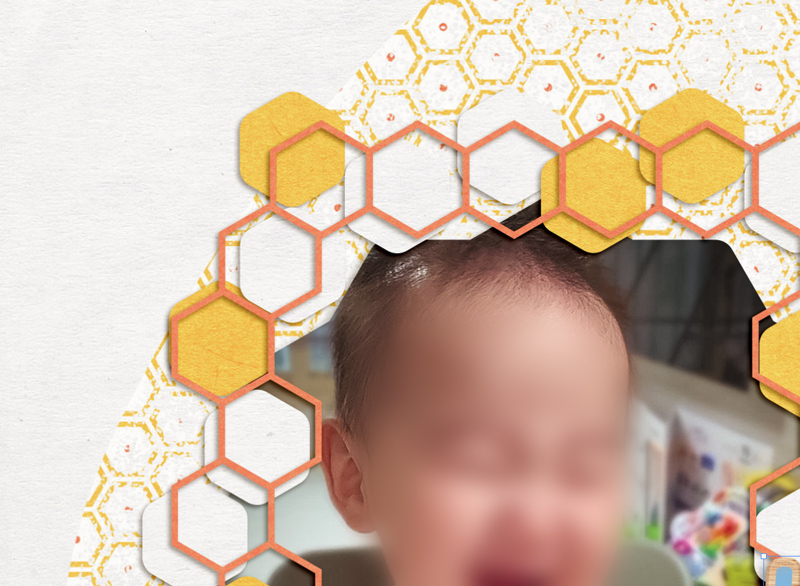
I took a simple hexagon shape. First I used only the outline version, connnected a few to make a row, then grouped them and copied that row and flipped it to make a column. I mutiplied the row and the column to finish the other sides of my frame.
I had left another version of those multiple hexagons separated, filled version this time, so that I can use them as a kind of spread under my outlined frame and add a layer of framing to my picture, I clipped paper to them. They are transformed with rounded corners to contrast with the straight outline version.
The photo mask is also 2 hexagons with rounded corners merged together (1 vertical + 1 horizontal)
Edit: adding this close-up so my transformation (the rounded corners) on my hexagons are easier to see
I used Photoshop's Custom Shape Tool, the Blob 2 Frame, with a Photoshop Moss Style applied to the outer circle and a Photoshop Wood Style applied to the inner circle, two different sizes of the shape and I placed brads under the outer ring of blob shapes for decoration. I used the shift key to constrain the shape to a symmetrical object because I wanted to create a nice wreath frame.
A pun is not fully matured until it is full groan.
Joined
Jan 2, 2015
Messages
9,112
This is my 5th or 6th try. I really wanted to do something with letters but it seemed too complicated. Finally I settled on the butterfly shape in the PSCC custom shape tool. I duplicated it lots of times, transforming it and rotating it each time and arranging them so they all touched. Then I flattened the shape layers so I could clip a paper to all of them at once.
Here's my layout for this challenge. My symbol was a capital S in Chopin Script font. I rotated & stretched it & connected it to make half of the frame then duplicated & rotated it to make a full frame.
I think I got this? This was a font - HarryP and my letters were WIZARD. In PSE, I couldn't group my layers as they were all text layers, so I couldn't apply the style to meld them into one layer. That said, I love that I got Phoenixes on the sides of the frame!
Your example made me think of the Art Deco style, so I knew right away what event I wanted to use for this layout!
I started with a rectangle and the letter V. The rectangle was duplicated twice and stretched/squished. The V was duplicated 5 times and rotated to create the diamonds.
This site uses cookies to help personalise content, tailor your experience and to keep you logged in if you register.
By continuing to use this site, you are consenting to our use of cookies.