Creating Mixed Media Backgrounds
Let me share a few ideas with you on how to create your own personalized mixed media background, which can be used over and over again, turning layers on and off, in whichever manner suits your page design. The possibilities are endless, use your imagination, try
What I love about the mixed media products is the variety and versatility, being suitable for any scrapbook style. Almost any products can be utilized in creating backgrounds but I find the mixed media line-up of products to be a good starting point because you will always find paper, elements, stamps, word art, paint and overlays to choose from.
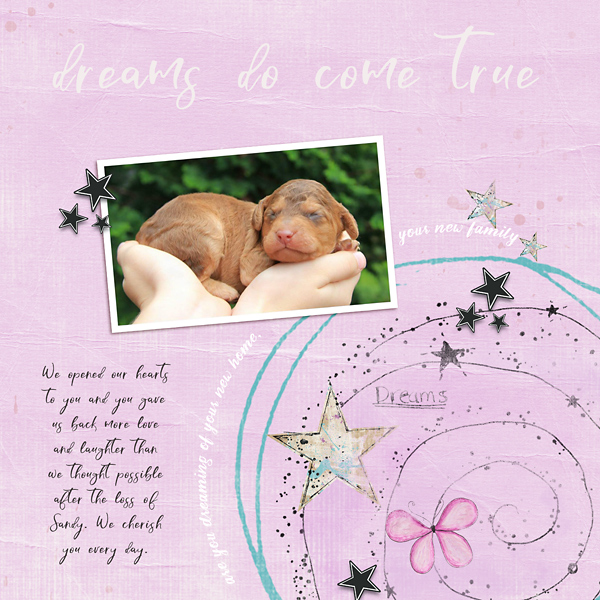
To start creating my background paper, I choose a textured pink paper from the M3 March 2018 collection. Then I added a few doodles and elements. I choose a soft jagged edged brush, chose a slightly darker color than the base paper, and at a low opacity I brushed over the large doodle in the right bottom corner.

Next I added a circular stamped element from Lynne-Marie Sketchbook 01 (from M3 August 2014). For the circular aqua stamp, I had erased the inner part of the stamp and then recolored in aqua (applied a color overlay).
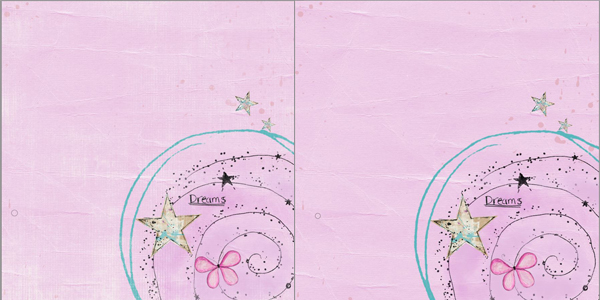
At this stage (image above right), I wanted to create a non-destructive top layer to add a style to which I could reduce opacity on and remove parts of (as shown in the above left image). This can be achieved by positioning the cursor on the top layer and then pressing Ctrl + Alt + shift keys and the letter “E”. This merged layer will be positioned above the other layers. Now I could apply a style (used a distress style of Just Jaimee’s) and this created the white brush strokes over the paper. I clicked on the FX symbol to open the layers style box in the layers palette and double clicked the “pattern overlay” from the style I just applied. I changed the scale slider to enlarge the style pattern. This created a subtle texture over the paper. I reduced the opacity of the layer. I created a (white) layer mask by clicking on the layer mask icon at the bottom of the layers palette, with black selected for the foreground color, I selected a soft brush and erased the distressed style texture off of the doodled area.
Almost done, but to finish off the background, I selected some paint splats from Rachel Jefferies Pearfect Mixed Media Artistry and placed them above the doodled area on the right, recoloring (select color overlay at bottom of layers palette, FX icon) to a slightly darker color than base paper). Then I duplicated this by pressing the V key (move key) and then while holding down the Alt key, clicking onto the paint and dragging to a new position on the paper. I added paint to three corners of the paper.
The background paper can be saved as a PSD file to preserve all the layers so that you can re-use it in the future, turning layers off and on as desired. Or you can save as a compressed jpeg (which creates a smaller sized file) with all layers flattened. Creating backgrounds is fun, each one is different, always unique, and can be customized to suit any page design. Have fun with it!