Create a Card: Personalizing Cards
I really enjoy giving cards to family and friends. Cards are perfect way to send birthday wishes, celebrate a special event, or even to just say hello to someone. I always try to have a selection of homemade cards on hand to give out for any of these occasions. I’ve noticed my supply of cards has been getting a bit low and committed myself to making a few cards to bolster it up. Back to School is the theme of today’s card. I also am sharing a tip about how to personalize mass produced cards.

Mass producing greeting cards is helpful when you need multiples of the same type of card. This year I decided to mass produce the cards that I give to my children and their teachers on the first day of school. But a bit of mommy guilt crept in and I decided that I “needed” to make each card special. Here is how I did it.
To make the cards I used the following supplies:
- My Tribe | Papers by Amber LaBau
- Brave Elements by Sabrina Dupre
- Sundara Alpha by Etc. by Danyale
- Doily
- Presentation Paper
- Card base
- Paper trimmer
- Glue or tape runner
- Foam adhesive
1. Using papers and embellishments from the August BYOC create your card design. I know these products don’t scream back to school, but I thought they were a fun alternative to the normal back to school color scheme.
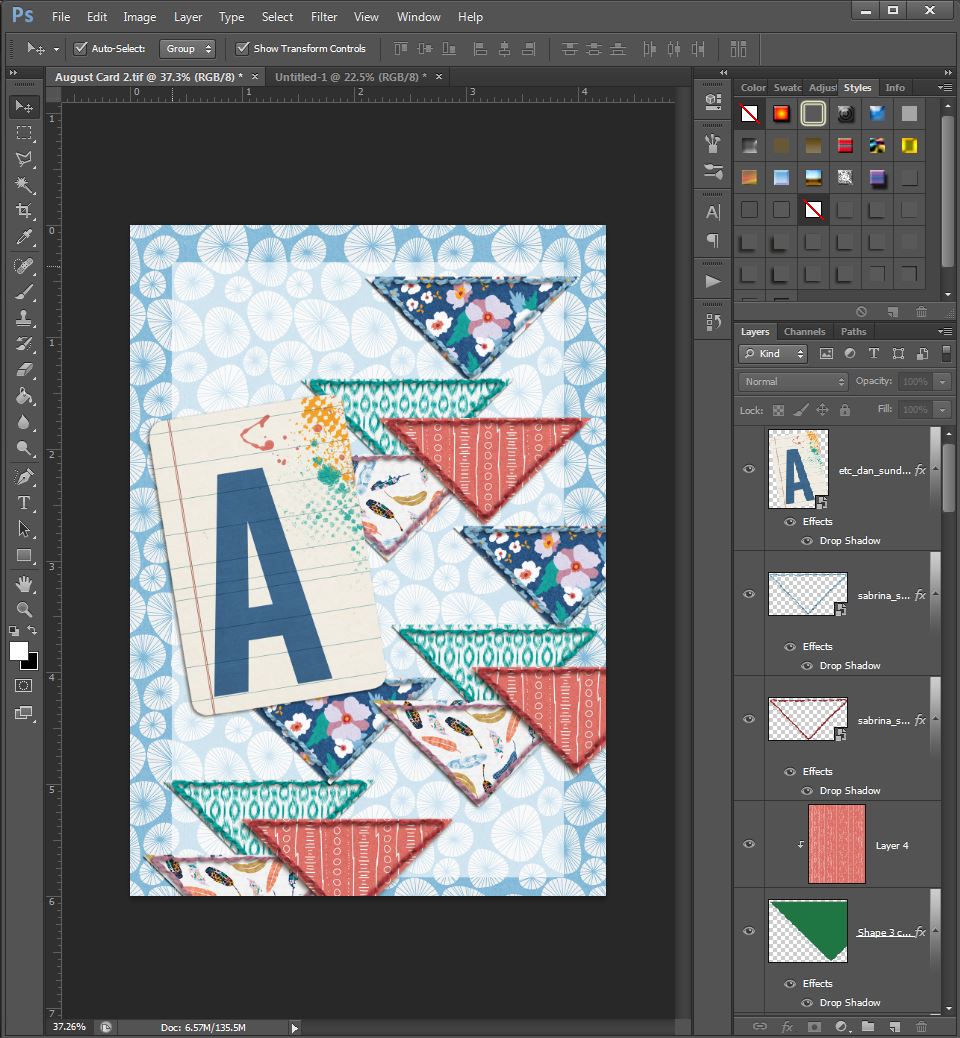
2. Duplicate all layers of your card to a new 8.5 in x 11 in document. Spread the pieces of your card out so they are not touching.
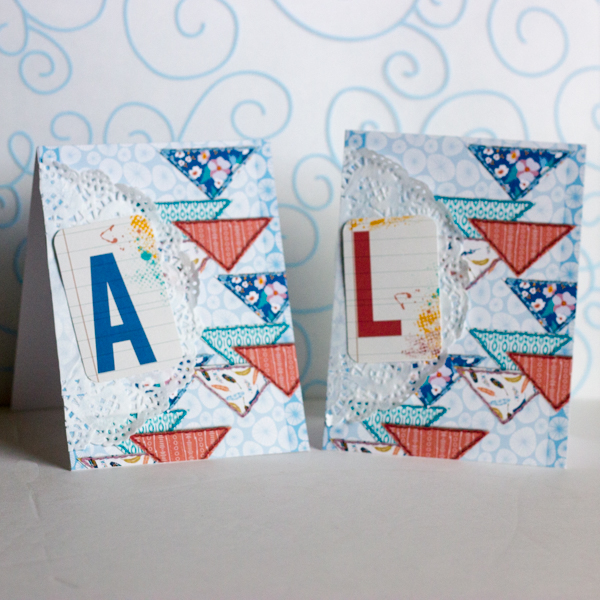
- In the picture below you will notice that most of my card is all one piece. I’ve duplicated the card so I can print two at a time. I’ve also pulled my alpha to the side. This is what I’m going to personalize. Each card will have the first letter of the person’s name. The examples are for my daughters Lily and Allie, thus I used an L and A. For their teacher’s cards I put the first letter of the teacher’s last name. For example, P for Mrs. Peters.

3. Print this sheet and use your scissors to cut out the card pieces.
4. Assemble your card using your original file as a guide.
5. Add additional embellishments as needed.
Simple as that you have made a bunch of cards with each one being personalized!
I hope you’ve enjoyed this short tutorial! Stay tuned next month for another Create a Card Tutorial. Be sure and share any cards you make with us! We love to see your creations in TLP gallery!