Build a Shelf & Anchor the Elements on Your Page.
Hi there!
Guess who’s hosting the challenge for Week 6 of Summer School?
It’s me, and we’re doing a STEM challenge, loosely based on Engineering: we’re making layouts that include a shelf that holds at least 3 different items.
Even if you aren’t playing along with the challenge, anchoring our elements or parts of our layout is useful in layout design. A shelf, the more literal or the more generic kind, can do that and visually connect and ground your elements rather than having them floating off in space.
I put the following graphic in the challenge thread for ideas in various styles (and I know it’s not shadowed) but I’m going to take you behind the scenes and look at my digi shelf construction a bit closer today.
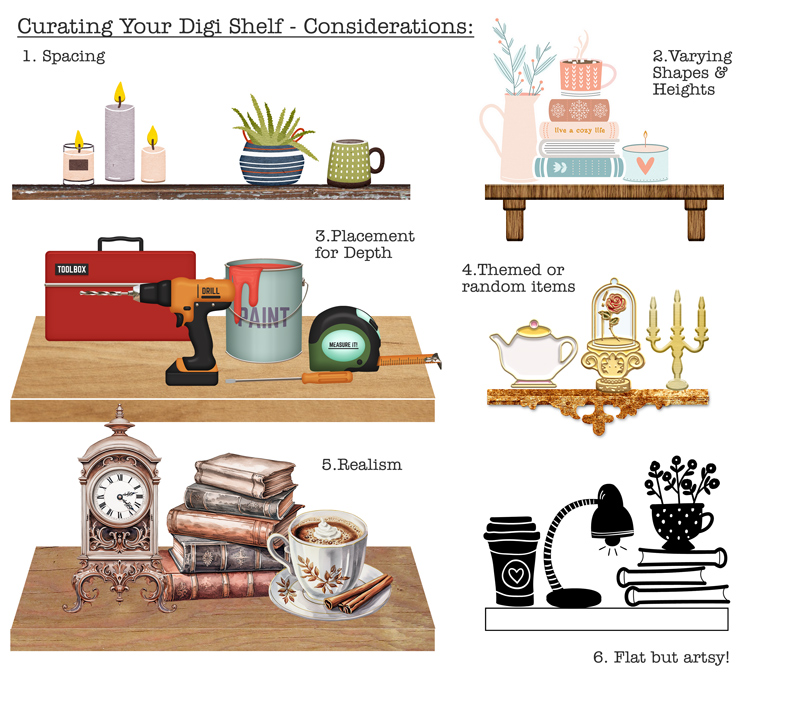 credits:
1 ForeverJoy | Weekend Vibes
2 Becca Bonneville | Snuggle Season; Mommyish | Just the Basics- Wood II layer style
3 Kristen Aagard | Home Renovation
4 Britt-ish Designs & Sahlin Studio | Project Mouse (Belle); Elif Sahin | Table for Two Stamps; Mommyish | MPM Spirit Velvet gold layer style
5 A Whimsical Adventure | Academy for Magic
6 Rachel Etrog | A Book & A Mug stamps
(Wood Papers used on Shelves 1,3,5 are from WoodBeGood vol 1. | Allison Pennington)
Basic 2D shelf: Starting with the basics is always a good idea so I knew I’d start with a basic shelf, like a floating shelf that we have several of in real life in our home. I’ve done this before for layouts just by ‘cutting’ a long thin rectangle from pattern paper. For this first shelf, I started with the elements I wanted to display and then dragged a rectangle shape just below them so that it was big enough to fit. In creating the shelf, I wanted the proportions to look realistic so that the candles didn’t look super short or that the pot plant looked as chunky as the shelf width. Here’s what I mean – this is the shelf I created just using the Shape (Rectangle) Tool before clipping one of Allison’s #WoodBeGood wooden backgrounds to it:
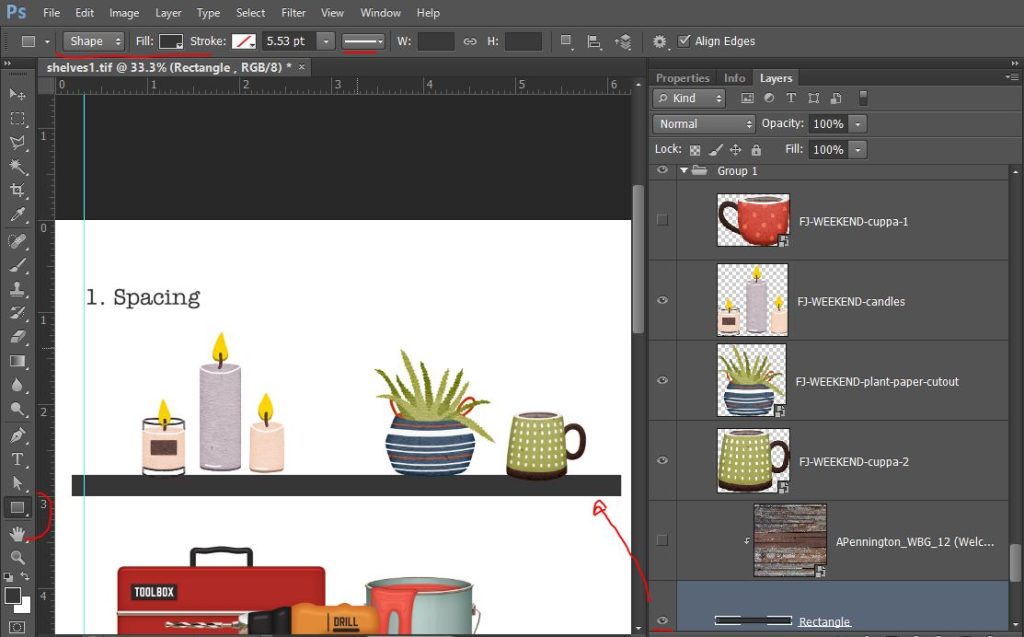
And here it is thicker and shorter, still a rectangle but more like a mantle above a fireplace (and now you can see some of that cool wooden paper):
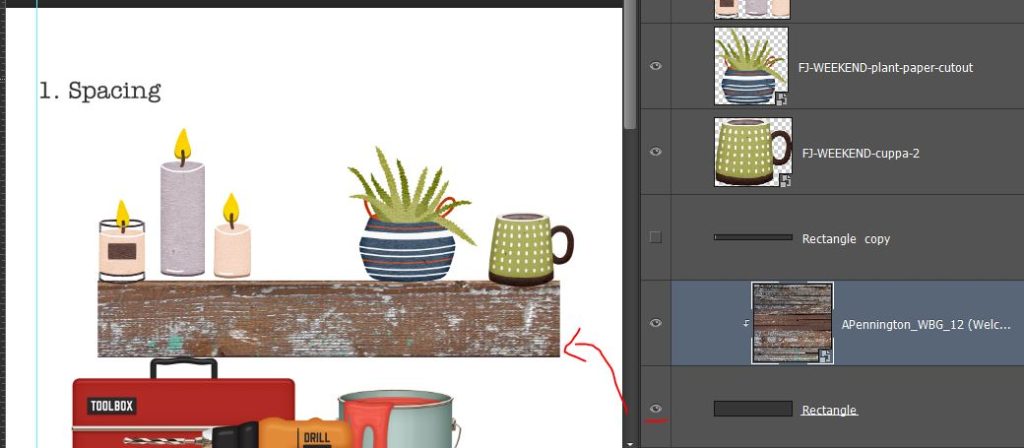
See how it changes the way the items on the shelf look?
They almost need to be bunched together more, you know, to stop that candle being knocked off the side and starting a fire, but I wouldn’t want my plant catching fire either, and yes, I think like this still when working with illustrations and digital stuff).
So this is an instance where working backwards helped for me. I pulled out the elements I wanted to display from ForeverJoy’s Weekend Vibes kit and put my items together first and from that I figured out my shelf dimensions; and that is how building and engineering usually works. Any Engineer or Architect or Builder will tell you to plan first and then build. And if we were paper scrapping this would be even more important but fortunately as digi-scrappers, we have the luxury of being able to resize as we go (‘measure twice, cut once’ is not quite so vital to us thanks to the Undo button!) so it’s fine if you need to tweak or even start your shelf again, so let’s look at some other shelf designs.
3D shelf : Shelf 3 may look a bit more complicated but it is just the same initial rectangle as above, (extended it a bit after choosing my ‘renovators items’ from Kristin Aagard’s kit first), and then just one extra, thicker rectangle with an extra step to ‘Transform’ it to create the illusion of depth.
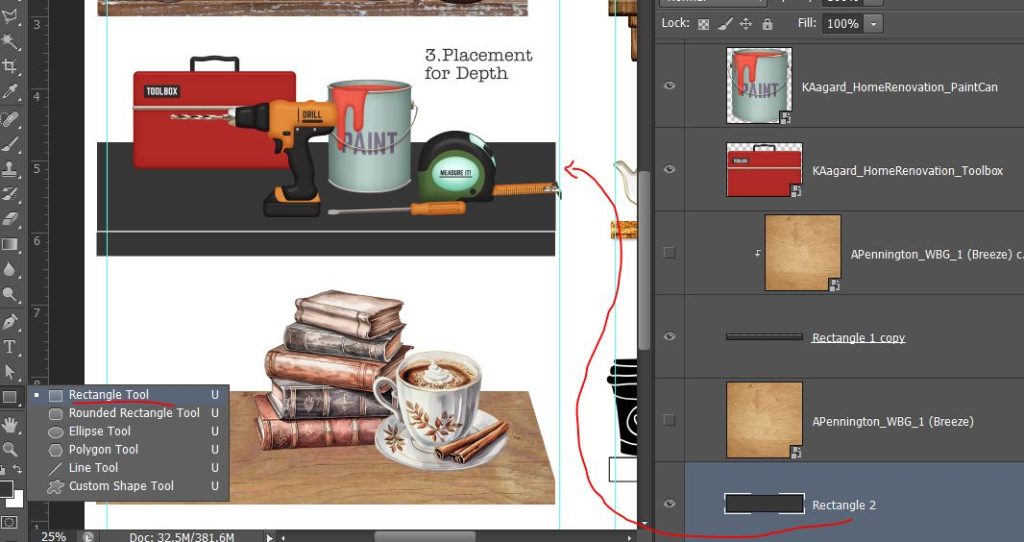
I used the Perspective Tool in the Transform menu on the extra rectangle to create a trapezium ( remember them from primary/elementary school maths? yes, Engineering uses Maths – hope you’re enjoying STEM week -but don’t worry we’re just going to eyeball it and go with what looks good).
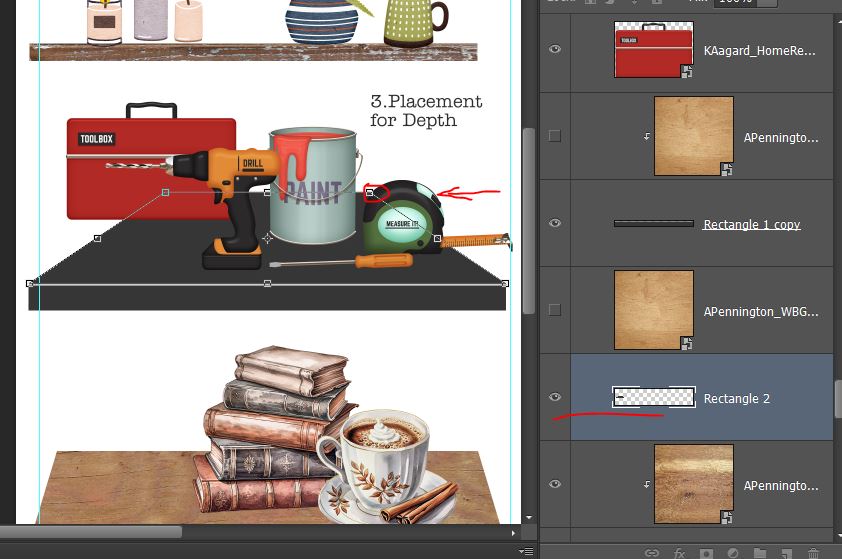
Just by clicking and dragging the circled anchor point on the Transform box over horizontally to the right, the corresponding anchor point on the left moves in too, mirroring the angle, creating perspective and give this deep shelf look. (Obviously I didn’t want my (illustrated) toolbox falling off so I used my preselected items again to guide my shelf building). Because these items are realistically larger than the 2D shelf items and staggered in their placement, a nice deep chunky/sturdy shelf is a logical choice (that paint tin with some paint in it alone would weigh more than everything together on shelf 1 and is a lot wider diameter than a candle! As a floating shelf, this would take some serious internal reinforcement or maybe some bracing… that’s another shelf idea). Anyway, when I was happy with that 3D shelf, I duplicated the whole thing and used a different wooden paper to create a new 5th shelf for the realistic elements of A Whimsical Adventure. So I engineered and built a template of a shelf once and got 2 different looks from it. Engineers work smart, right?!
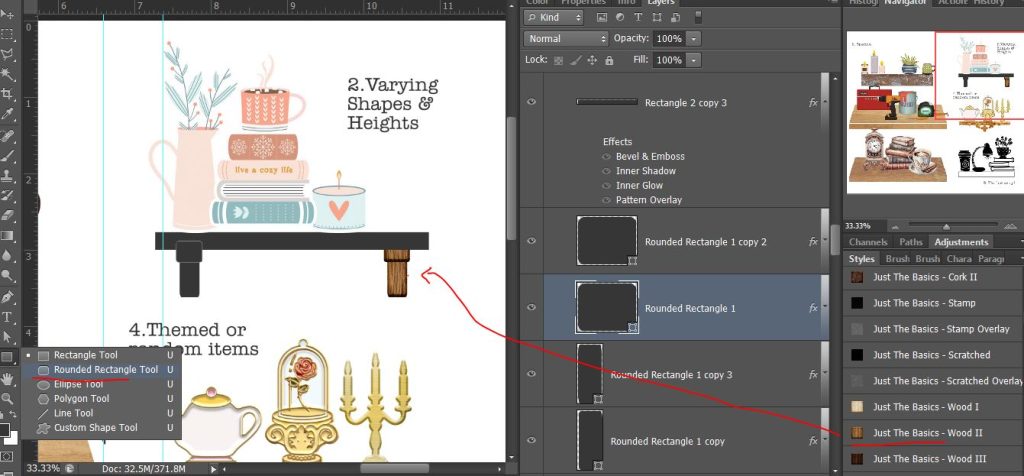
Supported shelf : So the bracing I just mentioned? Some freestanding shelves are reinforced with L brackets (they look like the letter ‘L’ from the side but from the front, not so much) that attach to the wall above or below the shelf at a right angle to the shelf itself.
So to create shelf 2, I duplicated the initial rectangle again, reducing the length a bit this time, and made 2 more ’rounded rectangles’, one quite small and another taller than wide and positioned them like this – Then I used one of Mommyish | Just The Basics Layer Styles in a wood effect instead of paper clipping this time and it gave each rectangle piece some dimension and more defined edges so that it still looked like a shelf built of separate pieces of wood. (If you want your shelf to look like it was all cut rom the same piece of wood, you would have to ‘merge’ all your rectangle layers together before applying the Layer Style).
Fancy shelf : When I started scrapbooking, shabby chic was trending and I’ve seen a lot of styles come and go and interior design trends influence everything including basic shelf design (rattan and swirly metal brackets are fun and have been common at times as well) so I tried to create one that was a bit different.
I’d already pulled some themey elements to use for a shelf and decided to make a shelf to complement them. For this shelf, again I started with a duplicate of the initial shelf rectangle and then added a stamped flourish journal stamp by Elif Sahin overlapping the rectangle. To make it fit the length of the rectangle I just used the Marquee tool to select the area I wanted (basically where I drew red brackets) and masked out the rest. Because, as you can see, it was transparent between the stripes, I used the Magic Wand on that stamp layer, went Select > Inverse and created Layer 1 that gave me the shape as a solid which I masked to the same boundaries to ‘fancy up’ my basic shelf.
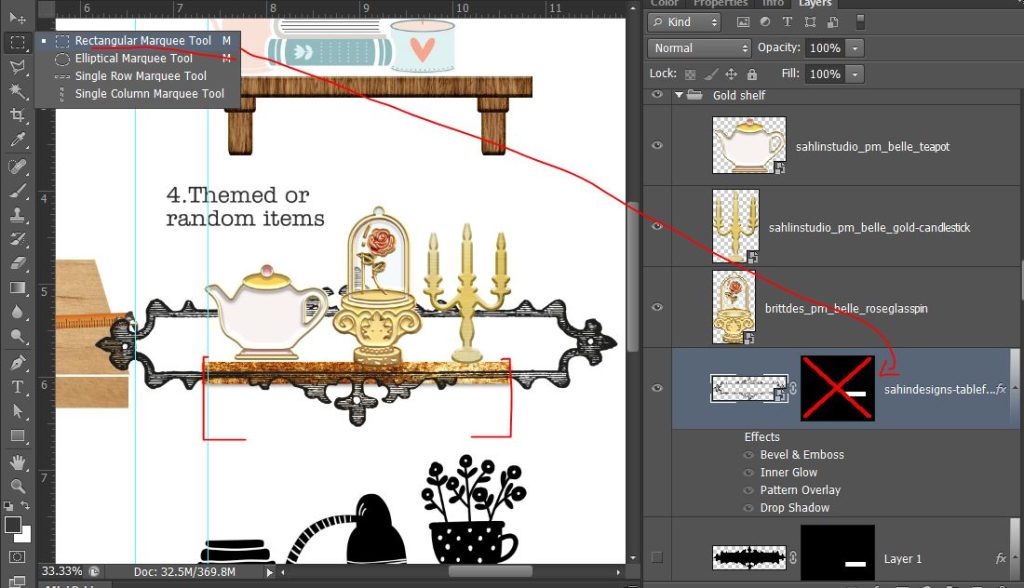
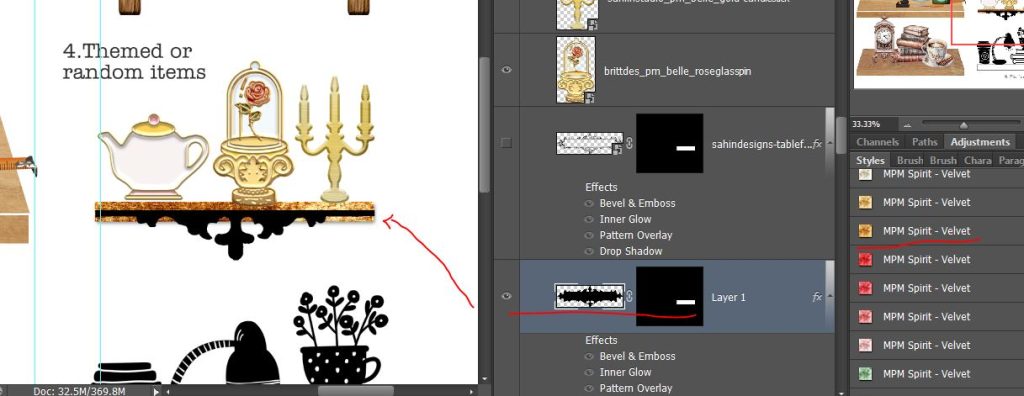
With a golden Layer Style overlay by Mommyish on both layers (MPM Spirit: Velvet in dark gold) this shelf has some character, just like those Beauty & The Beast inspired elements from Project Mouse and feels worthy of displaying such treasures.
Hopefully this post has shown you engineering a shelf is not as challenging as it may have first sounded in the Summer School thread, so I hope you’ll have a go and play along before the deadline especially as this is the last week of Summer School… or at least check out the creativity of the other shelves posted by the team and members in the thread!
Happy engineering!