Resizing Print and Cut Stickers
Hi scrappy friends!!
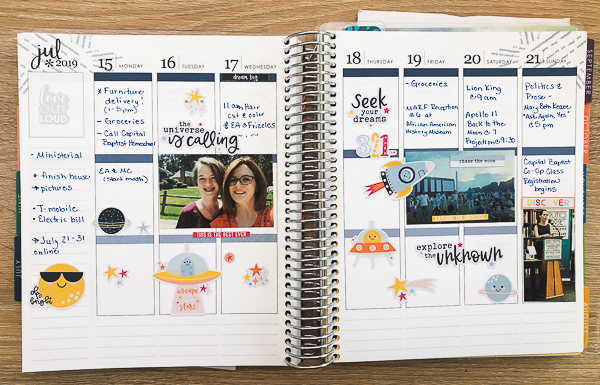
It’s Polly Monica here with a fun tutorial to help you get more out of your digi-supplies by resizing print and cut stickers. When I saw Becca Bonneville’s The Universe is Calling Sticker set in the store this weekend I knew they would be perfect for my planner spread a couple of weeks ago. This was the week that we went to see the Apollo 11 Back to the Moon Projection show on the National Mall.

I love using print and cut stickers, but often they are just a little too big at the letter size they are made in to fit into my planner. So, I decided to resize these stickers to half their size and fit two pages of stickers on one letter-sized sticker sheet.
I will describe my process for doing this and share a video I made that will also walk you through the process if you are more of a visual learner.
Here are the steps for resizing your print and cut files, tracing them, printing and sending them to your Silhouette cutting machine.
- Import the “easy trace” .png file
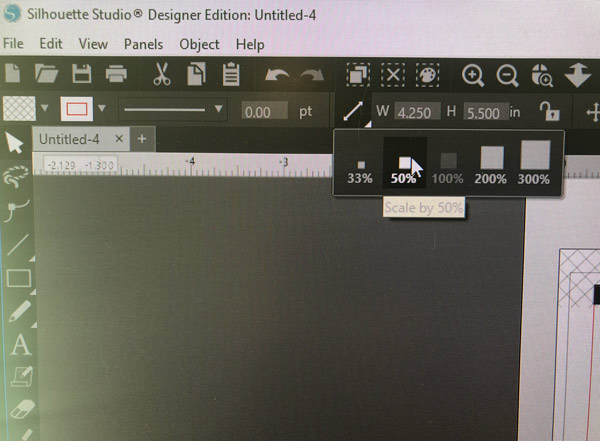
- Scale to 50% size (see image below)
- Import the matching colored print & cut .png file
- Scale to 50% size and place it over the easy trace file
- Repeat steps 1-4 for a second letter-sized print and cut sheet
- Move the colored print and cut files off of the work space
- Trace the “easy trace” file by selecting trace area and then selecting trace
- Place colored file back over the traced file
- Send to the printer
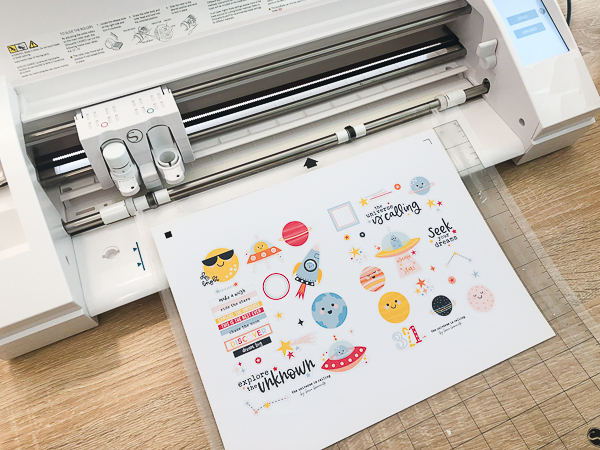
- Place printed sheet of stickers on the cutting mat and load into cutting machine
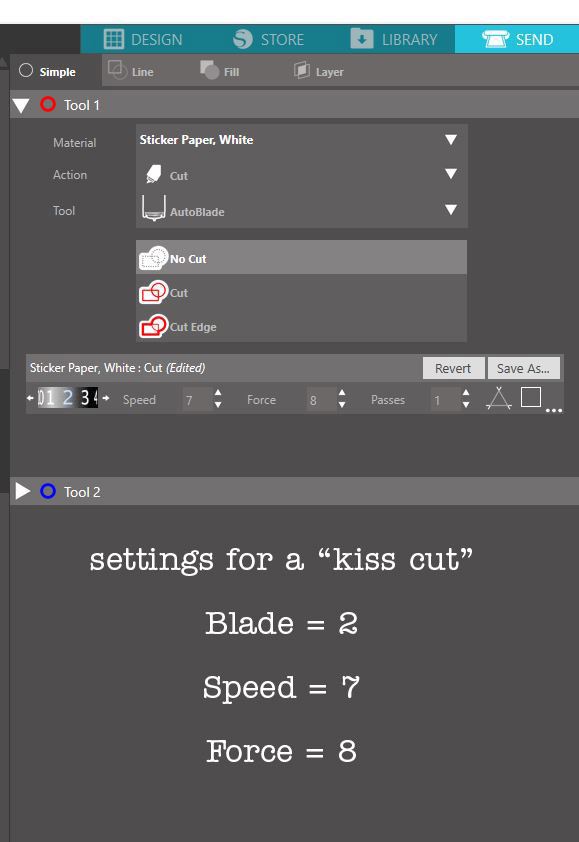
- Under “send” panel select correct material. I used “Sticker Paper, White” and adjust cut settings to achieve a “kiss cut”. (see below)
- Send to your cutting machine and watch it work!!
I used my paper trimmer to cut out two individual sticker sheets. I could see myself using this technique to print several sheets of stickers and clipping them together to make a sticker book.

The stickers turned out so cute!!! I love the adorable illustrations!

And, yes, I had a blast decorating my planner with them along with photos from my week!
If you use print and cut stickers in your planner or traveler’s notebook pages, I know you’ll love resizing them to this smaller size!
Here’s the video I recorded to show you the steps I described above:
Resizing Print and Cut Stickers from The Lilypad on Vimeo.
I hope you enjoy and would love to hear how you use print and cut stickers in your creative endeavors!!