Creating Dimension on Background Papers
Hello all my artsy friends! I’m just dropping in today with a fun tip for adding shadows and dimension to patterned background papers. Have you ever found the most amazingly perfect background paper and wanted to work it into a dimensional design? Well, there is a quick and easy way to achieve this effect.
Take a look at this page for an example of the technique in action:
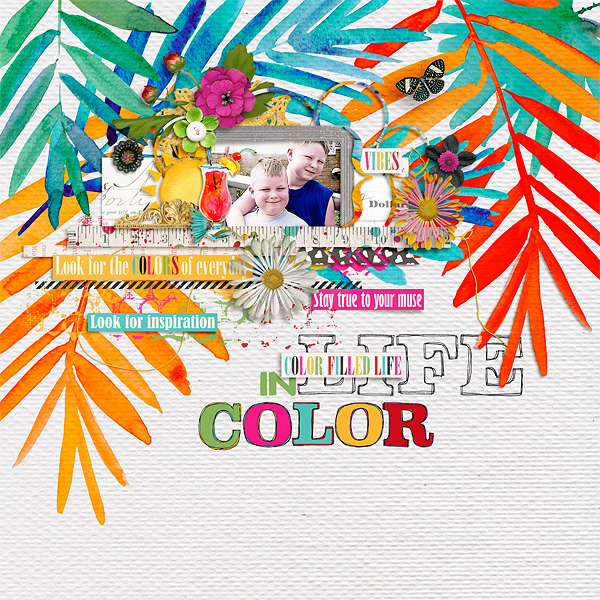
Notice how the orange leaf overlaps the word art (LIFE)? That leaf is actually part of the background paper. How did I add the shadowing to it? I simply followed these steps:
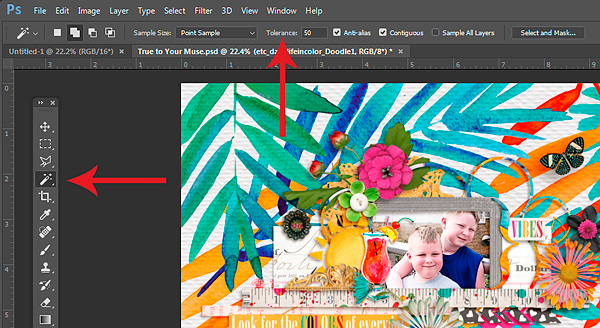
1. Extract the portion of the background to which you want to add dimension. The extraction was quite easy on this paper because of the white background. I used the Magic Wand tool with a tolerance of 50 to select out the orange leaves. You could also use the quick selection tool, the pen tool, or one of the lasso tools.
2. Once the selection is made and active, copy it onto a new layer with the shortcut Ctrl/Cmd J. This should place a copy of the selection on the layer just above the background paper. If your selection is larger than what you want, you can adjust it by deleting the extra sections with the eraser tool, or by using a non-destructive layer mask (my favorite method). To make a layer mask, click on the button that looks like a rectangle with a circle inside and then select the Brush tool (shortcut Ctrl/Cmd B). Choose a relatively hard brush and set the foreground color to black (“D” is the shortcut for setting the foreground to black and the background to white). Now brush over the areas that you don’t want to appear.
3. Once you have the selection copy the way you want it, add a slight drop shadow to it. Because I only selected the bottom portion of the leaf, I blended out the shadow by separating it onto a new layer (left click on the drop shadow in the layers palette and choose “Create Layer” from the pop up menu) adding a layer mask (as discussed in Step 2) and hiding a portion of the shadow with a soft round black brush set to an opacity of 25%. (If you want to add dimension to the entirety of an object, you can skip the second part of this step.)
4. Alternatively, you can integrate the word art in with the background design by “erasing” the parts of the word art that overlap the background paper elements. As discussed in Step 2, you can do this non-destructively by adding a layer mask to the word art layer and painting out the overlapping parts with a hard round black brush.
And that is it!
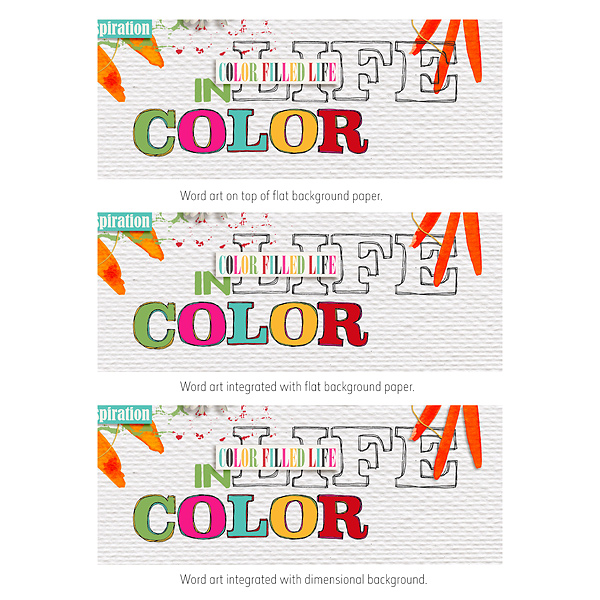
Here is a comparison of the word art on top of the flat background, the word art integrated with the background (Step 4) and the word art with the dimensional background (Step 3).
I hope you have fun with this technique!
Until next time ~
Judie


