Creating a Dimensional Ocean Diorama
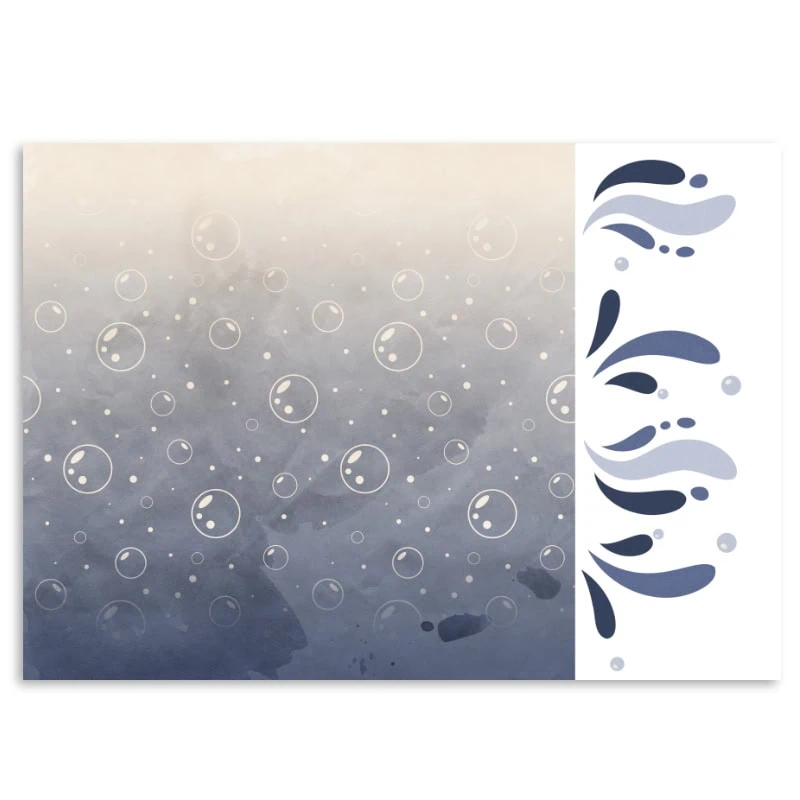
The moment I came across the Saltwater Dreams Kit from Studio Kaleidoscope, part of June BYOC at The Lilypad, I knew it was destined to become a diorama. The colors, the textures, the dreamy underwater elements, everything about it just begged to be layered into a little world of its own.
Choosing the Papers and Size
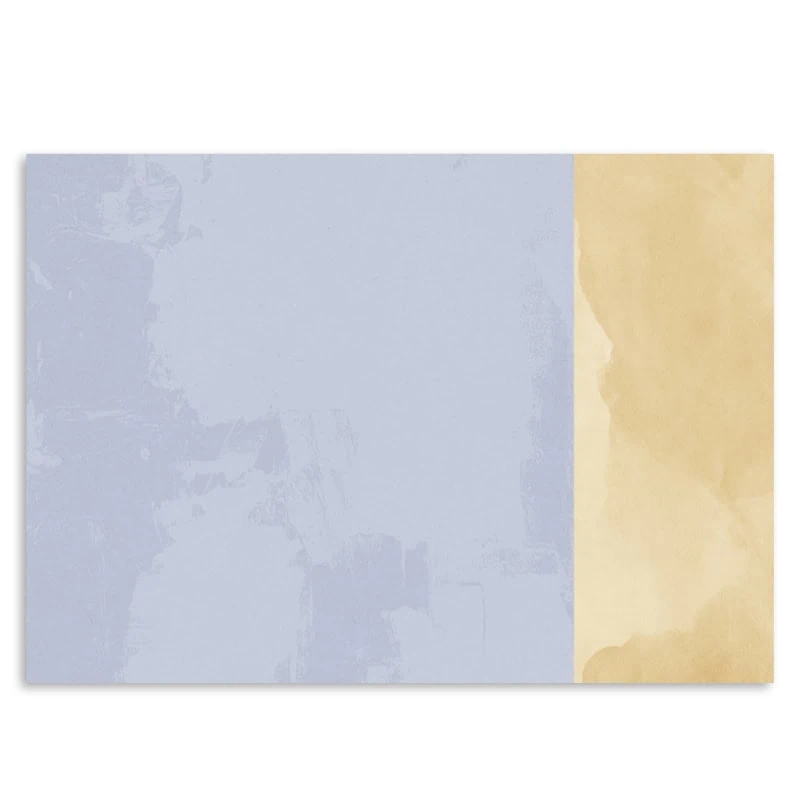
I started by printing three different papers from the kit that I wanted to use as the layers of my ocean scene. I worked in a 21 × 21 cm format because it fits perfectly on standard A4 paper (21 × 29,7 cm).

I printed on 200 gsm cardstock, which usually works great, but in hindsight I wish I had glued two sheets together before I started cutting them. The layers turned out a bit flimsier than I’d hoped, something I’ll definitely adjust next time.
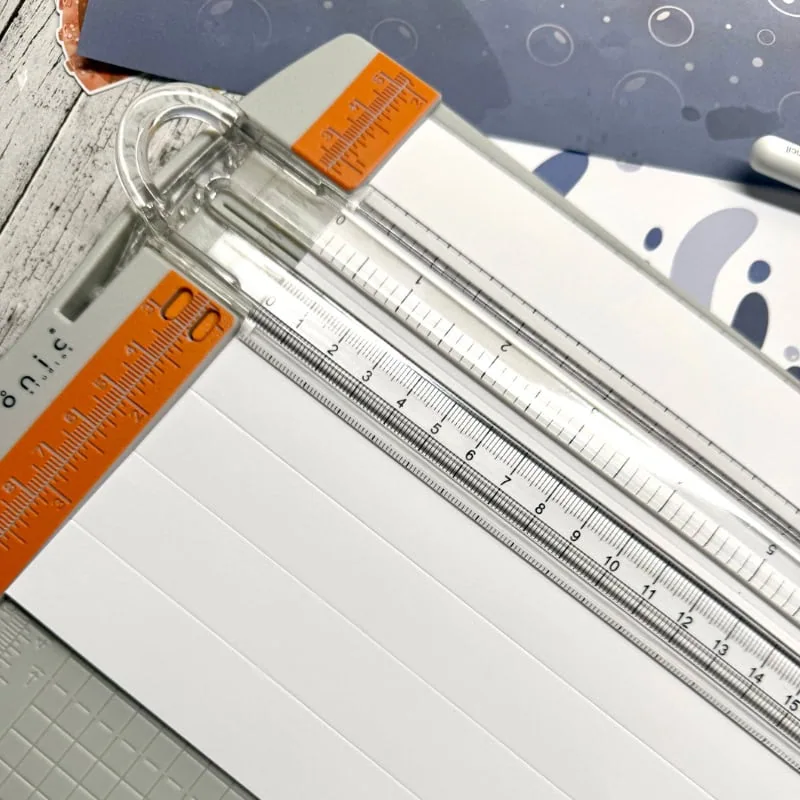
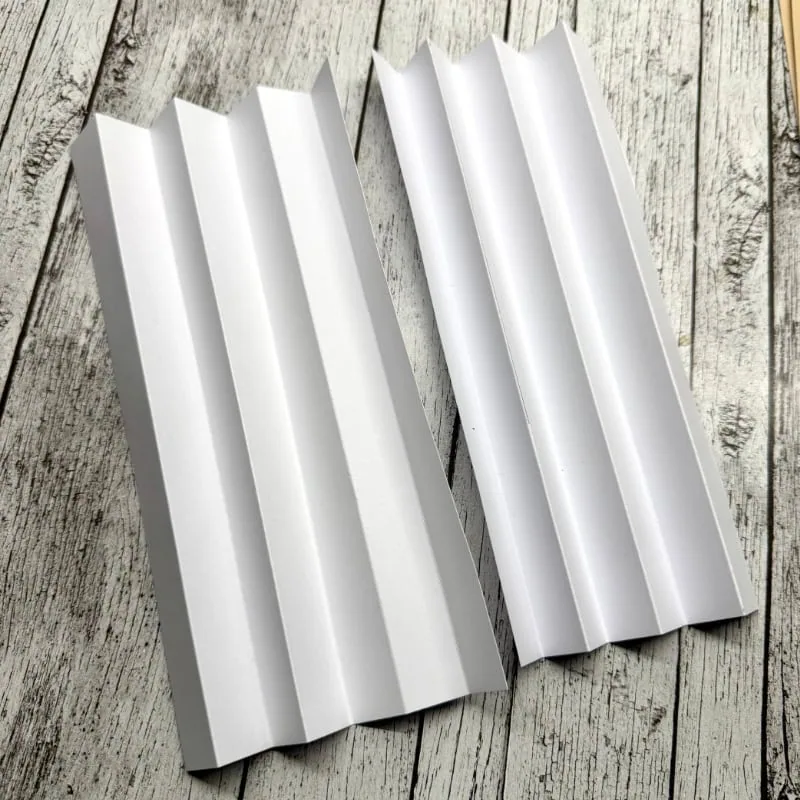
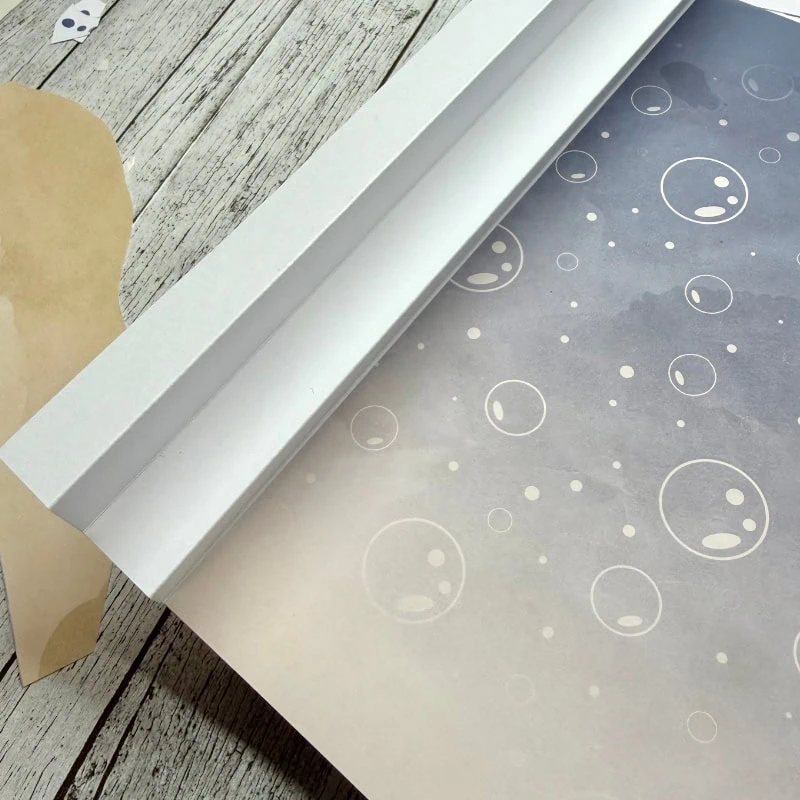
Building the Accordion Sides
To create the sides that hold each layer in place, I cut an A4 sheet in half and folded each piece like an accordion, with each fold measuring 2 cm. These folds act as the “tracks” where each layer of the diorama slides in, creating that wonderful tunnel‑book depth.
Preparing the Layers
Once everything was printed, I sketched a wavy frame on two of the papers to form the front and middle layers. The third paper, the one with the bubbles, made the perfect background. I also cut out a few extra pieces to build up the sea floor and add more dimension.
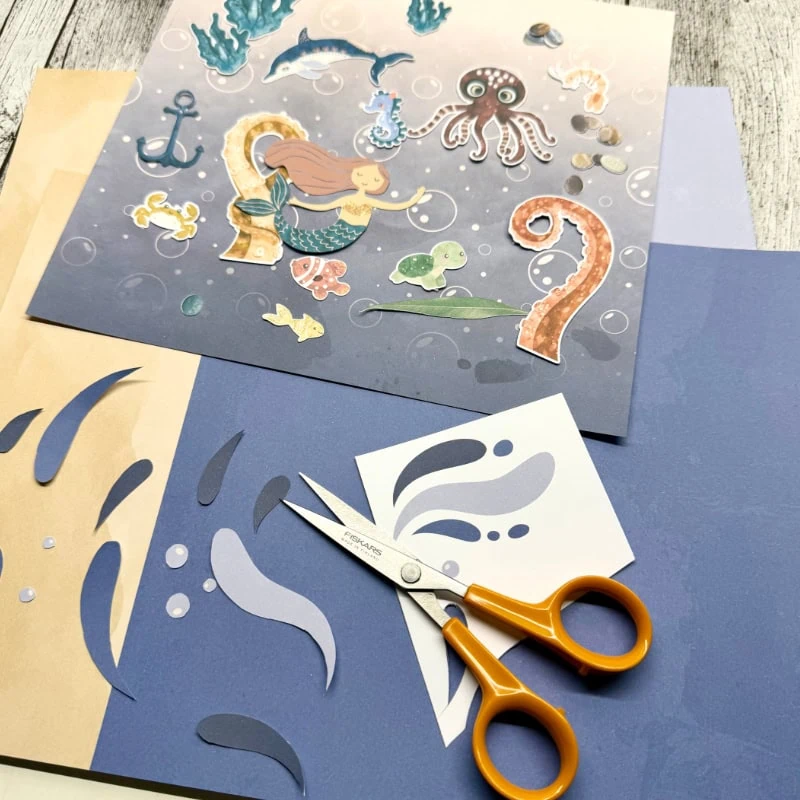
To bring the scene to life, I selected a bunch of decorative elements and cut them using my Silhouette Cameo. Little details like sea animals, seaweed, and pebbles really help the layers pop.
Assembling the Diorama
I started by attaching the background to the third fold of the accordion sides and added the first set of decorations. Then I moved on to the middle layer, decorating it before securing it in place. Finally, I added the front layer and gave it a few extra embellishments.
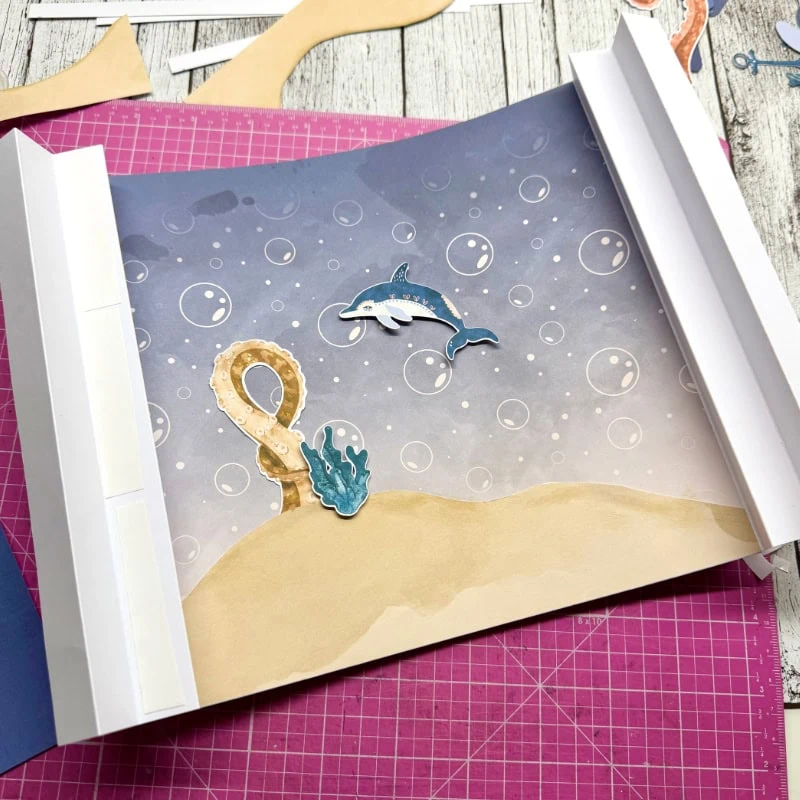
To create even more depth, I used a mix of regular double‑sided tape and foam tape. The foam tape lifts certain elements forward, making the whole scene feel more alive.
Finishing Touches
For a little extra sparkle, I added touches of glitter glue here and there. It catches the light beautifully and gives the whole piece a magical underwater shimmer.

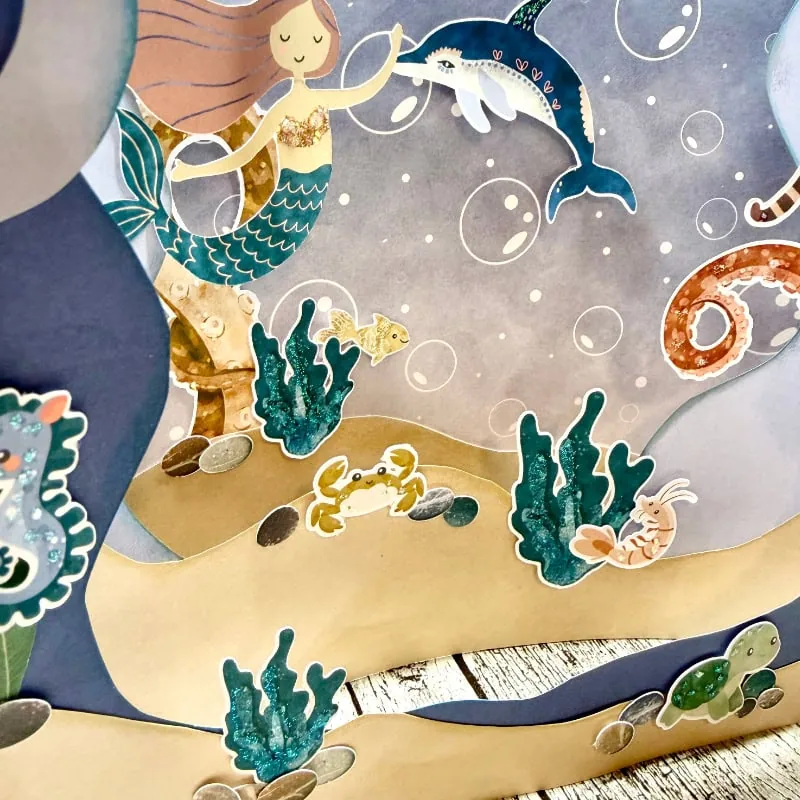
Photographs never quite capture the depth of a diorama, but I’ve included a few shots anyway, hopefully you can get at least a hint of the dimension and movement happening inside this tiny ocean world.
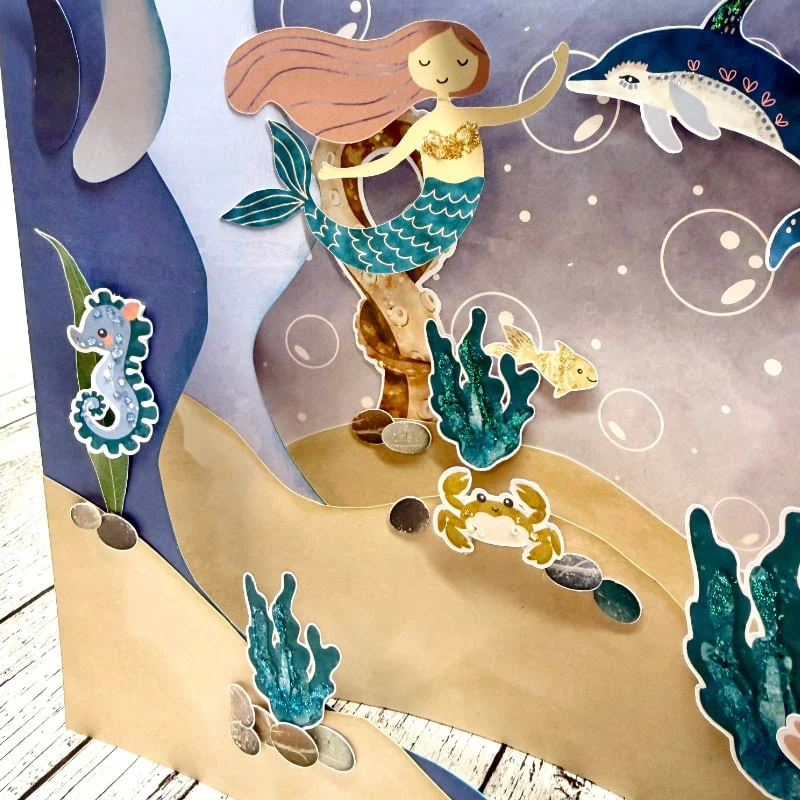
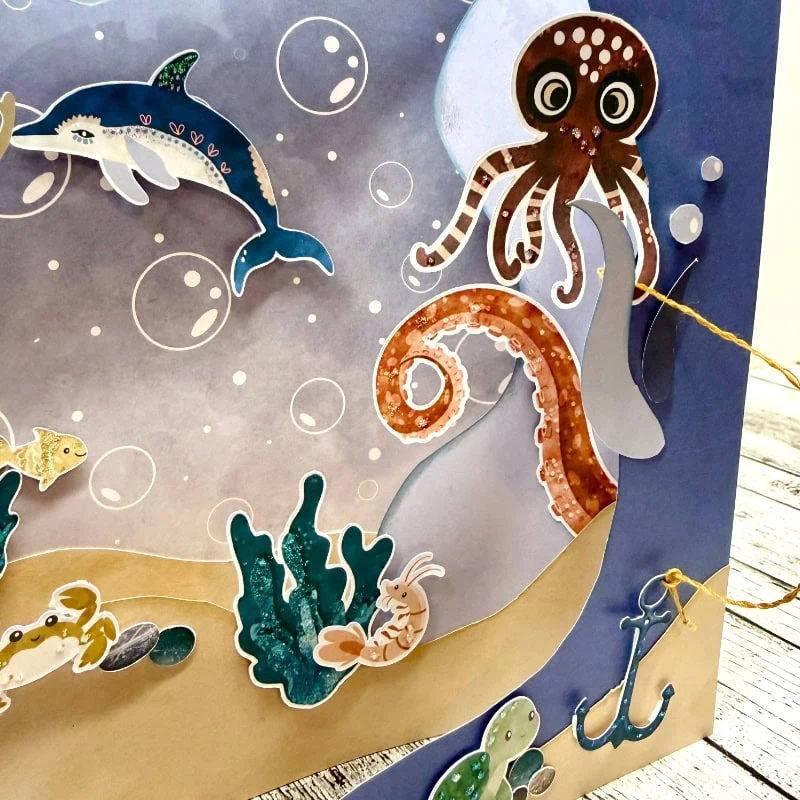
In the left photo you can see the dolfin on the background layer, fastened with foam tape, the mermaid on the middle layer and the little seahorse on the top layer. In the right photo you can see the octopus arm and the shrimp on the middle layer and the octopus, the little turtle and the anchor on the top layer.
I hope this little underwater scene inspires you to try out and create a diorama, maybe with a meadow or a desert landscape.


I think this is so very creative! Thank you so much for sharing your process with us! I’m sure someone will be inspired to work on this with their children!
–Becky–
aka scrapchyck
Thanks Becky! It was a really fun project!