DIY Refillable Notebook using Digital Papers
Hi, all! Sarah here and I’m so excited to share another fun hybrid project with you today. I’ve always been a planner. I adore to do lists, journals, and calendars but I’ve always struggled to figure out how to make them work together for me. Recently, I learned about refillable notebooks. These are typically leather covers with elastic bands that you can pull notebooks in and out of easily allowing you to change out notebooks if they become full or simply to carry only the notebooks you need at any given time.
As soon as I learned about these notebooks I spent a couple of weeks learning everything I could about them. I watched videos, checked out blog posts, and even printed out a test insert for myself to see how the size would work for me. I was so excited to try out this notebook system, but was hesitant to spend the money to find out whether or not it would work for me. In my research I watched quite a few DIY videos on creating notebooks of this type and I was so excited when I came across a couple of videos for creating this style of notebook out of paper (check out my Pinterest board for these videos plus even more inspiration). Today, I created a notebook using Valerie Wibben’s June BYOC Make a Wish Papers.

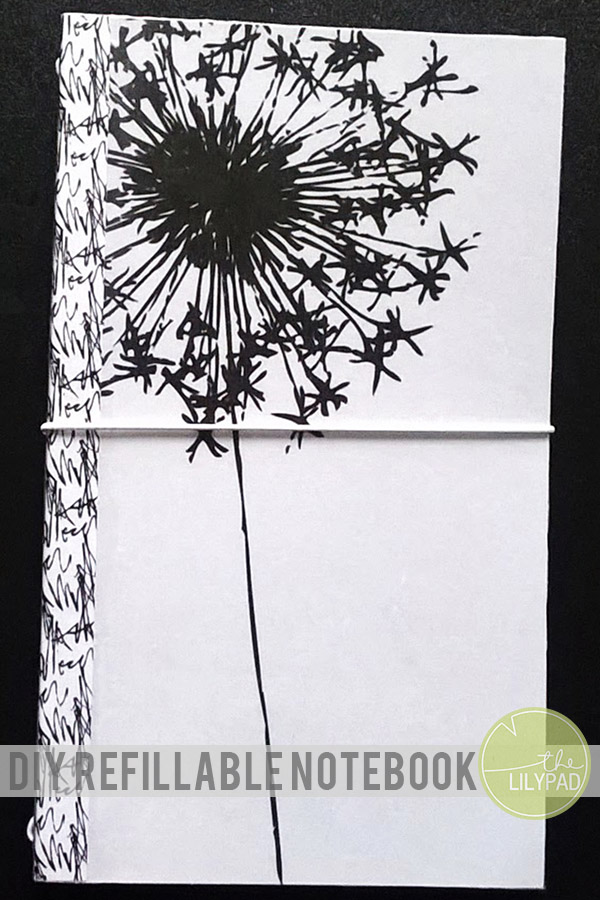
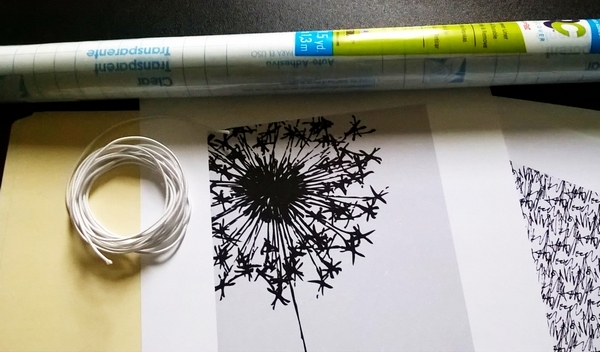
I love the dandelion theme and decided that the paper with the large dandelion would make a striking cover. I reduced the paper size and cropped it to slightly larger than 8.5″x5″ (The final size of my notebook). I then cropped the right side of the paper to the same size giving me a solid color for my back cover. I printed these out on cardstock and chose my paper for the inside. I also reduced the size of this paper and cropped it to the same dimensions as the previous paper, printing two copies out on cardstock and one on matte presentation paper. In addition to the paper the only other supplies I needed were a manila file folder, some elastic cording and contact paper.
To prepare the file folder I began by creasing the folder on the outermost prescored line. This, along with the preexisting fold, would create the spine of my notebook. I then cut the folder 5″ to the outside of each fold and cut the height of the folder to 8.5″, giving me a final dimension of 10.75″x8.5″.


Next I adhered the dandelion paper to the front and back covers and trimmed off the excess. I cut a strip of the patterned paper printed on the presentation paper 8.5″x1.75″ and covered the spine. I made sure to cut the strip wide enough to cover the bit of dandelion on the back cover.

The inside was completed in much the same way except that I placed the presentation paper down first so that the seams wouldn’t be as noticeable.

The next step was to cover both sides in contact paper and trim to size. I then added an elastic which allows me to add notebook inserts. I did this by punching two pairs of holes near each end of the spine. The first hole was placed about .25″ from the top centered on the spine and a second place another .25″ below that. I repeated on the bottom of the spine and strung my elastic so that most the elastic remained inside the cover, finishing it off with a square knot. A final hole was placed in the center of the spine and I strung a knotted elastic through to act as a closure.

Finally, I created a notebook insert using another of the patterned papers from Valerie’s kit as the cover. The inside pages are created with blank 24 lb. copy paper for me to use for note taking and recording ideas. The final measurements of the notebook are 8.25″x4.33″. I love how this yellow just pops against the neutral background.

I made my first paper notebook in this style a few weeks ago and have been putting it to good use. I’m so excited to add this new notebook to my collection. I’m already planning my next notebook and have been perusing the TLP store looking for the perfect papers!