dawninskip
Well-Known Member
- Joined
- Dec 15, 2009
- Messages
- 1,801
Jan 4 Stylin' Titles (Technique Challenge)
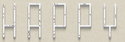
Transparent Acrylic action on title
Follow along with the video below to see how to install our site as a web app on your home screen.
Note: This feature may not be available in some browsers.
Thank you! I did this for pse8 and it worked! dl some style and now off to play.......Easy style installation came with PSE 11. If you have an earlier version, just google "installing styles in PSE#" and use your number. You'll have to install the .asl file and the .html file in your actual software. Turn PSE off before you start and then open it when you're done. (Seriously, think of upgrading!)
Here's a link for how to in PSE11 on...the simple way!
http://scrapgirls.net/forum/topic/62369-about-installing-styles-in-pse-13/
Thanks for sharing. I was thinking the same thing - filling with paper is easy. I will try looking at the different filters as well!!For Artisan/SBC+ users - obvious choices are fill with paper or gradient, but live a little and play with Filters. There are lots of choices in there, like add a 3-D edge, make it look like a oil painting, add a texture, etc. Create your text using Insert Text Shape to have control over individual letters. Or use Insert Text and then flatten before playing.

Thanks for encouraging me to use styles. I've used them before, years ago, but only my own shadow styles in recent years. So this prompted me to learn how to load styles in PSCC. Much easier than it was in PSE!
Question: Is there a way to organize them so it's not just one super long list I have to scroll through?